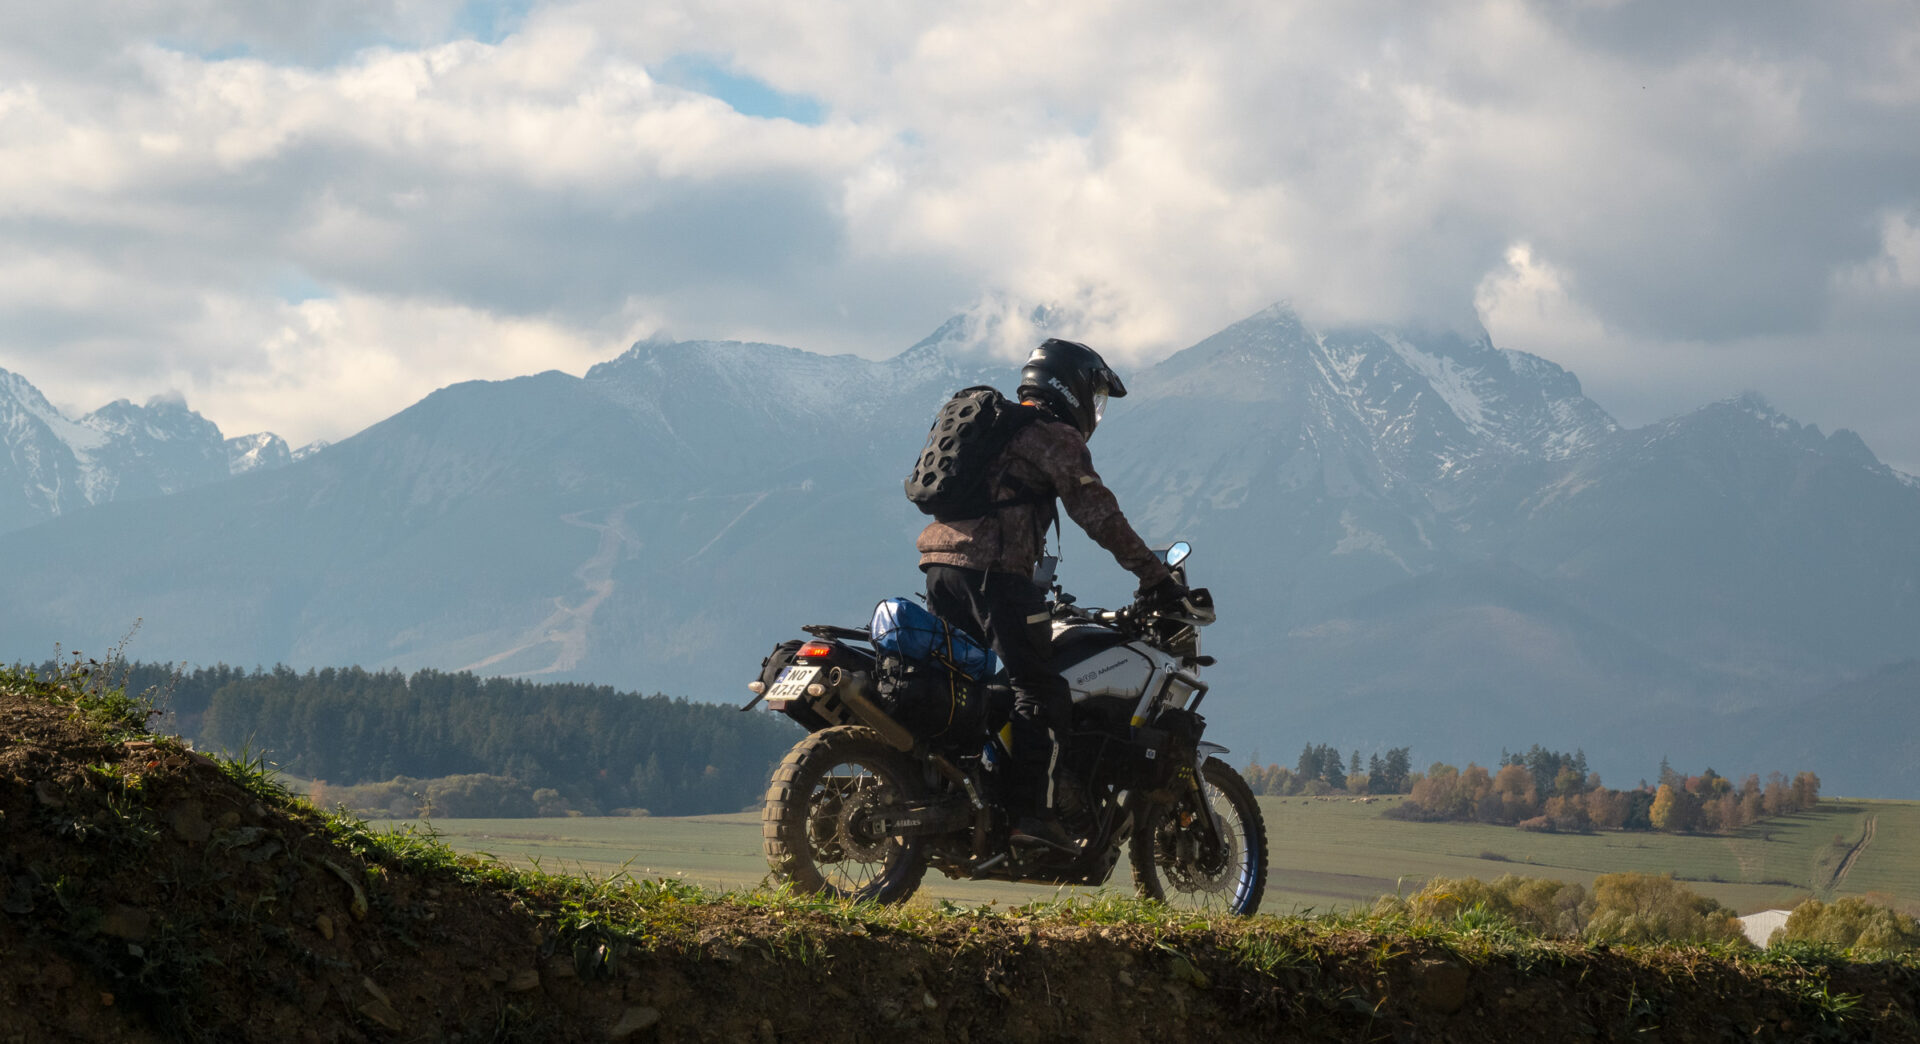
Changing my motorcycle from the Tenere XT660ZA to the Tenere 700 was a huge leap for me in riding experience and satisfaction. The Tenere 700, above all, allows me to ride off-road in a way I could only dream of on the XT660ZA.
Since the factory version of Yamaha Tenere 700 is the cure for all the ills of its predecessor, is there any point in changing anything about it? Everyone has their own preferences and requirements, and the T7 gives you many options for customizing it so it suits you perfectly. Here’s a list of minor changes I made.
Table of Contents
Accessories
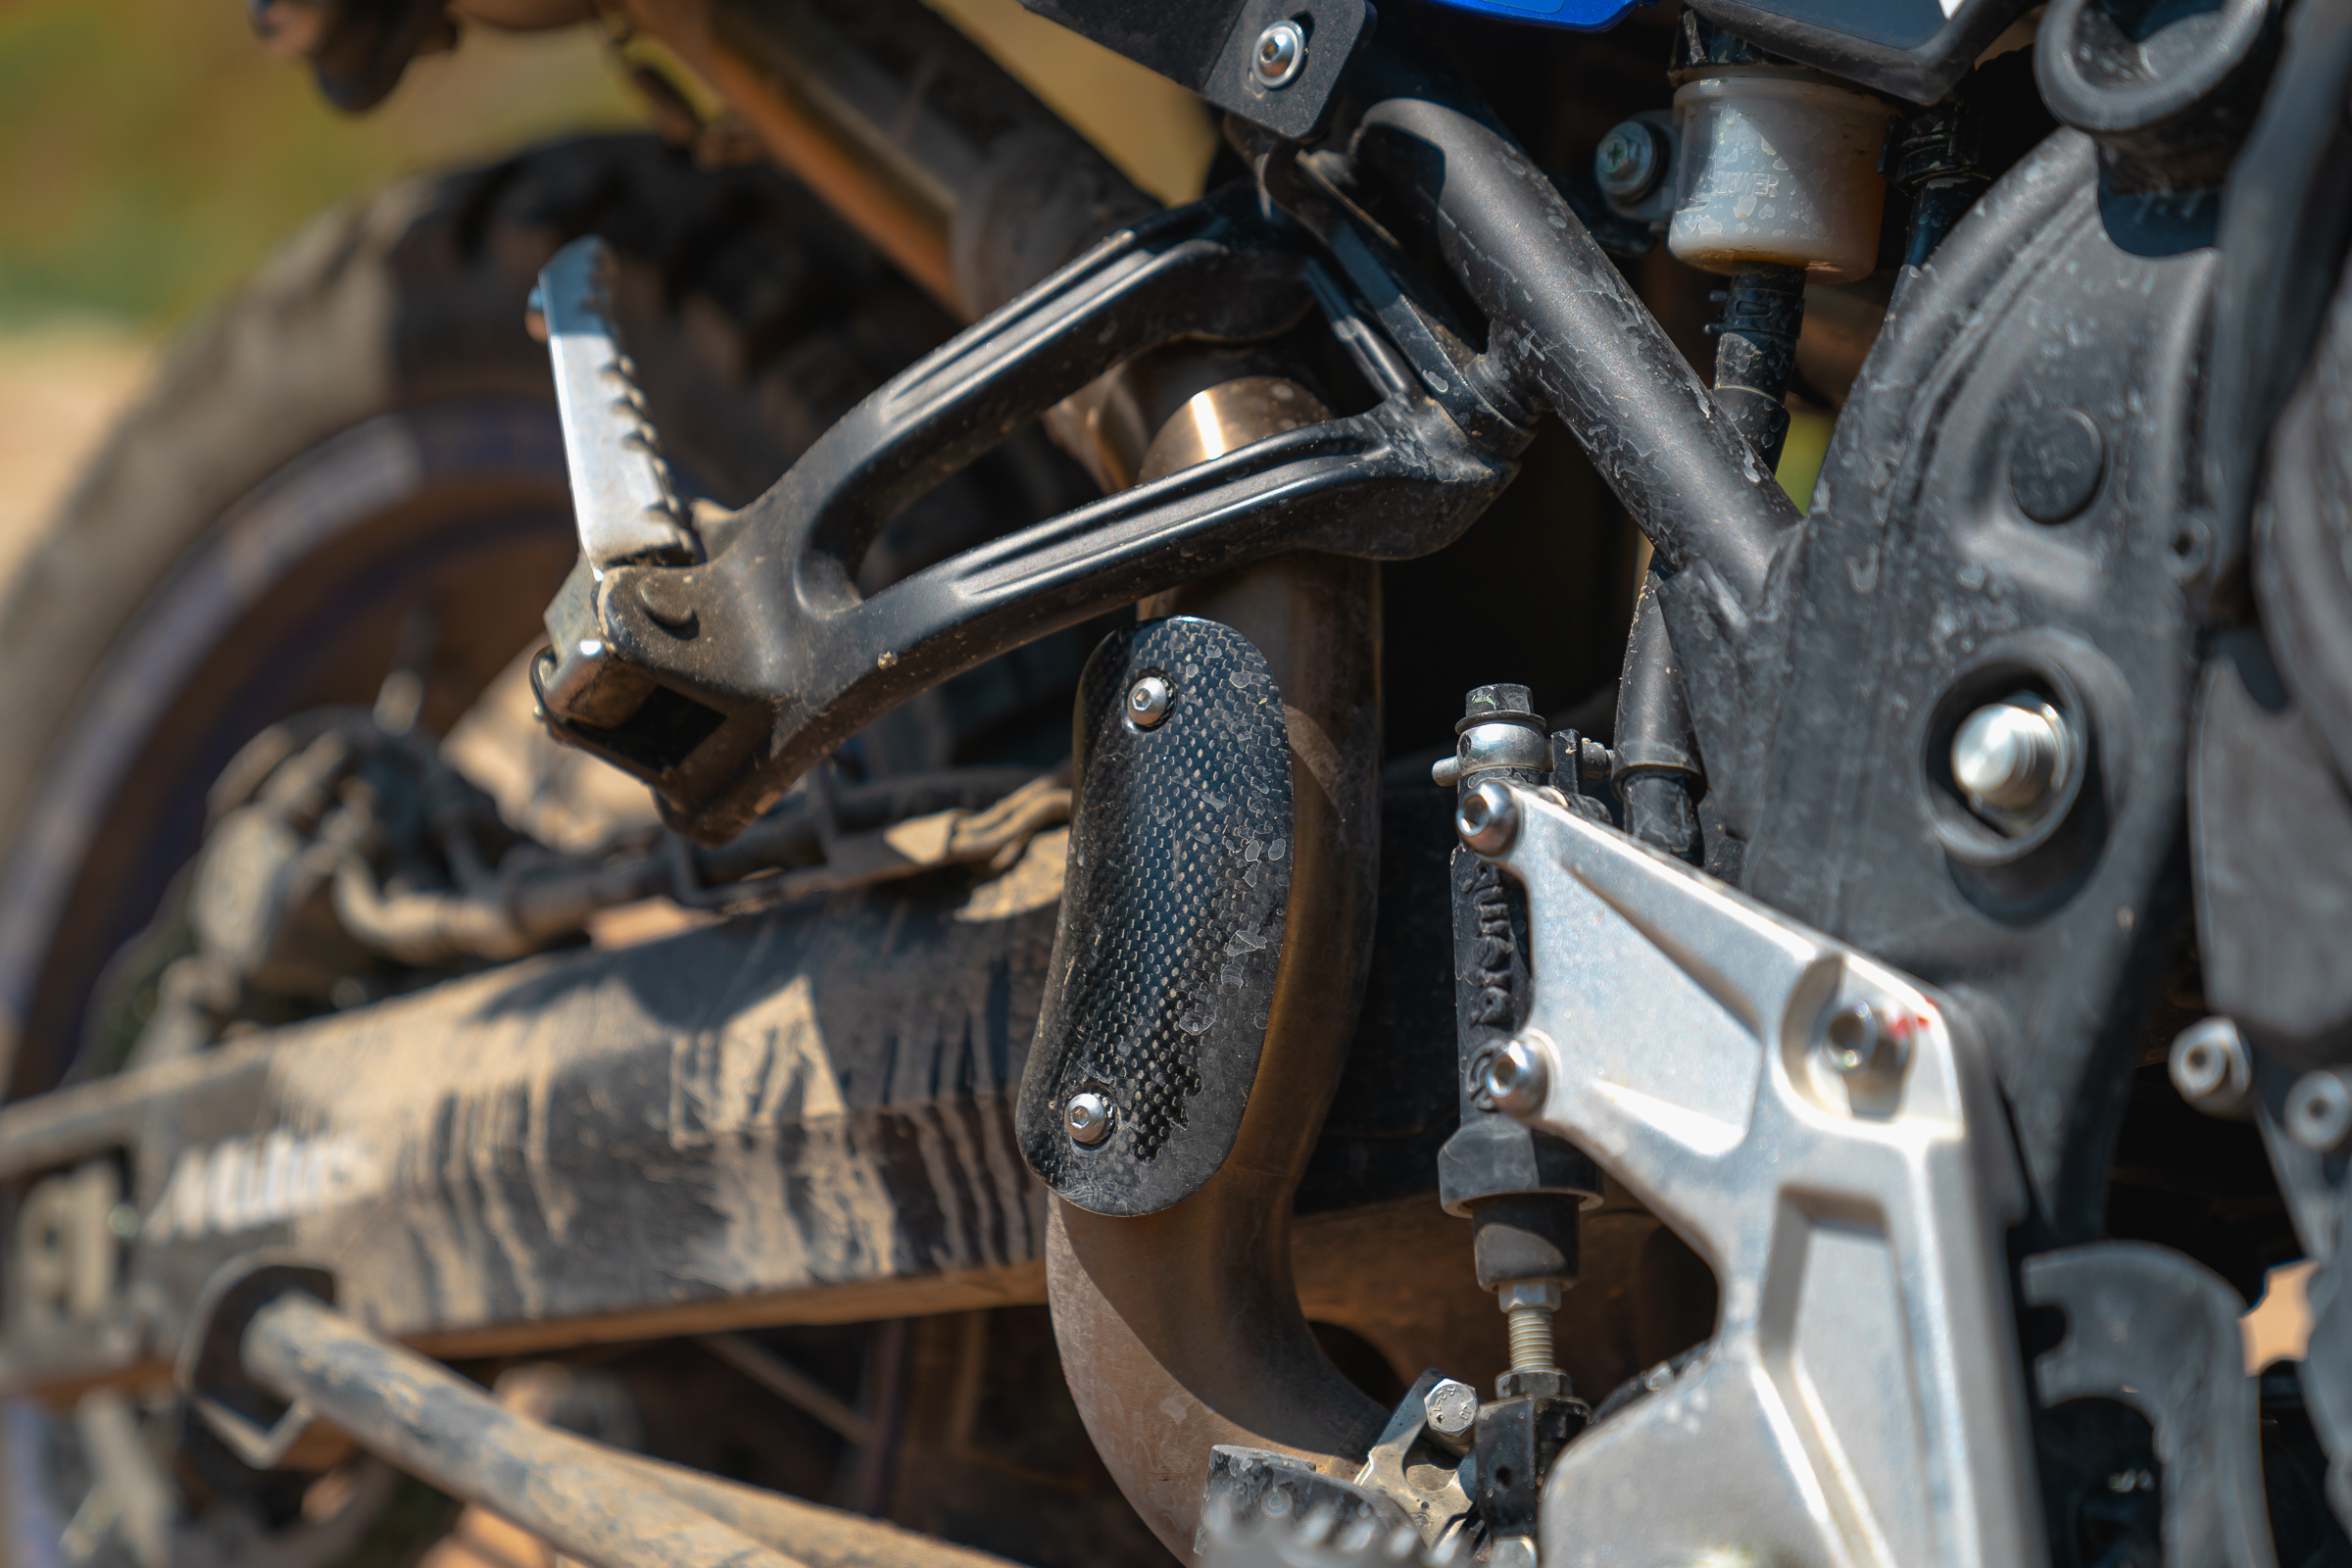
HP Corse Exhaust
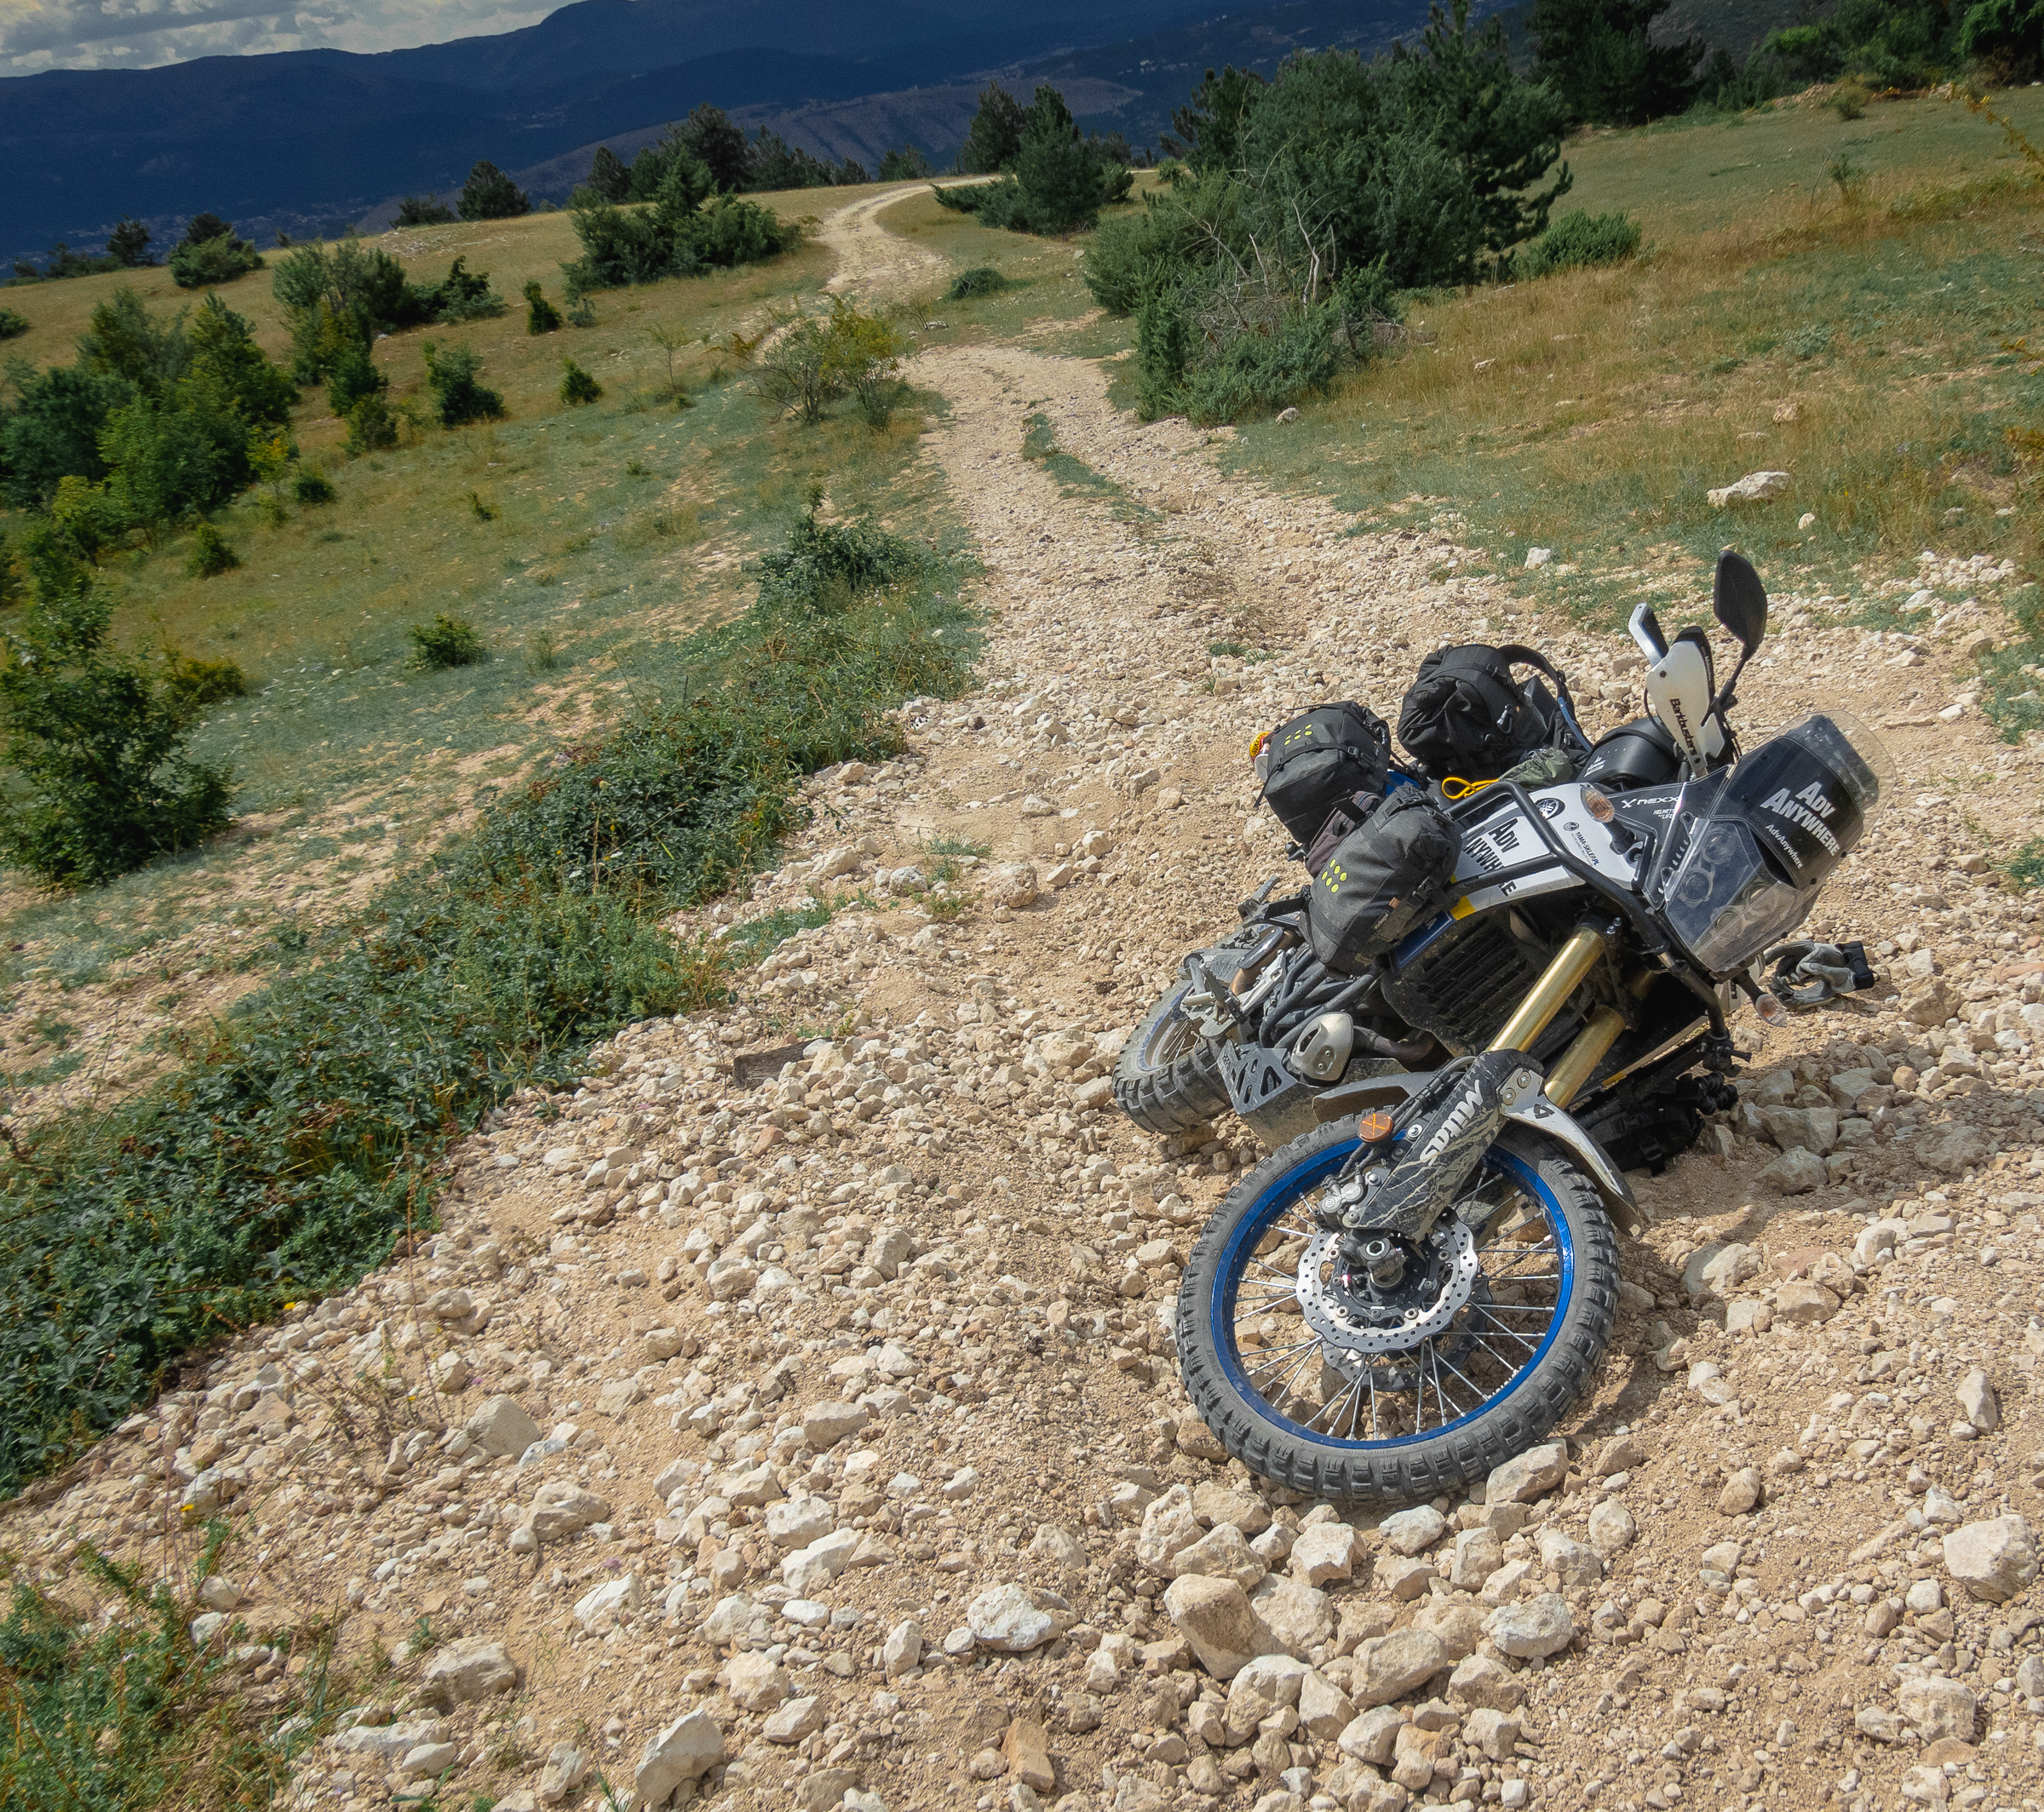
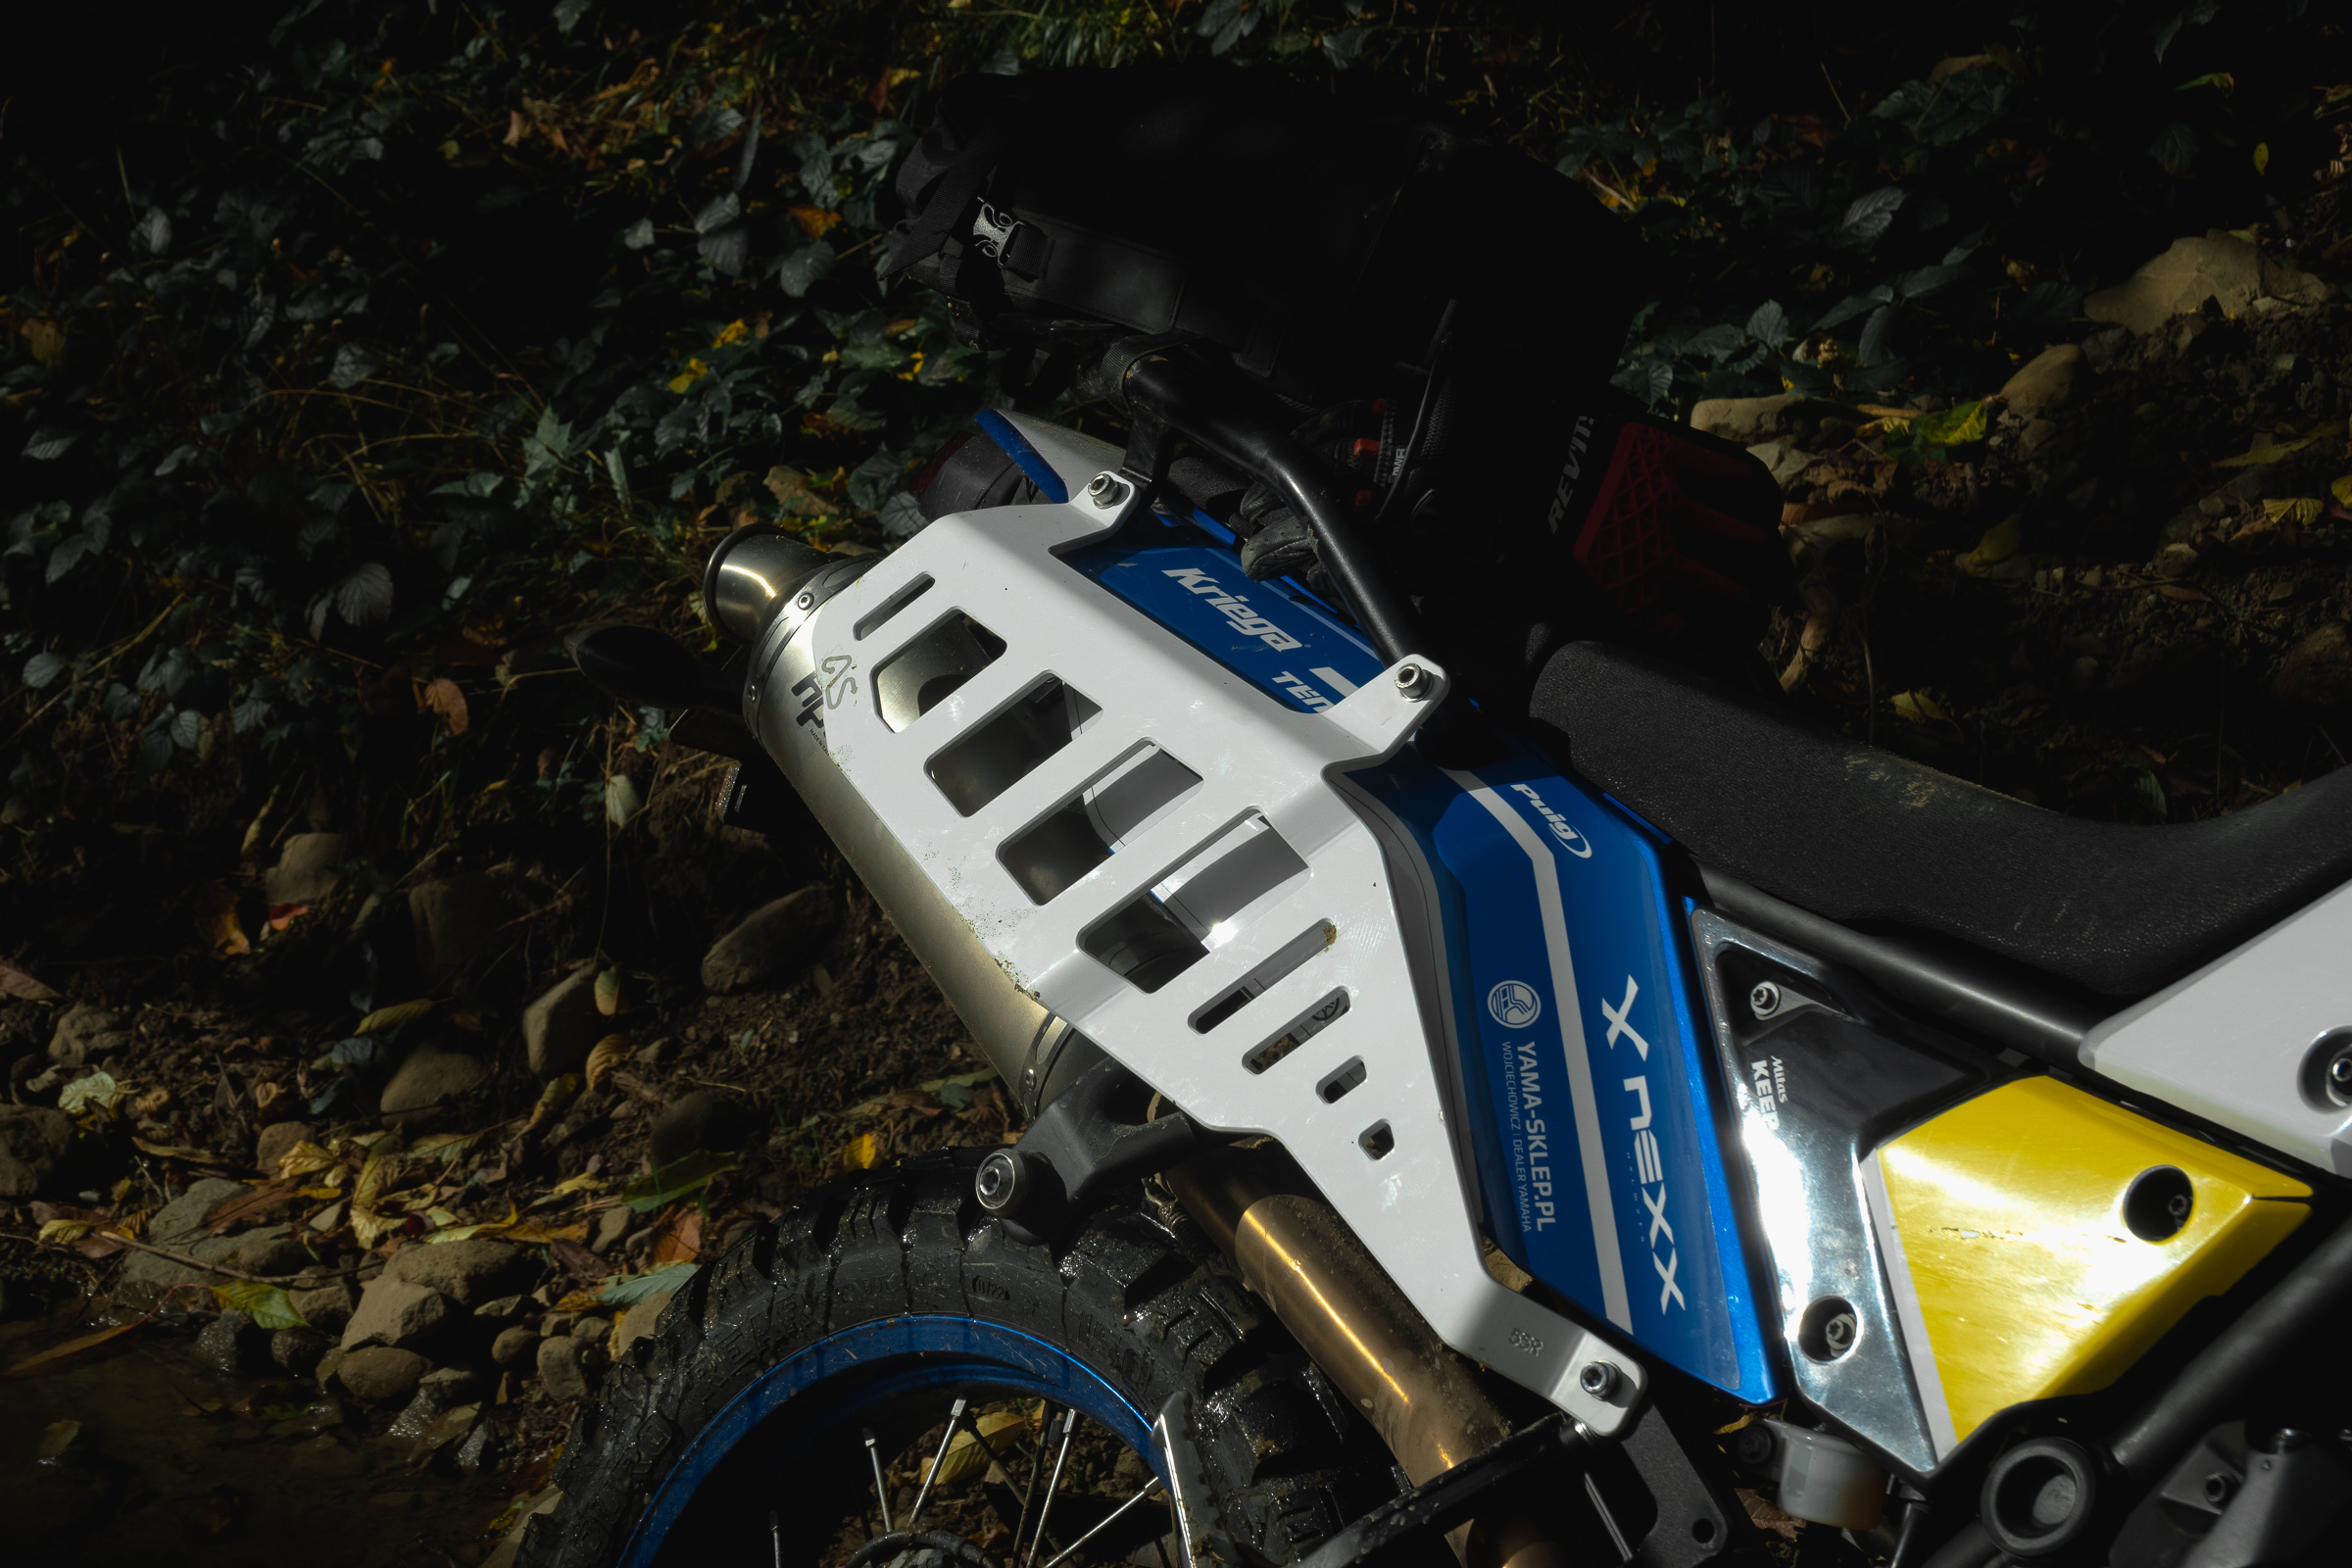
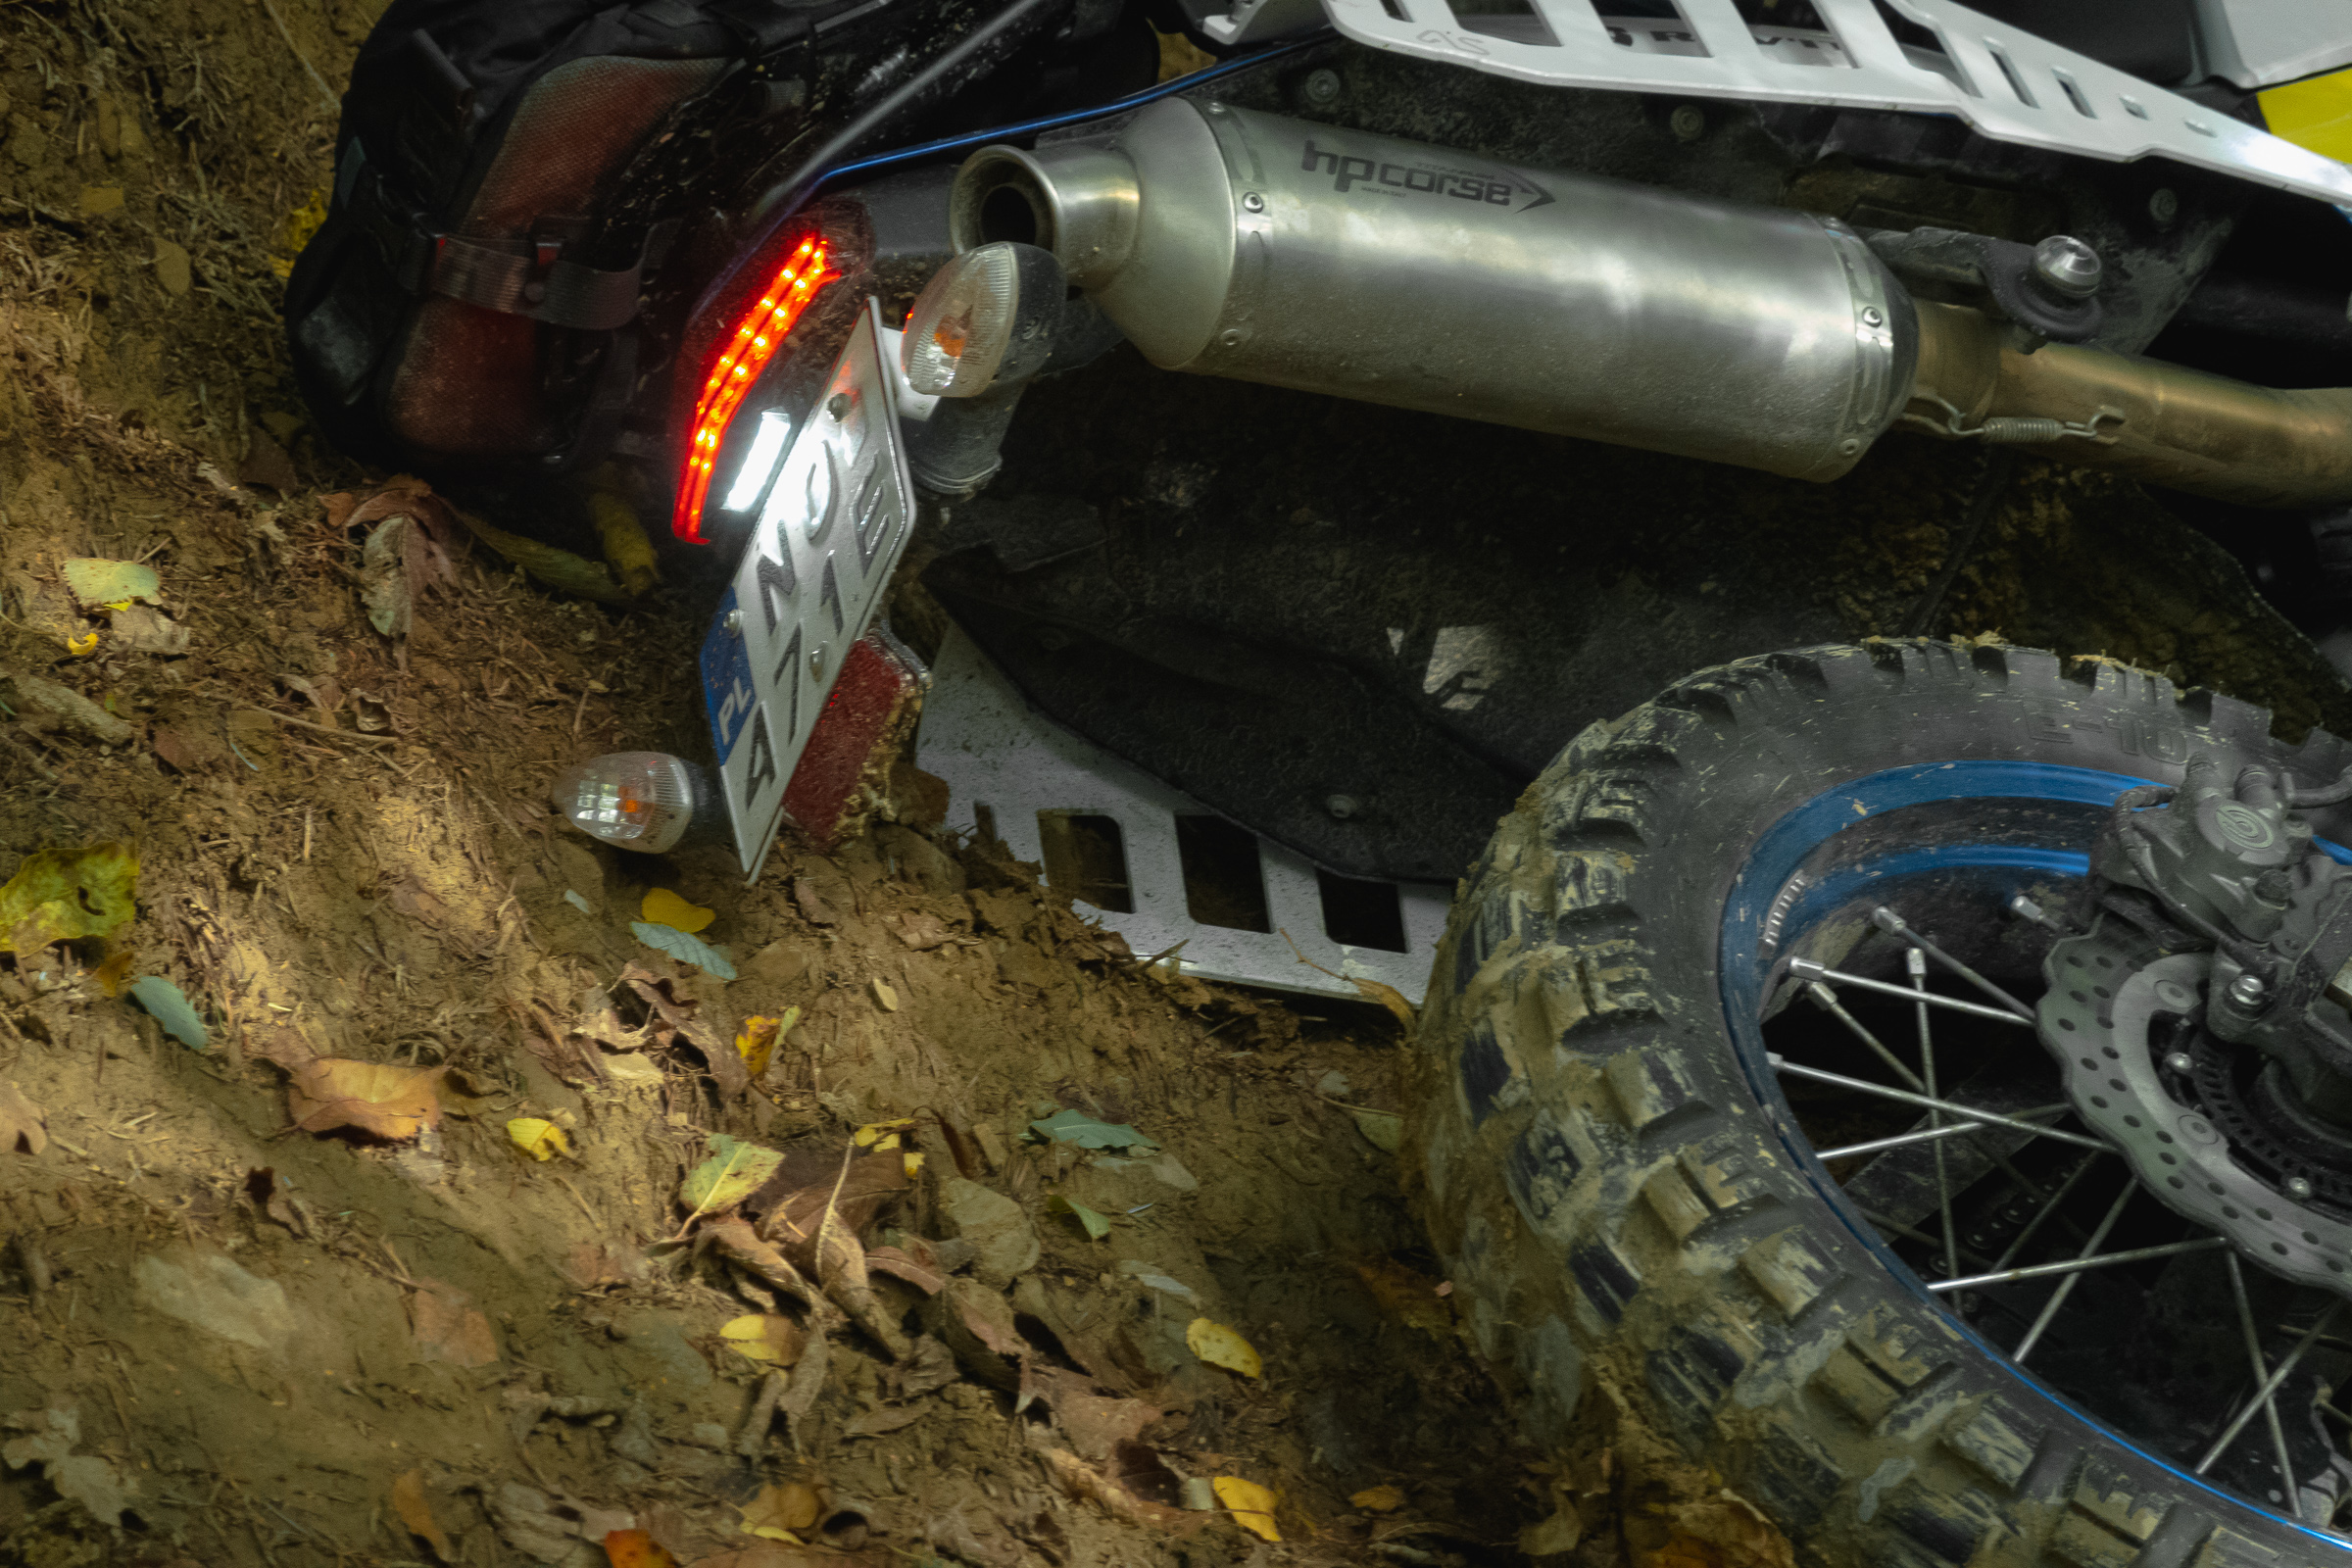
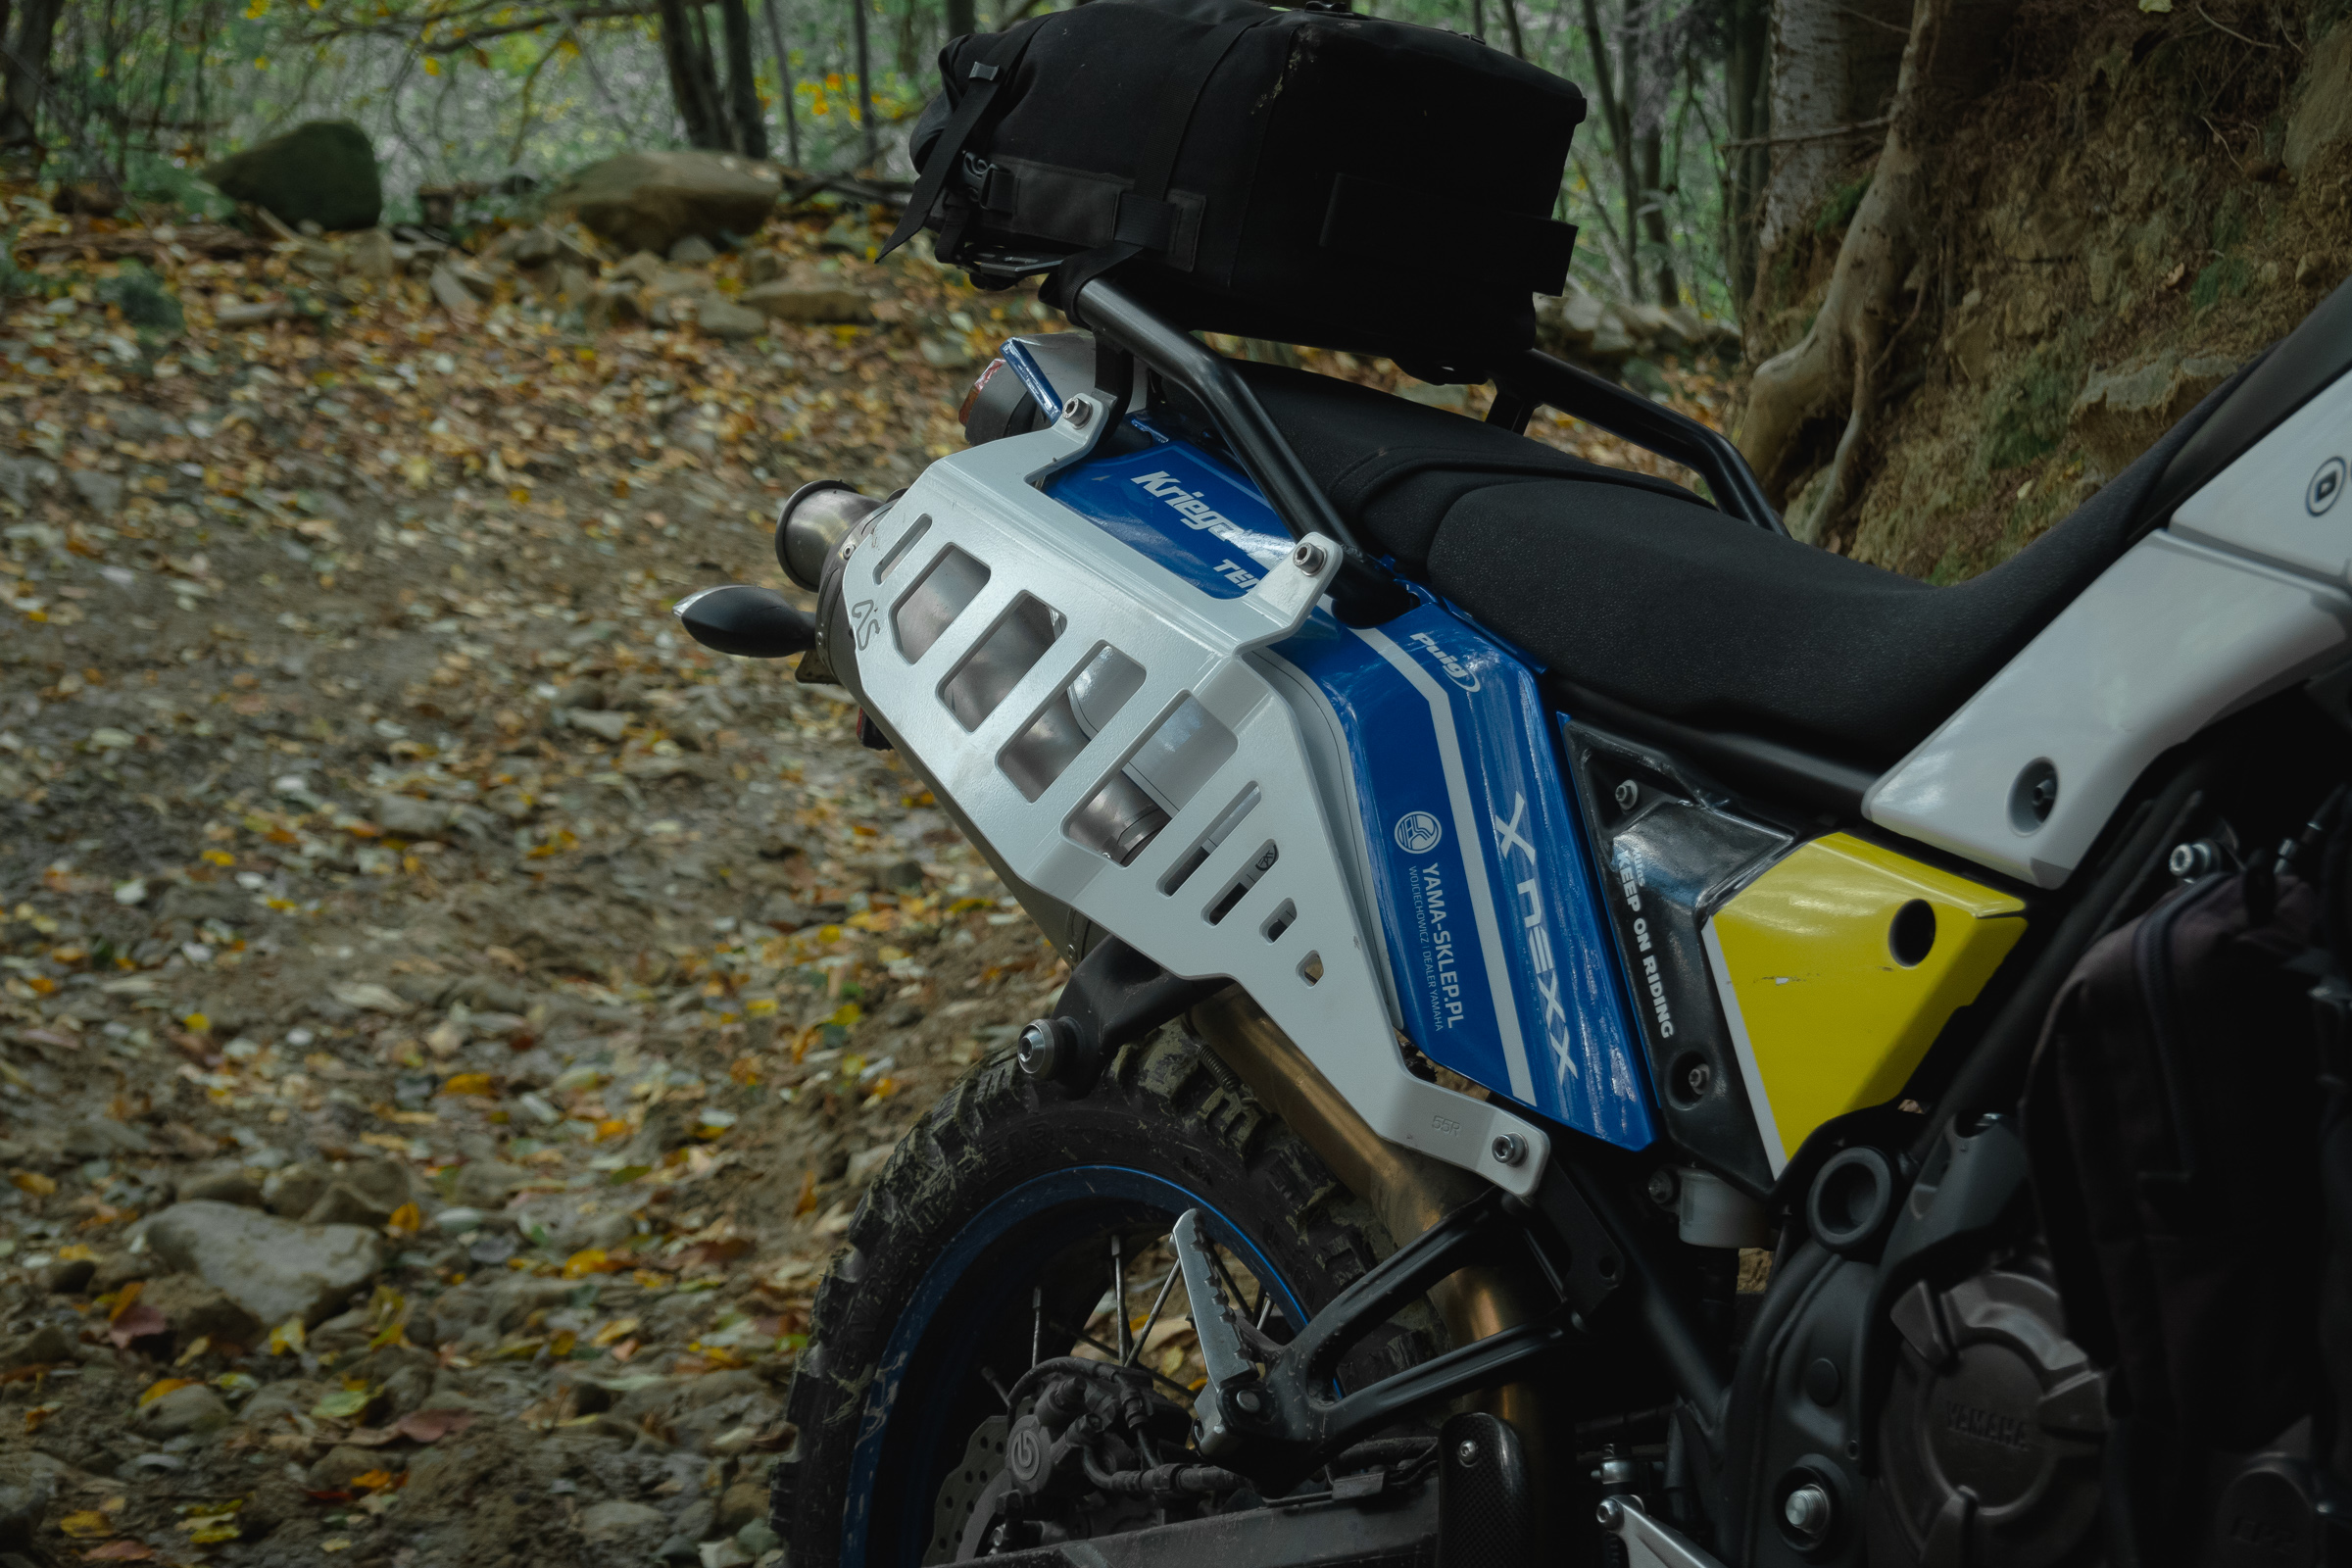
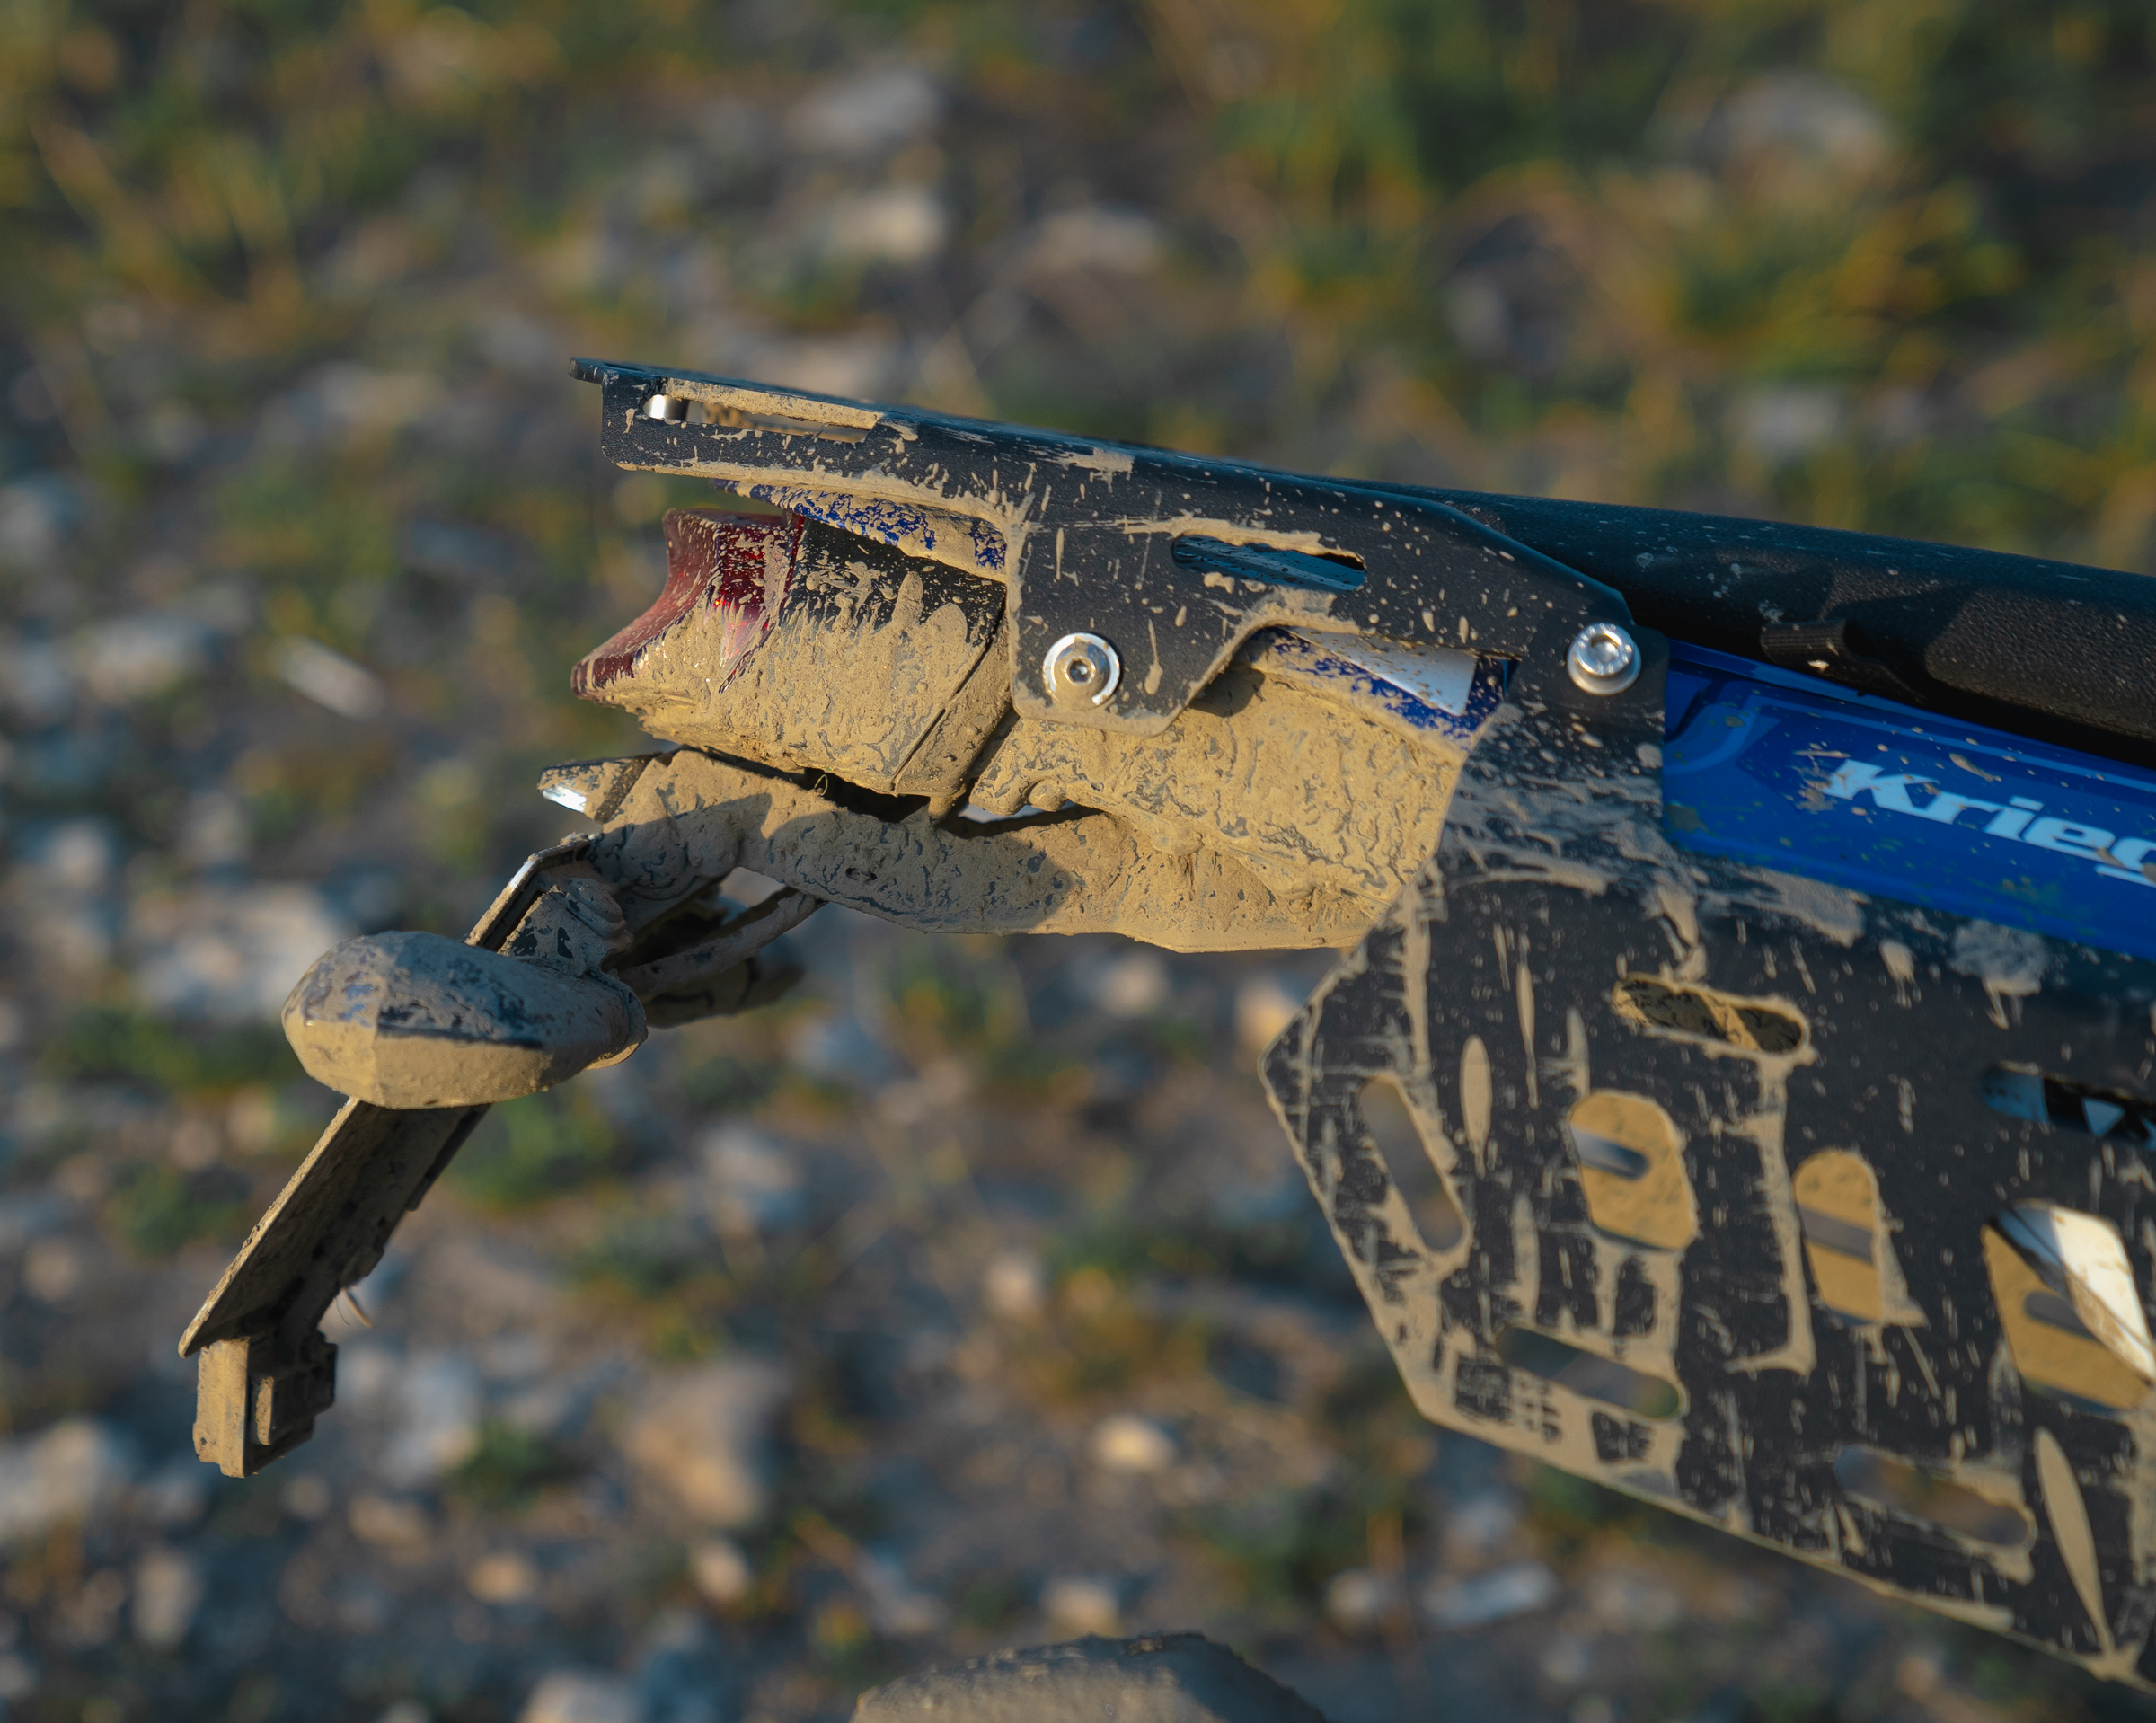
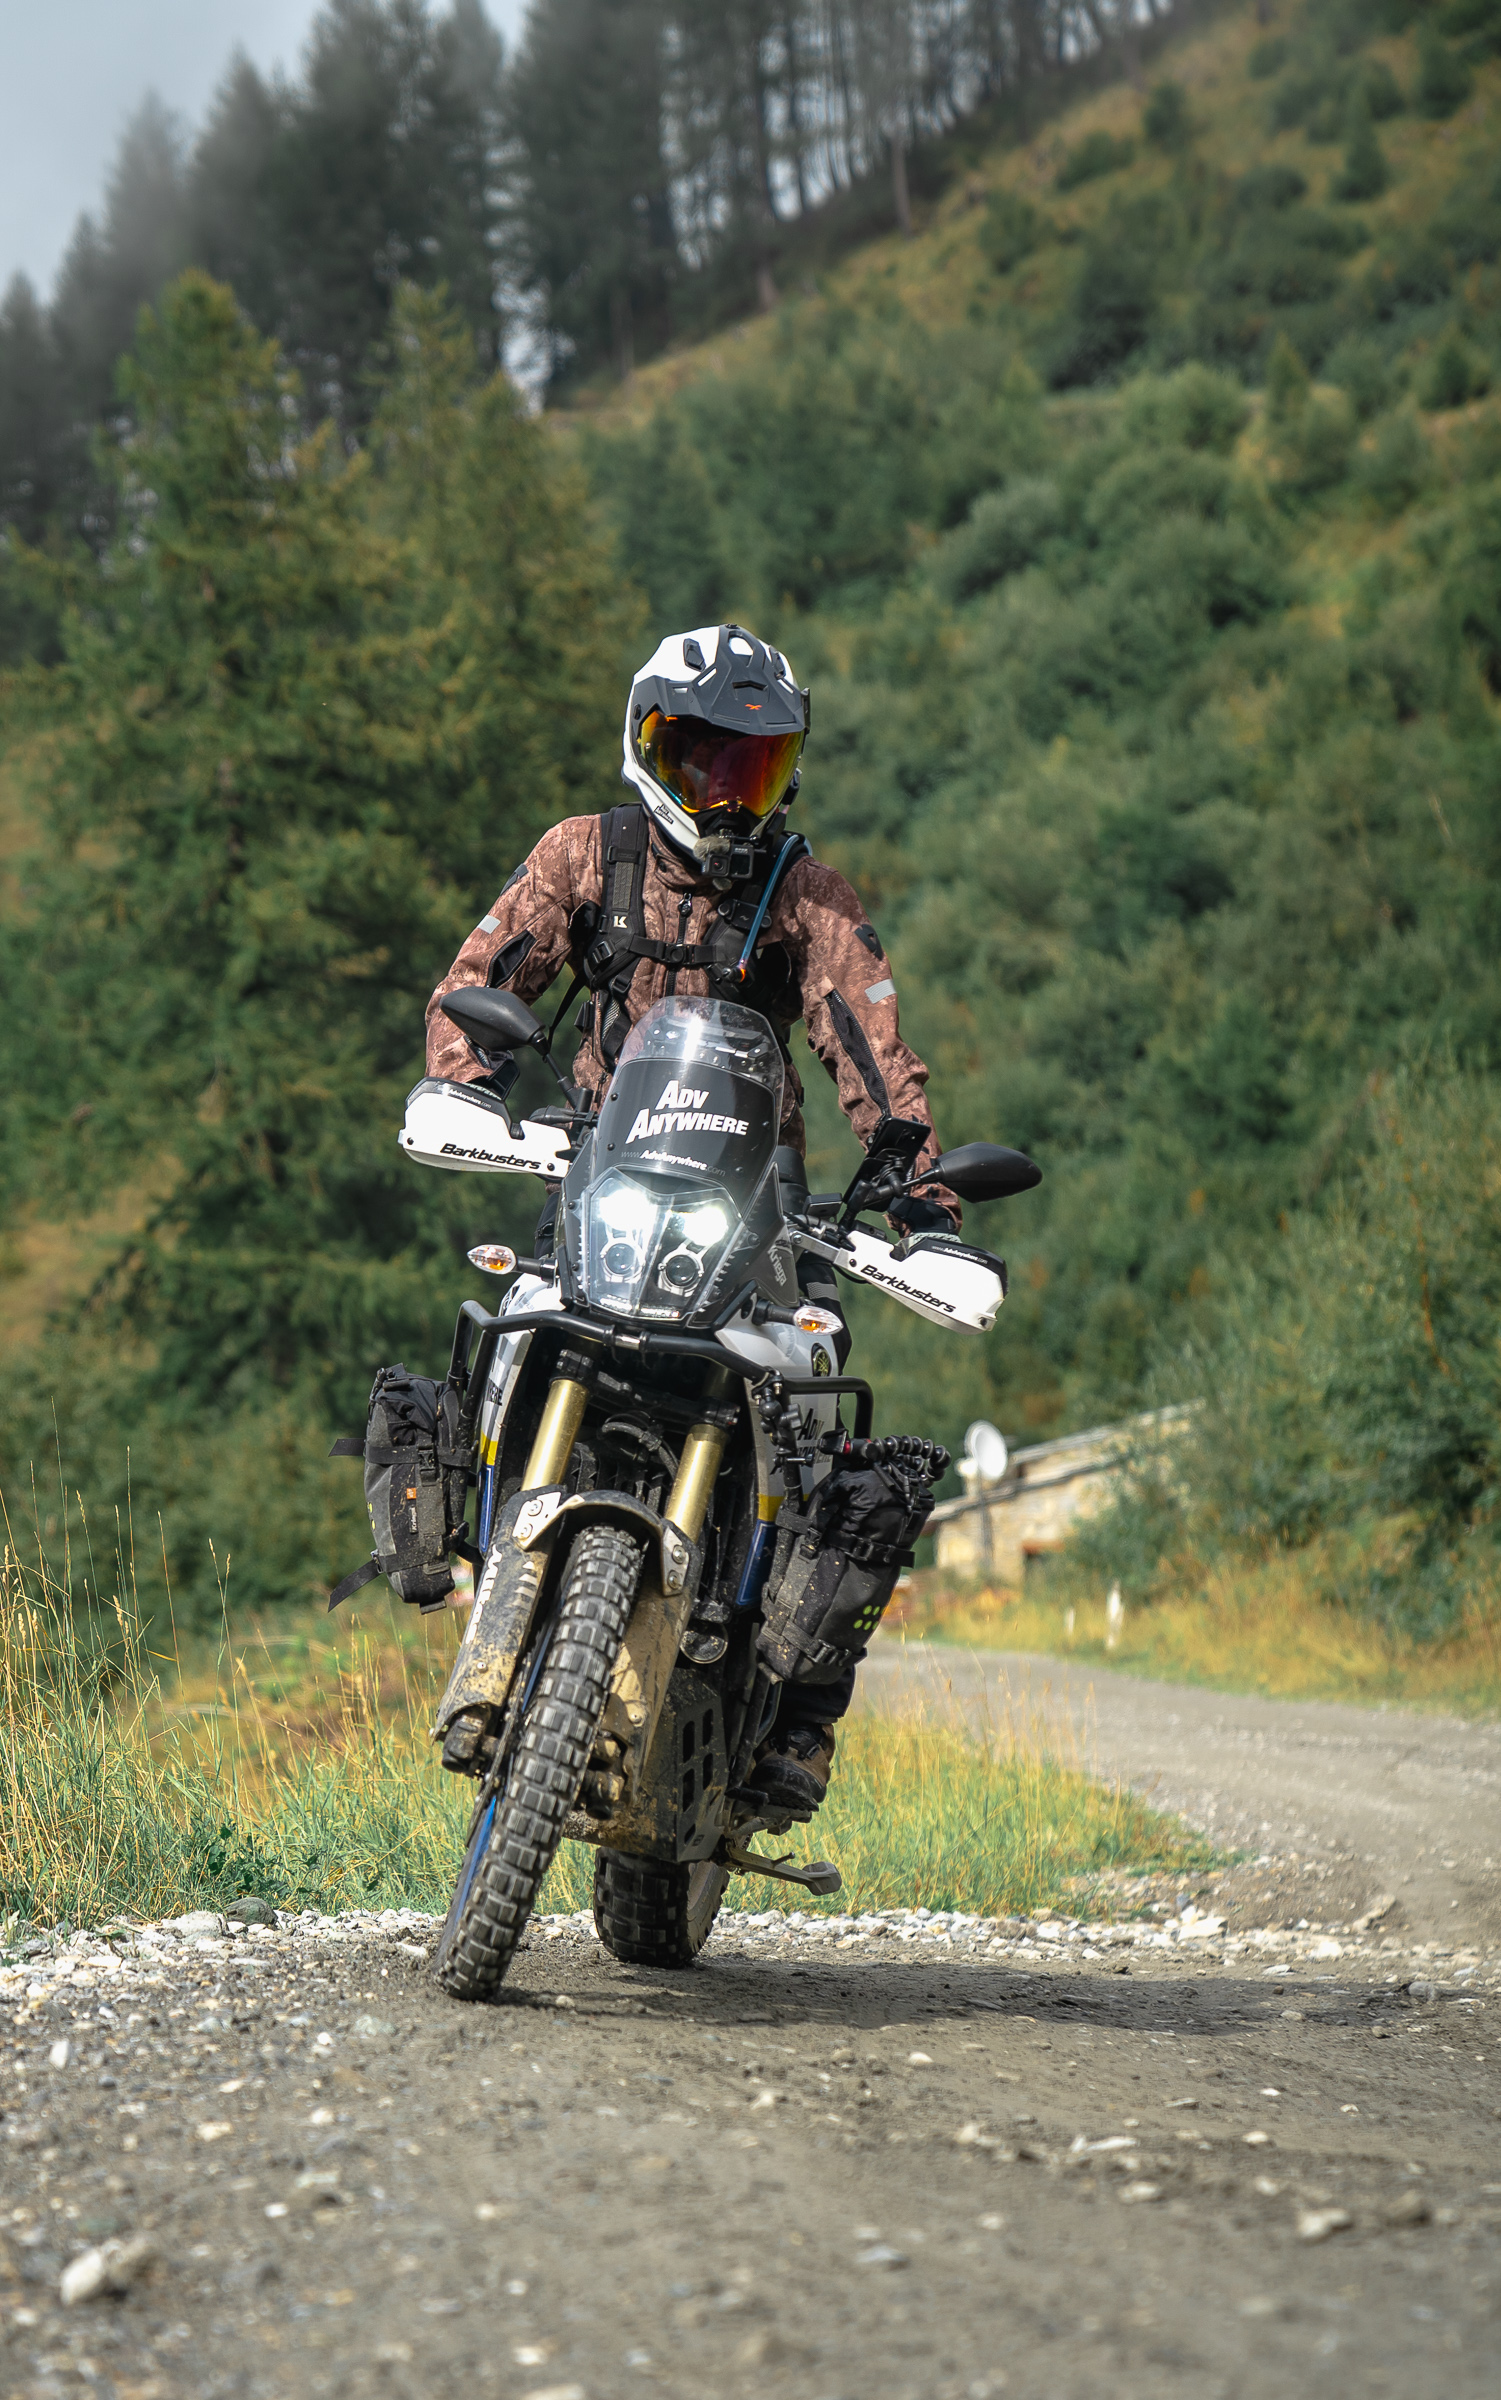
Sound, appearance, performance, and weight. These are the most popular reasons for replacing the exhaust system on a motorcycle. In the case of the Tenere 700, there is another, definitely crucial reason. Reducing the chances of damage when the motorcycle falls. The factory exhaust on the T7 is low and mounted in such a way that with a few falls of the motorcycle to the right side – which is not unusual in off-road riding – the exhaust can bend inward, blocking the swingarm. After several falls, the mount has to be bent back to its original state. As if this was not enough, damage to the mount means also damage to the frame. Yes, this mount is welded to the frame, it’s not a tightened part. For me, this is the only drawback in the entire design of the Tenere 700, but of course, there is a way to handle it – high-mount exhaust. For my Yamaha, I chose the Italian HP Corse titanium exhaust, which neatly hides behind the side racks. Now I’m not afraid of falls.
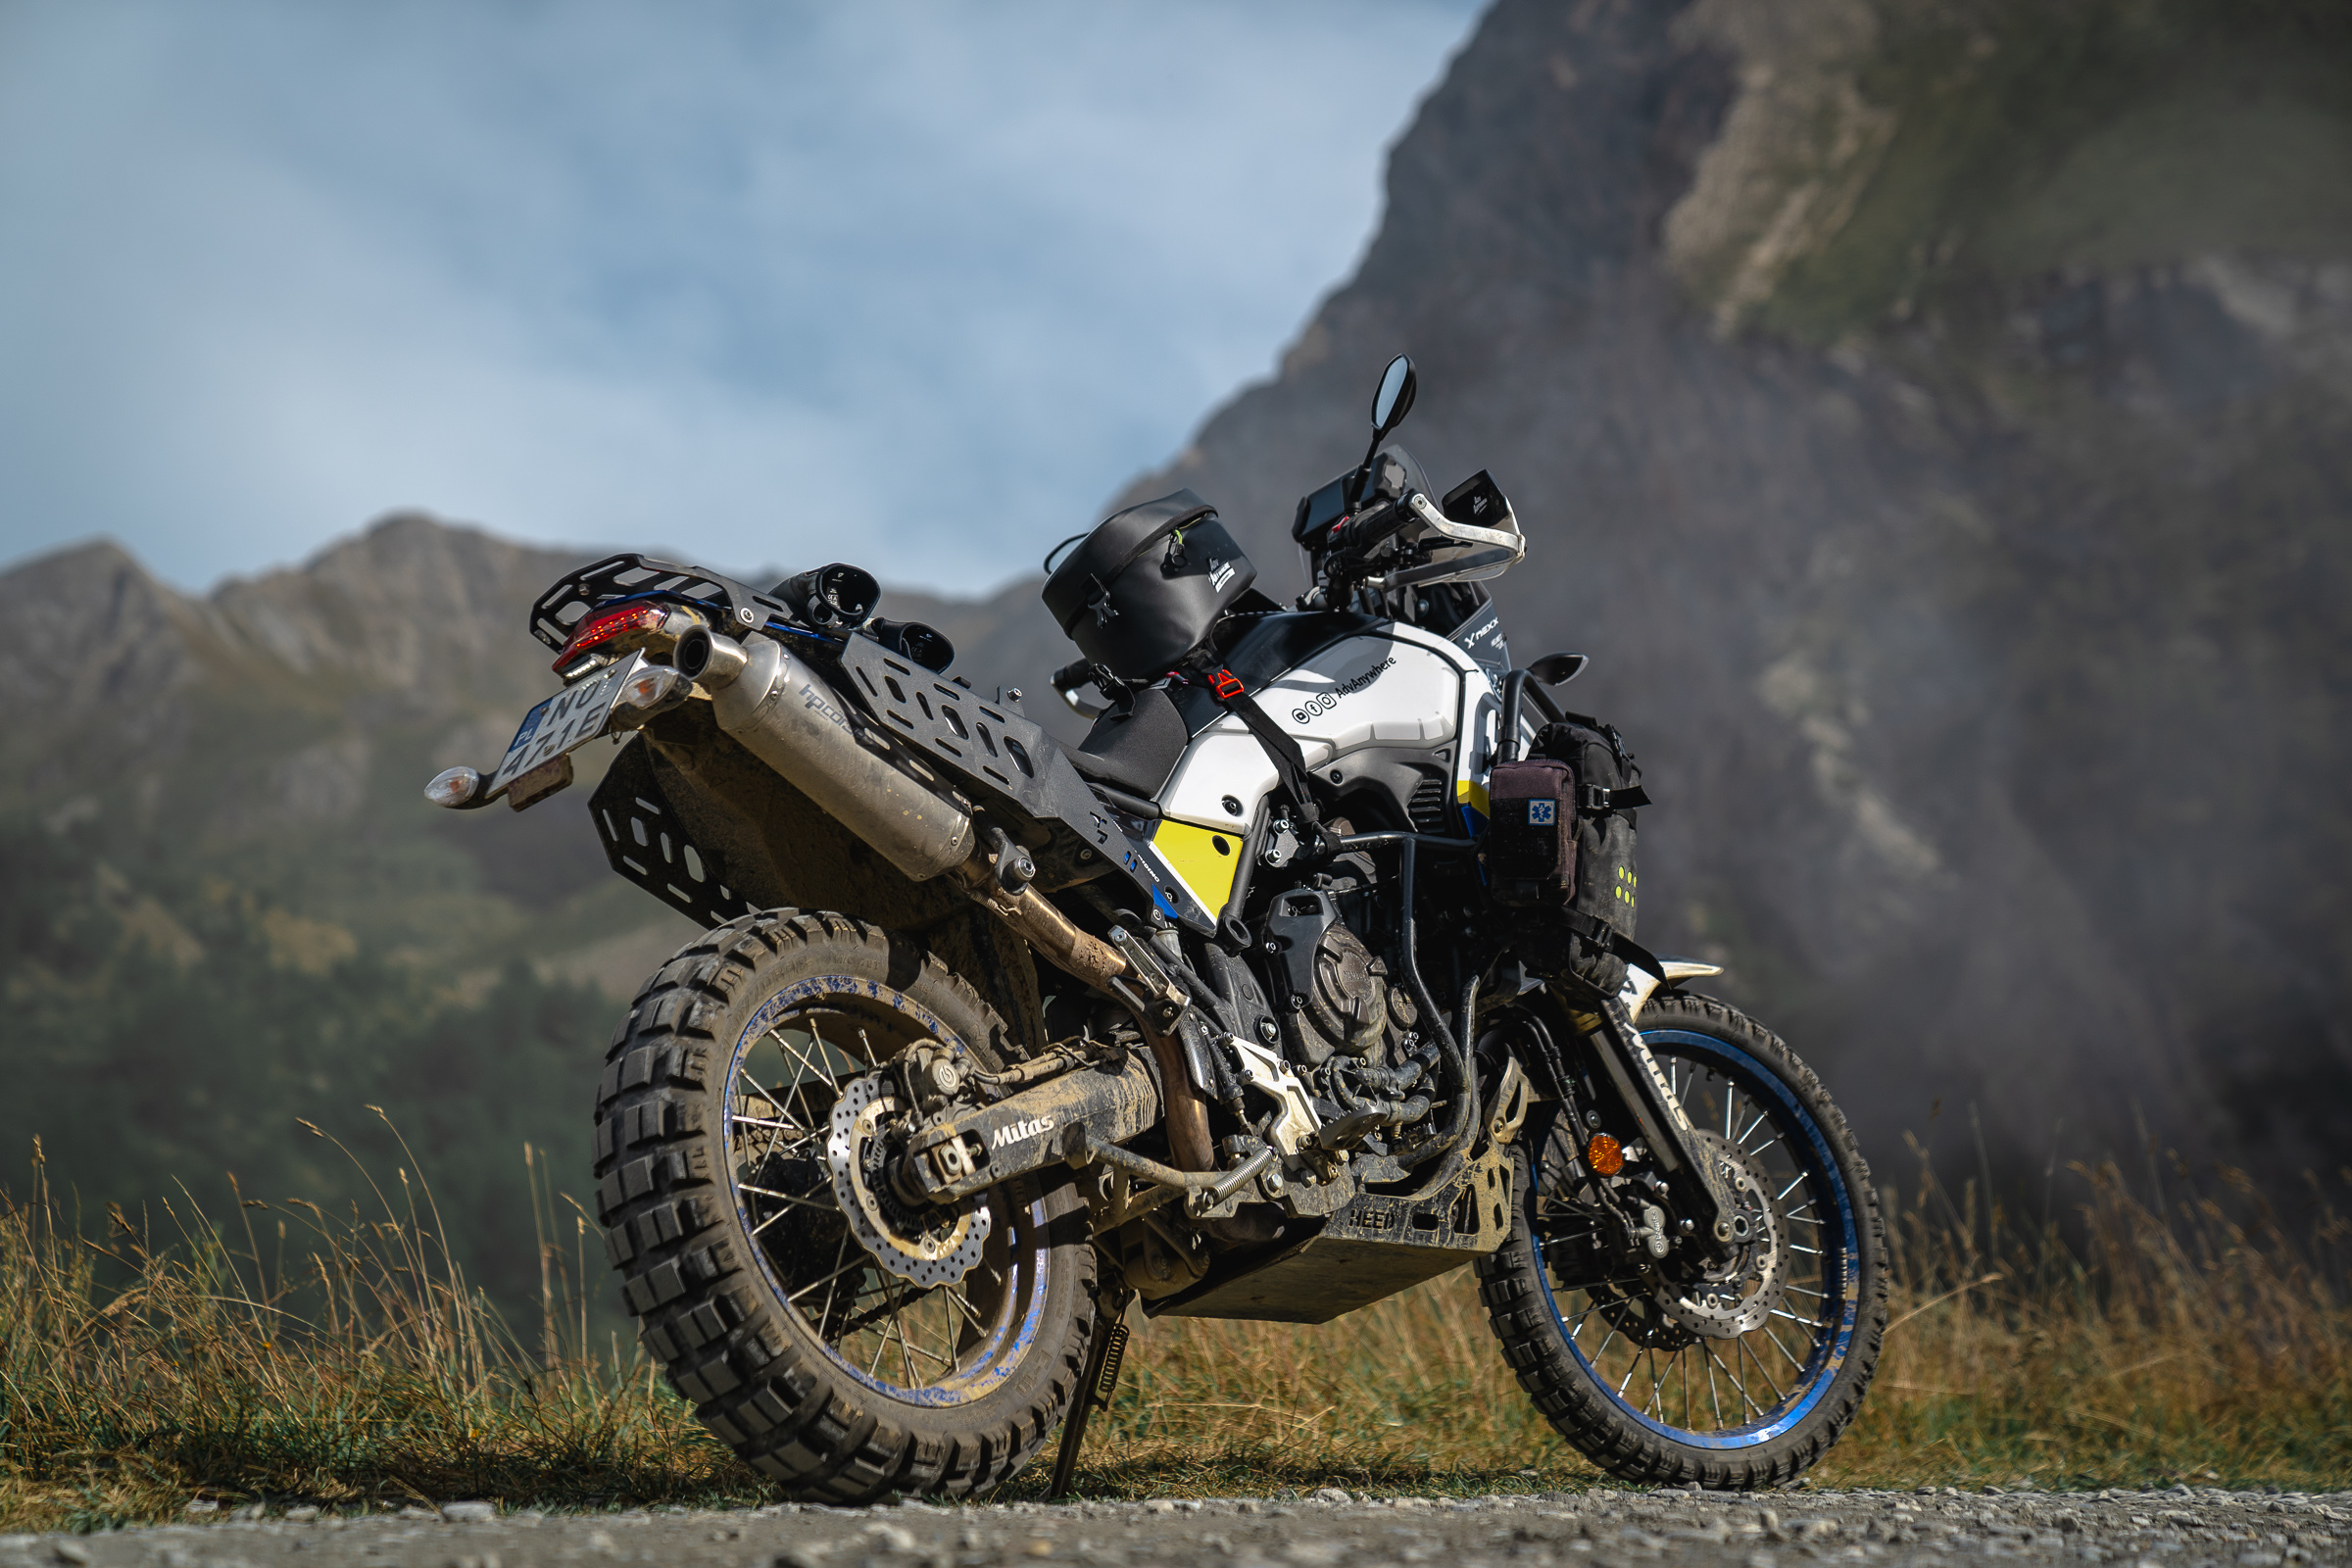
The HP Corse weighs around 3 kg less than the factory exhaust and it’s noticeable. It looks great and accentuates the aggressive lines of the Tenere.
The HP Corse exhaust for the Tenere 700 has a non-removable dB killer, which to me is quite a leap over the Akrapovič dual exhaust with removable dB killers on my old Tenere XT660ZA. The factory exhaust on the T7 sounds more like a scooter than an off-road beast. The HP Corse accessory exhaust brings out the sound and character of the Tenere beautifully.

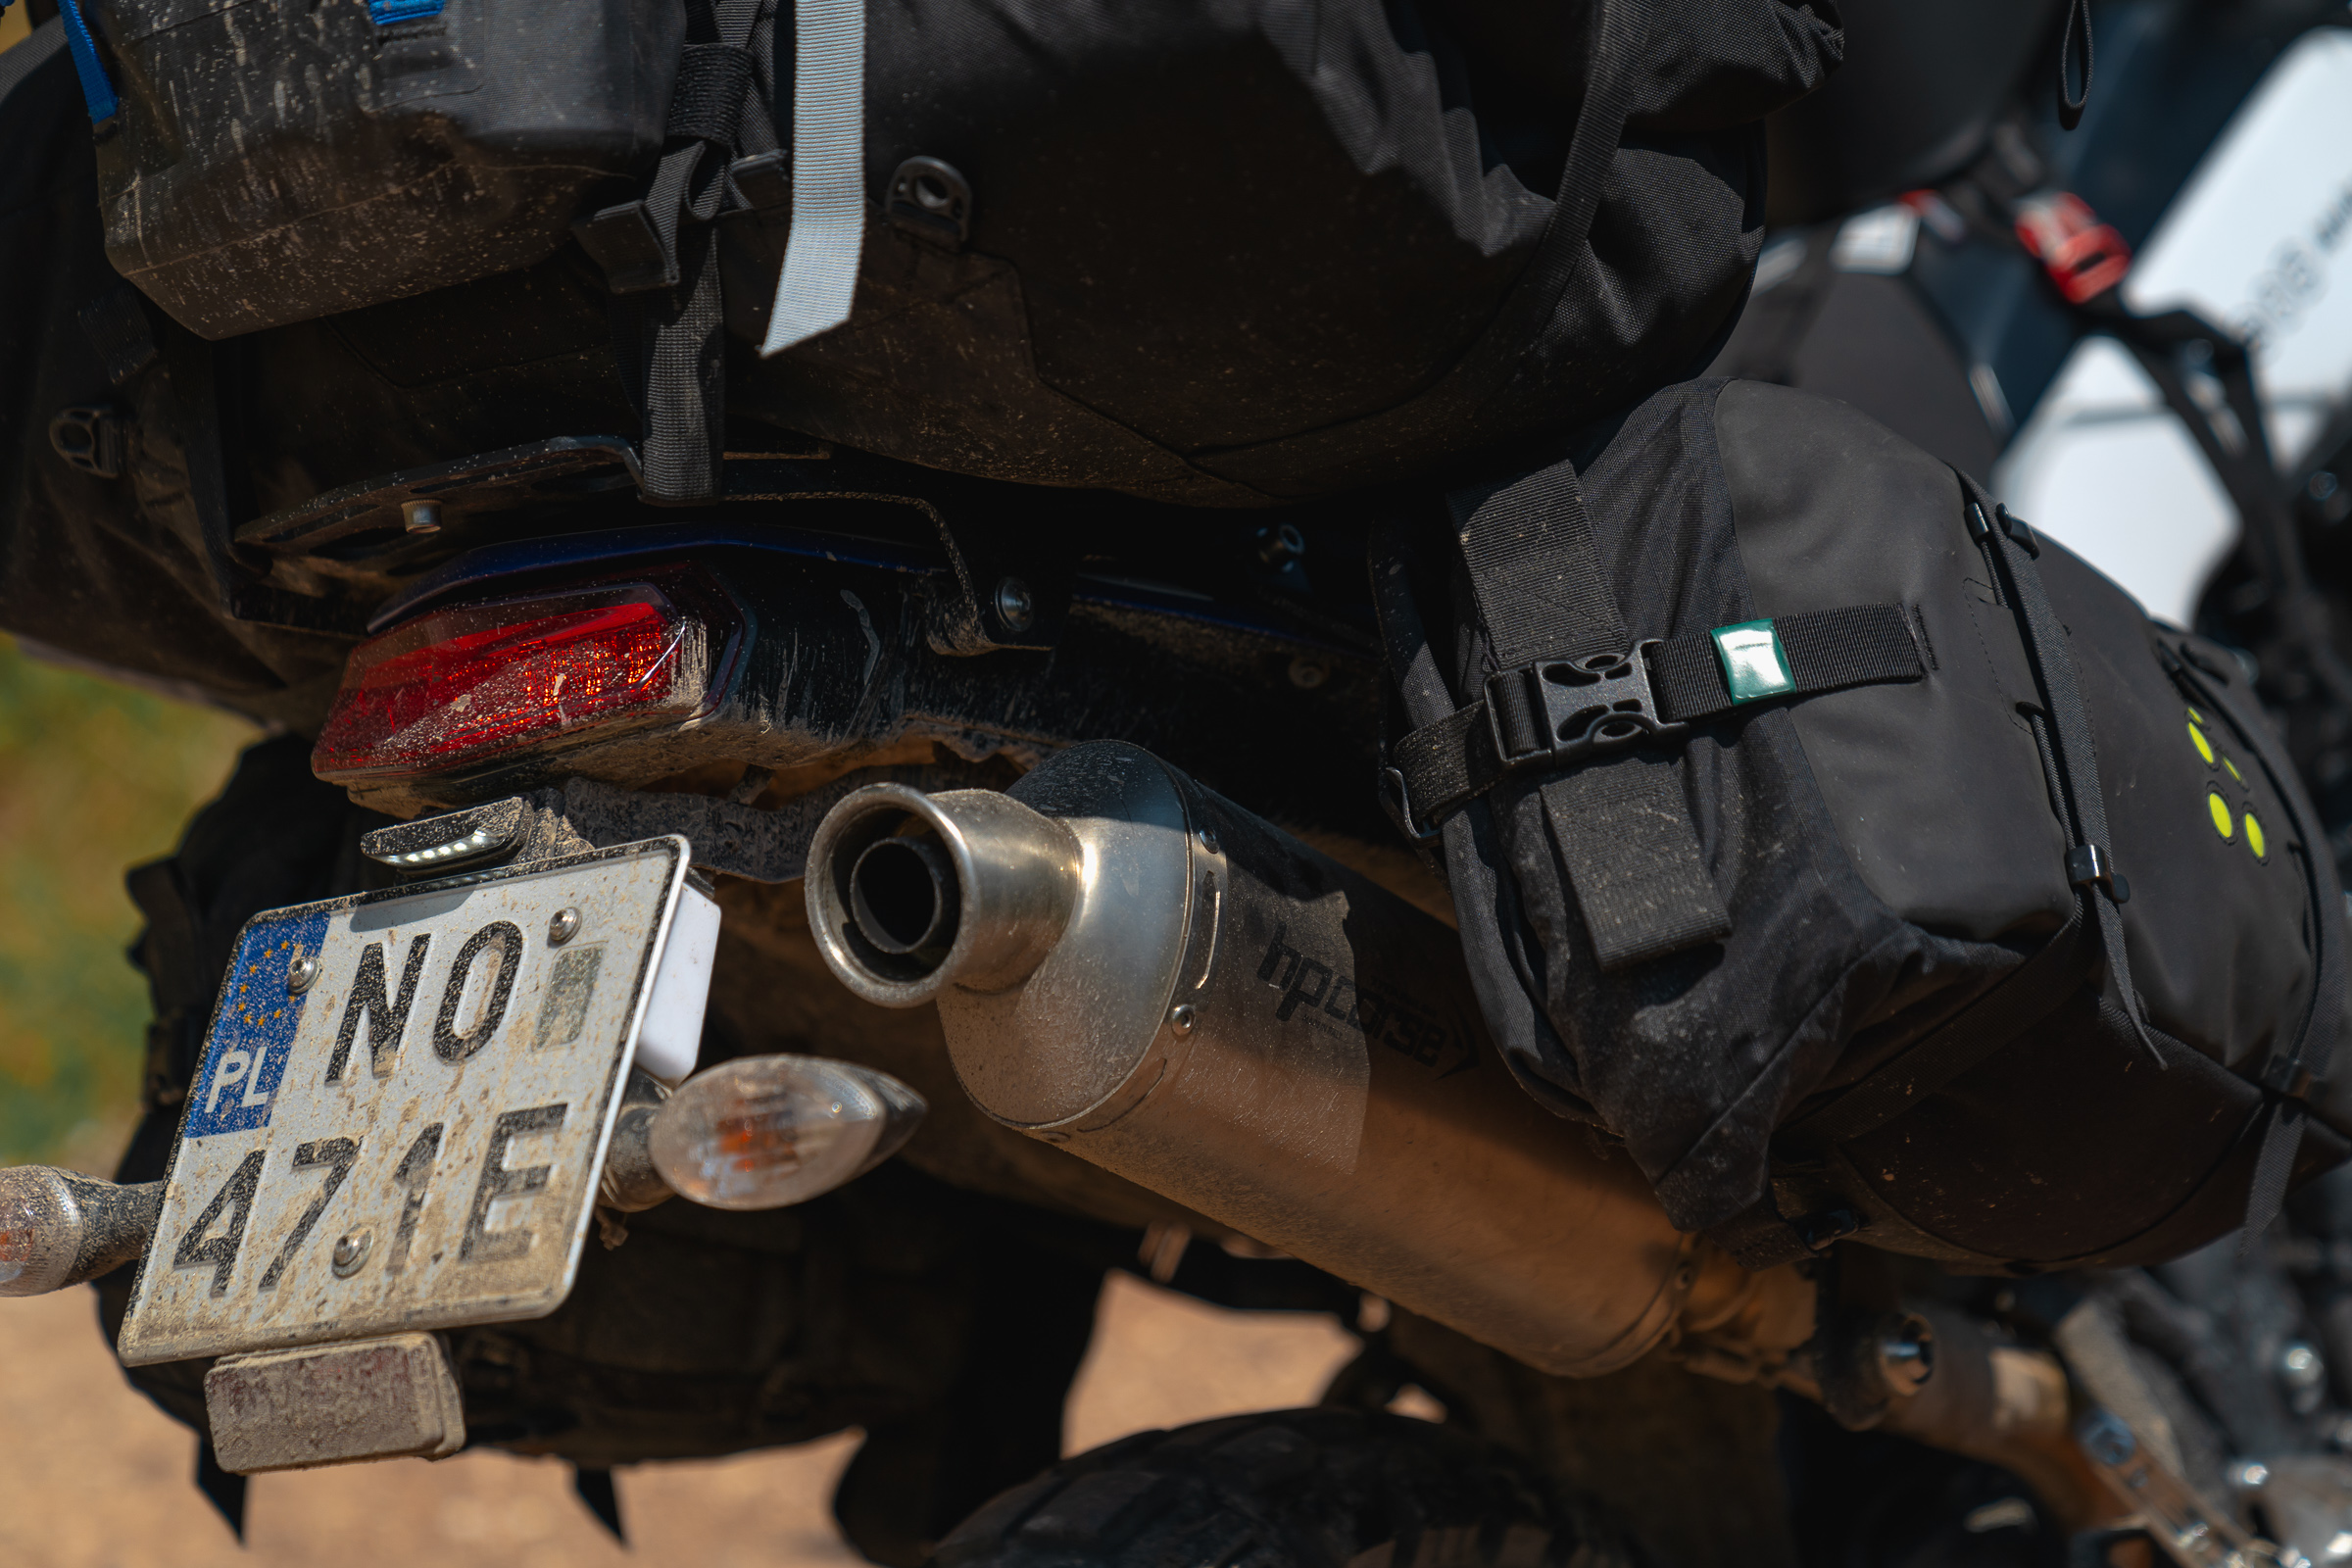
Regarding the compatibility of the HP Corse high-mount exhaust and Puig tail tidy, I can provide you with some insights based on my personal experience. Initially, I had the Puig tail tidy installed on my Tenere 700, which worked well for some time. However, during a ride on the TET Serbia, I, unfortunately, lost three screws from the tail tidy, and as a result, I decided to switch to the HP Corse Tidy Tail (YAT700PLATE01).
The HP Corse Tidy Tail has been a reliable choice for me, and I haven’t encountered any issues with its compatibility with the high-mount exhaust.
I should mention that if you plan to install Adventure Specs side panels, you may need to make a slight extension to the exhaust holder (both Puig and HP Corse). This is necessary to ensure proper clearance and avoid any interference between the side panels and the exhaust system.
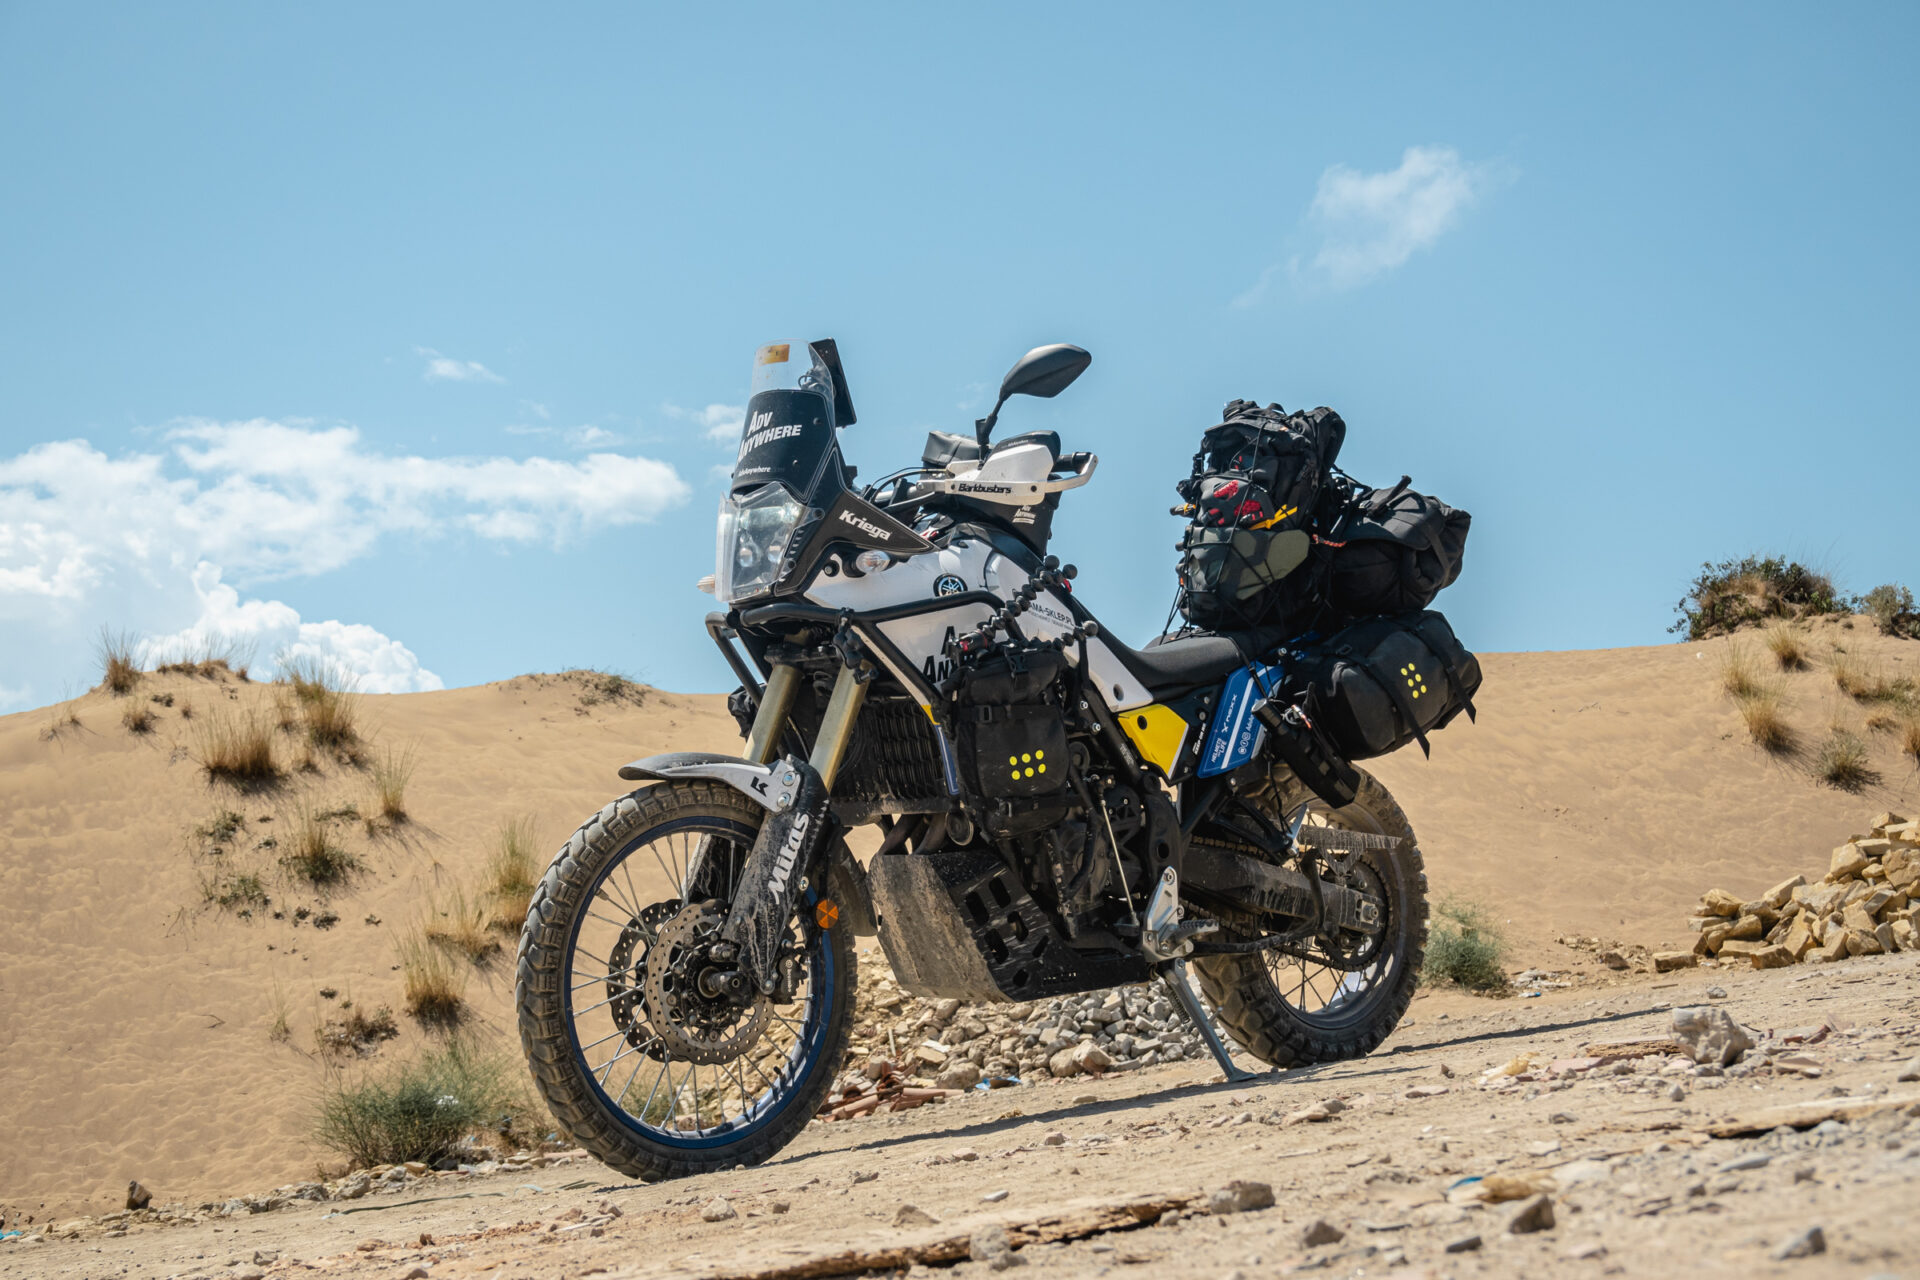
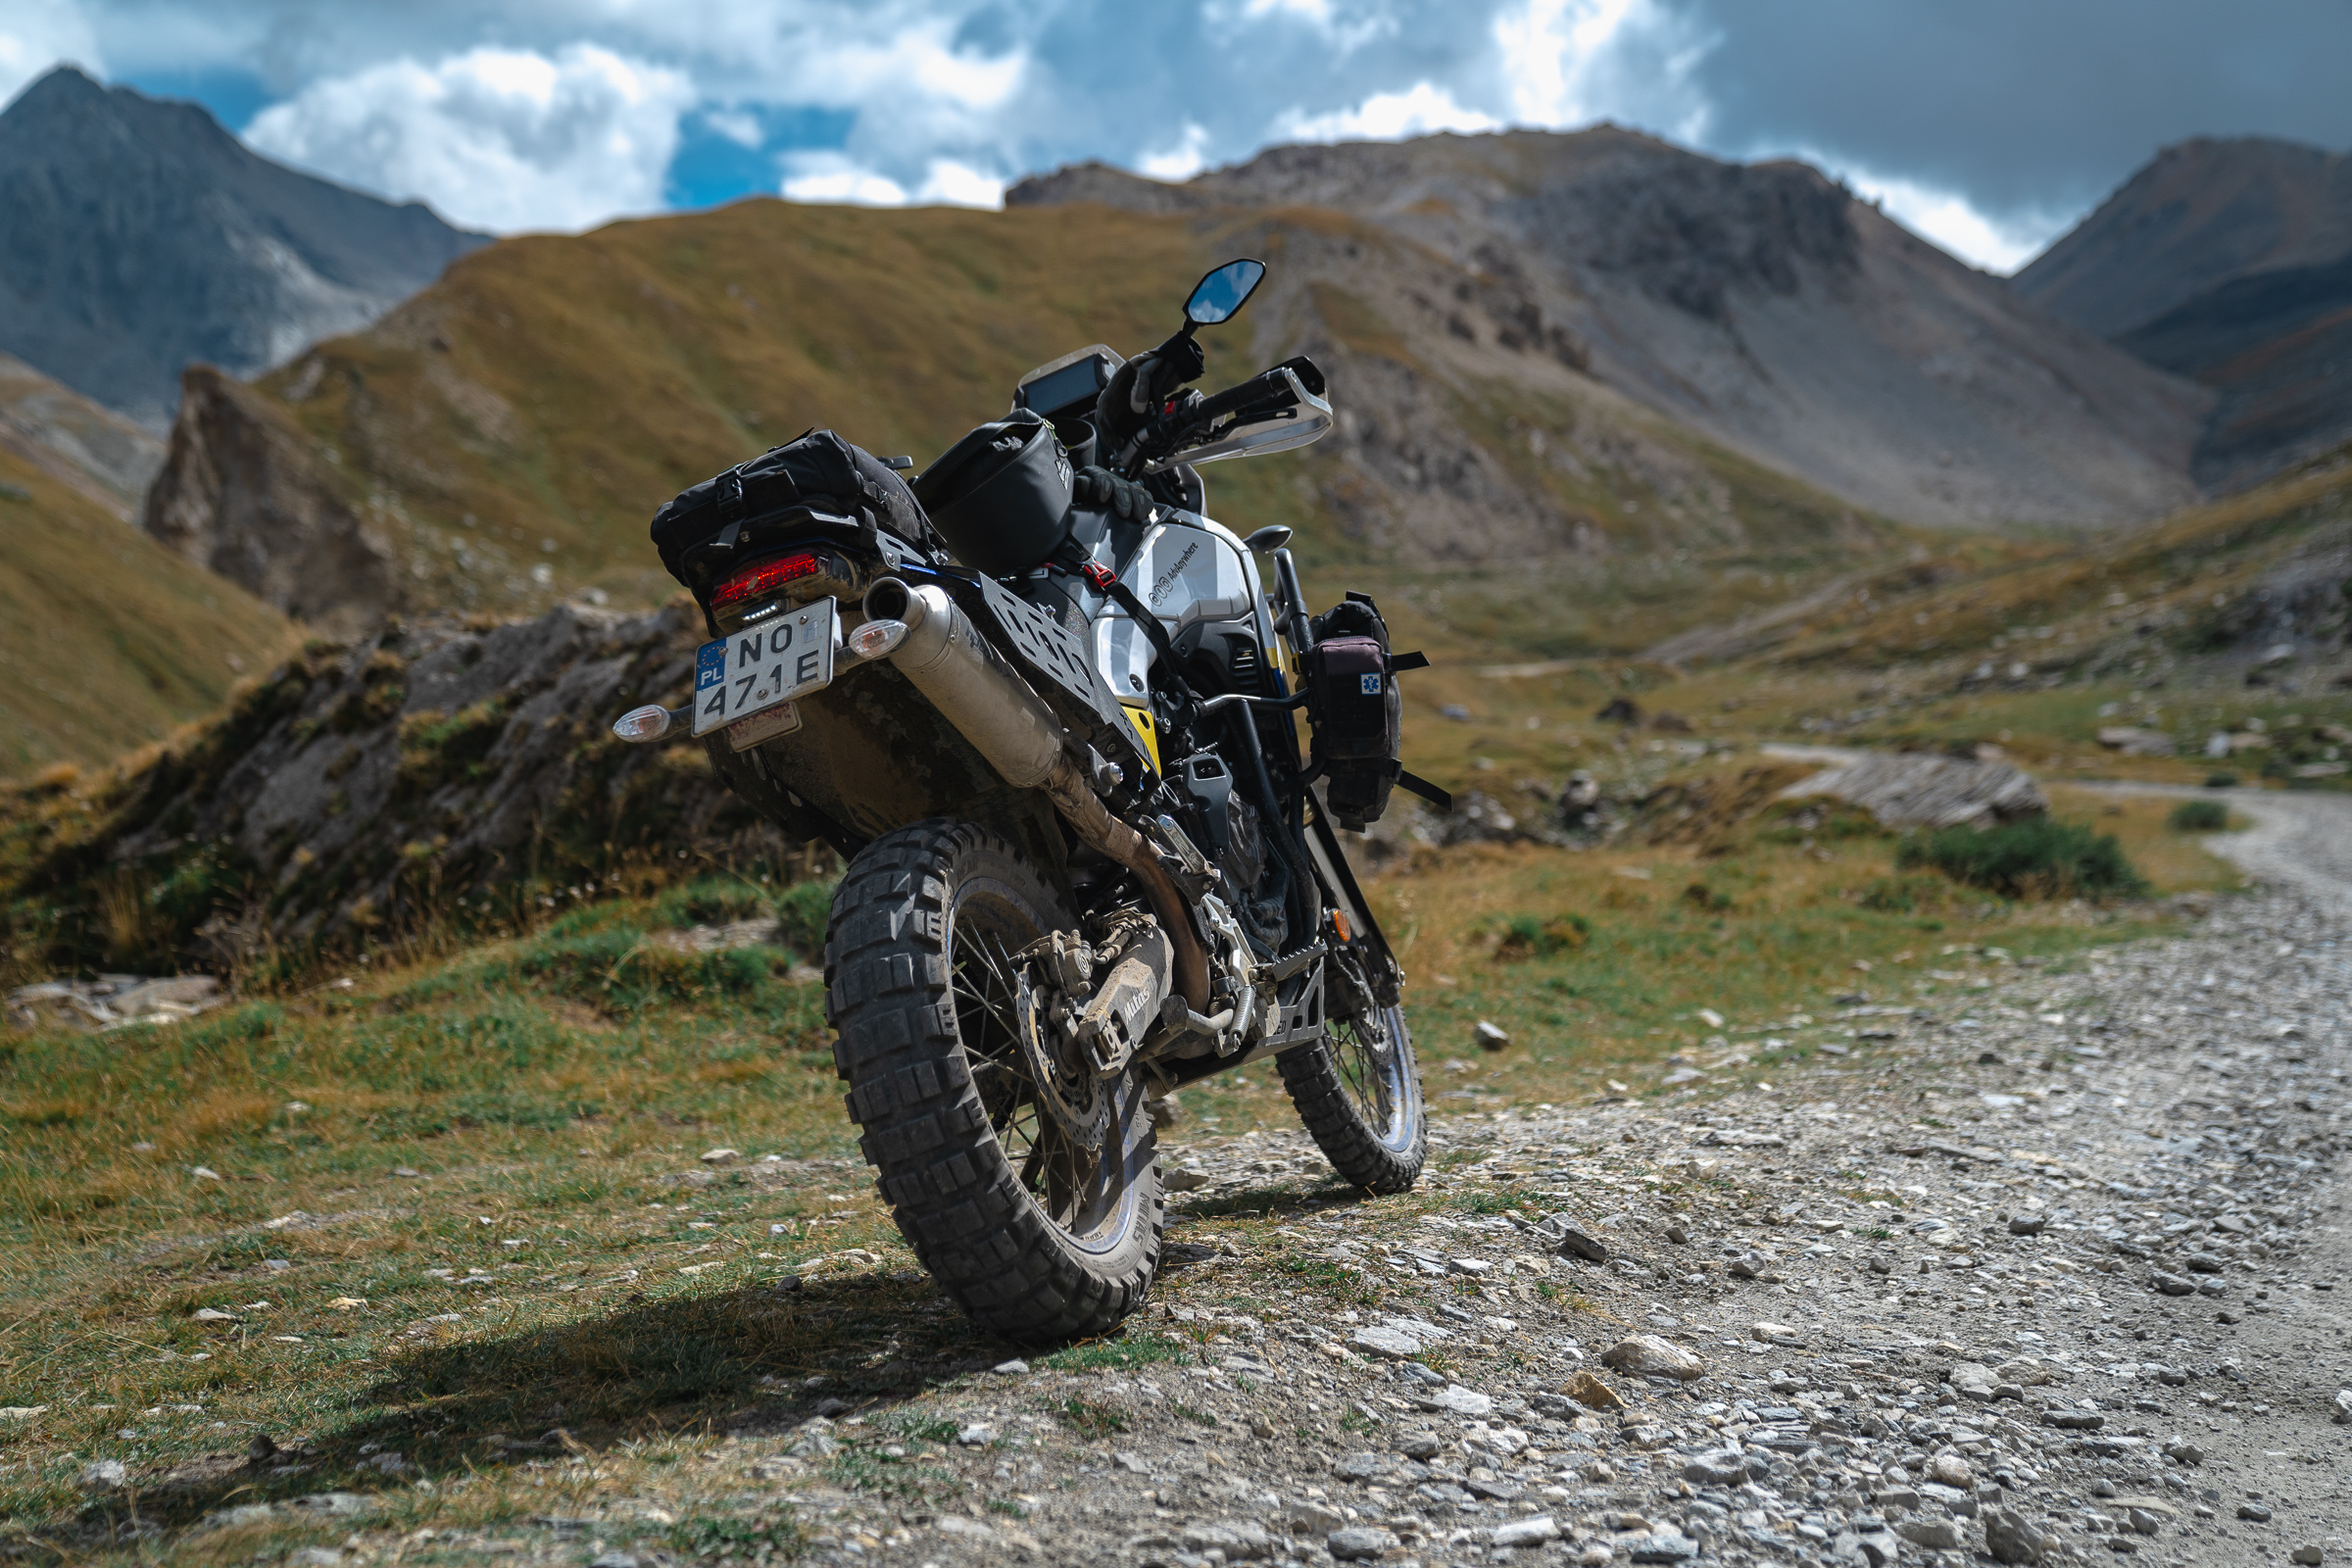
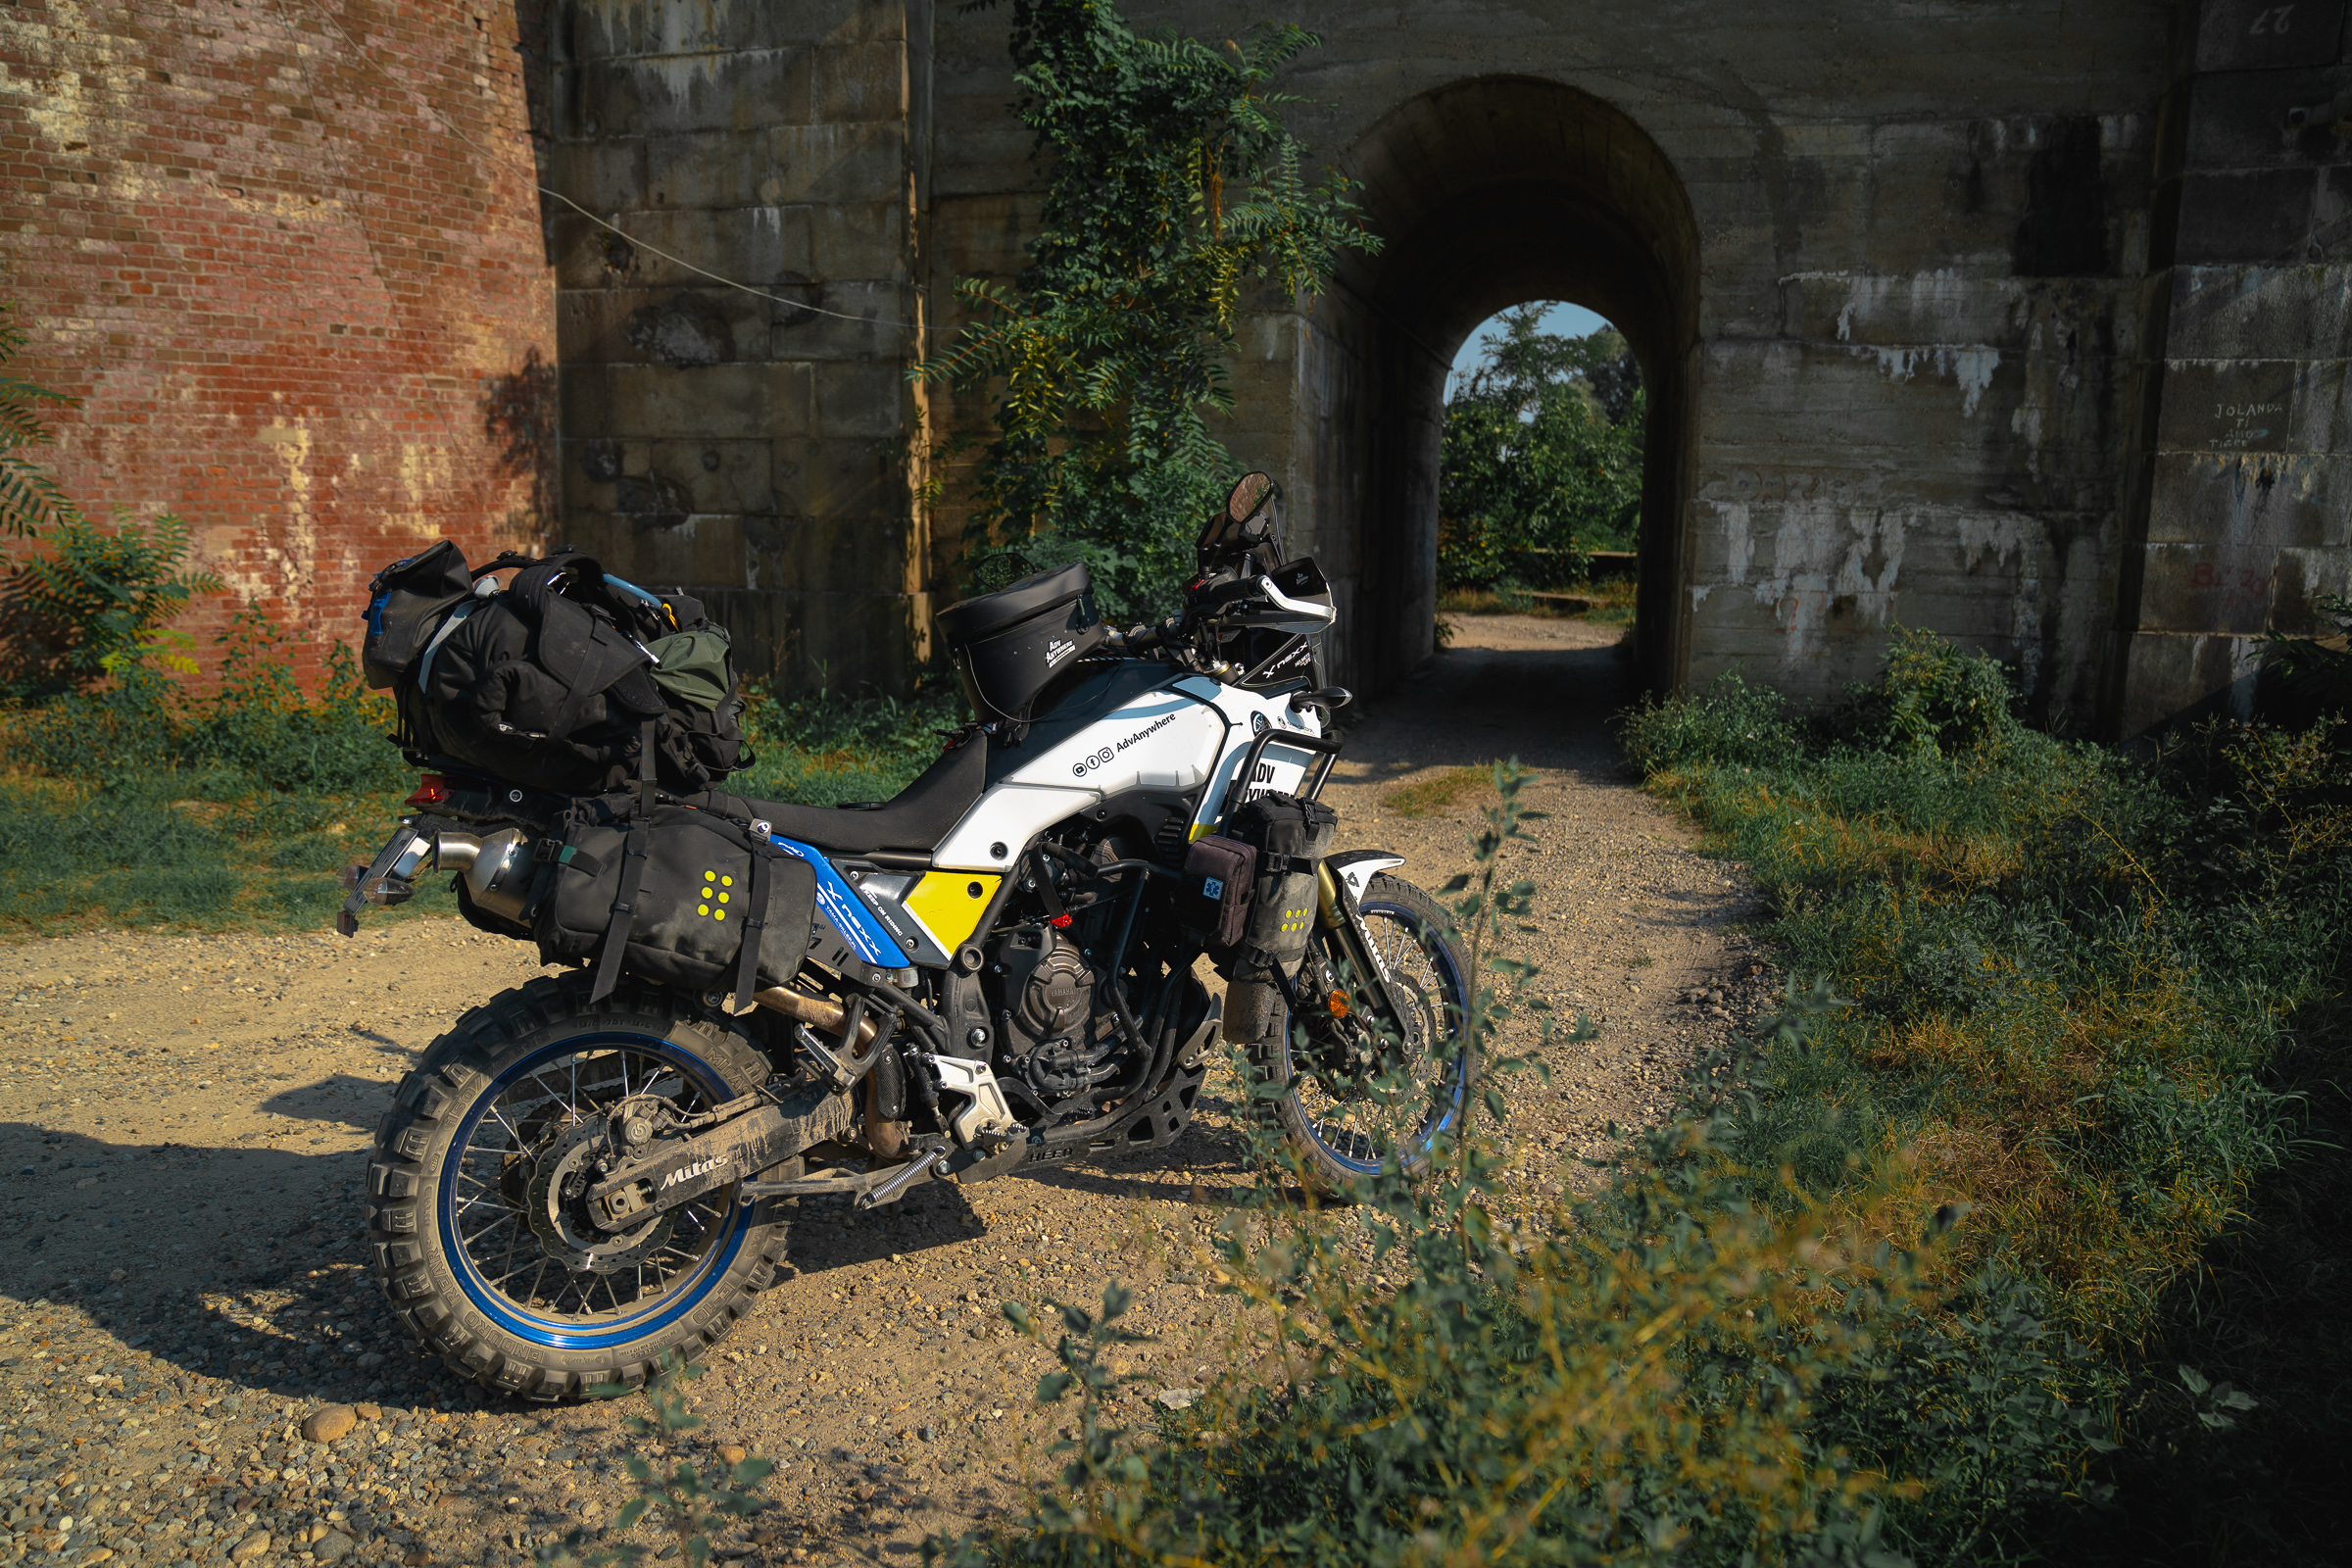
Adventure Spec Side Racks
The Adventure Spec racks are, in my opinion, by far the best choice on the market. Assembly is extremely easy, a reasonable distance is maintained between the plastics, and the whole thing is solidly built.
In many photos, you can see black racks of another brand that I had before, but after the first long trip, I had to change them. The sharp edges abraded my luggage straps, and it was hard to attach anything to the back plate. The Adventure Spec has rounded, contoured edges and larger and more versatile mounting cuts.
Adventure Spec Top Rack
To complete the set, my Tenere is equipped also with a rear rack from Adventure Spec. Again, great and thoughtful design that beats the competition. Hands down. I talk a little more about it in the Adventure Spec racks mounting video on YouTube.
The rear rack for the Tenere 700 is set on additional tubes, which, in addition to the myriad possibilities for mounting luggage, serve another role – they are great handles. Very useful for lifting the motorcycle, turning it around, and pulling it out of swamps.
The rack is properly raised above the plastic, which makes it easier to attach the mounting straps.
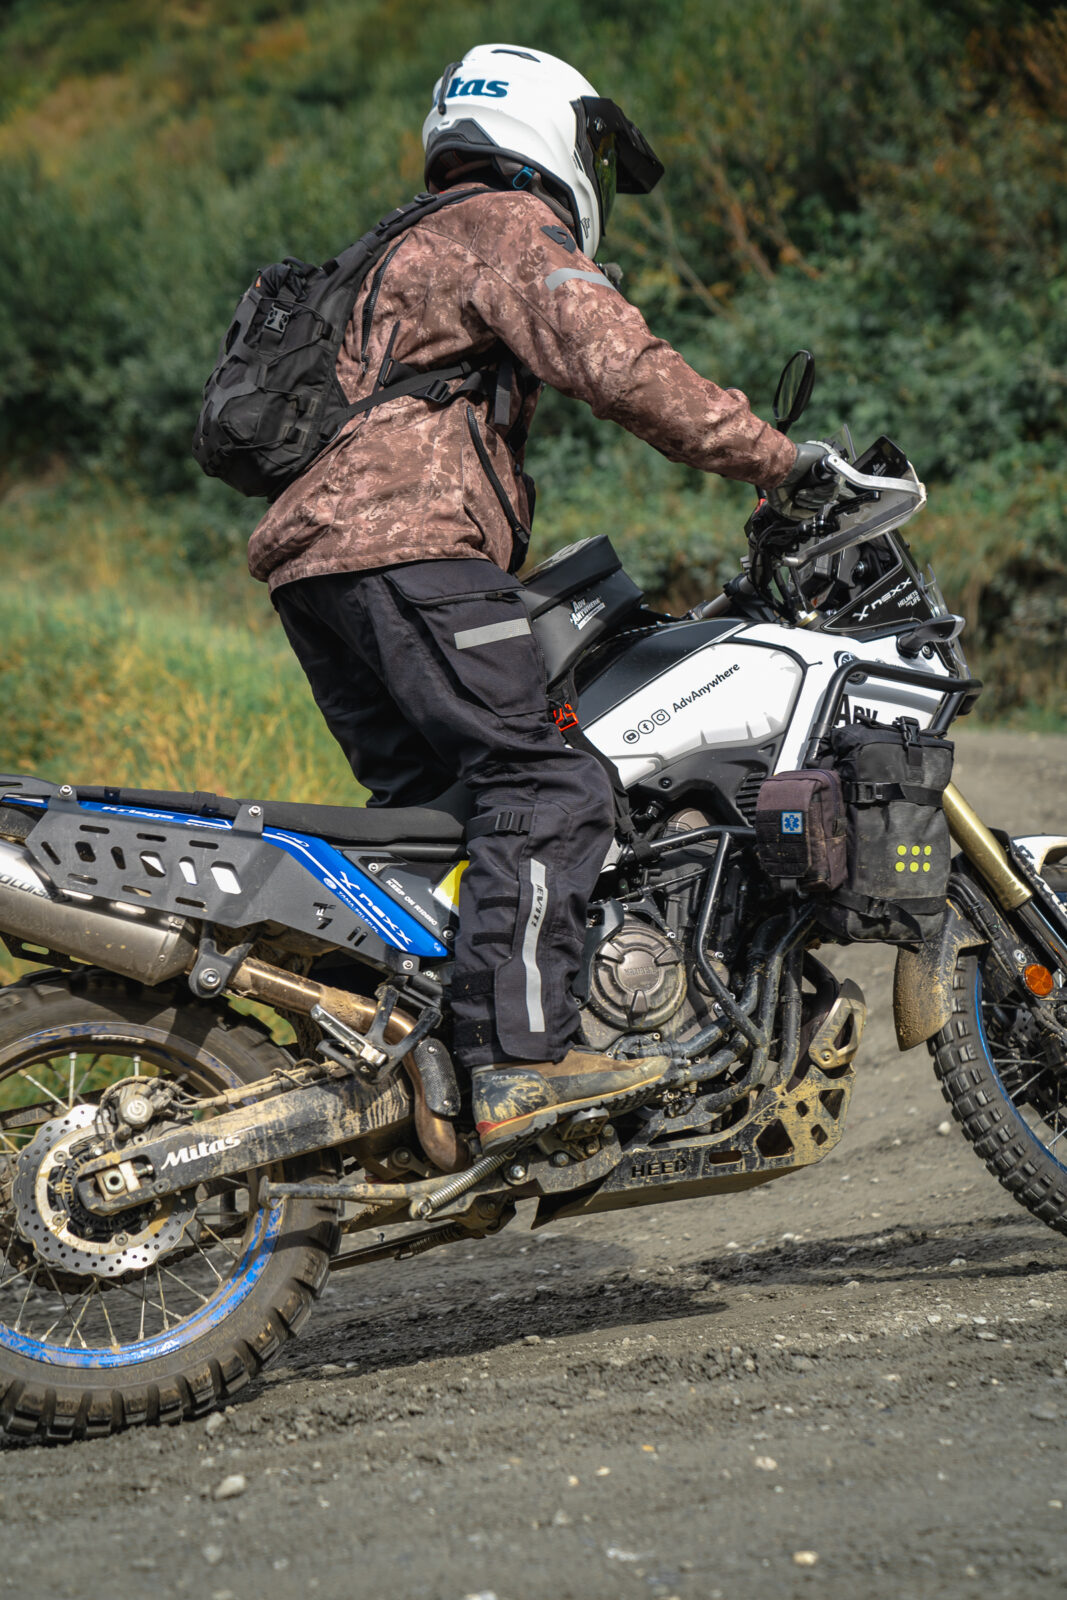
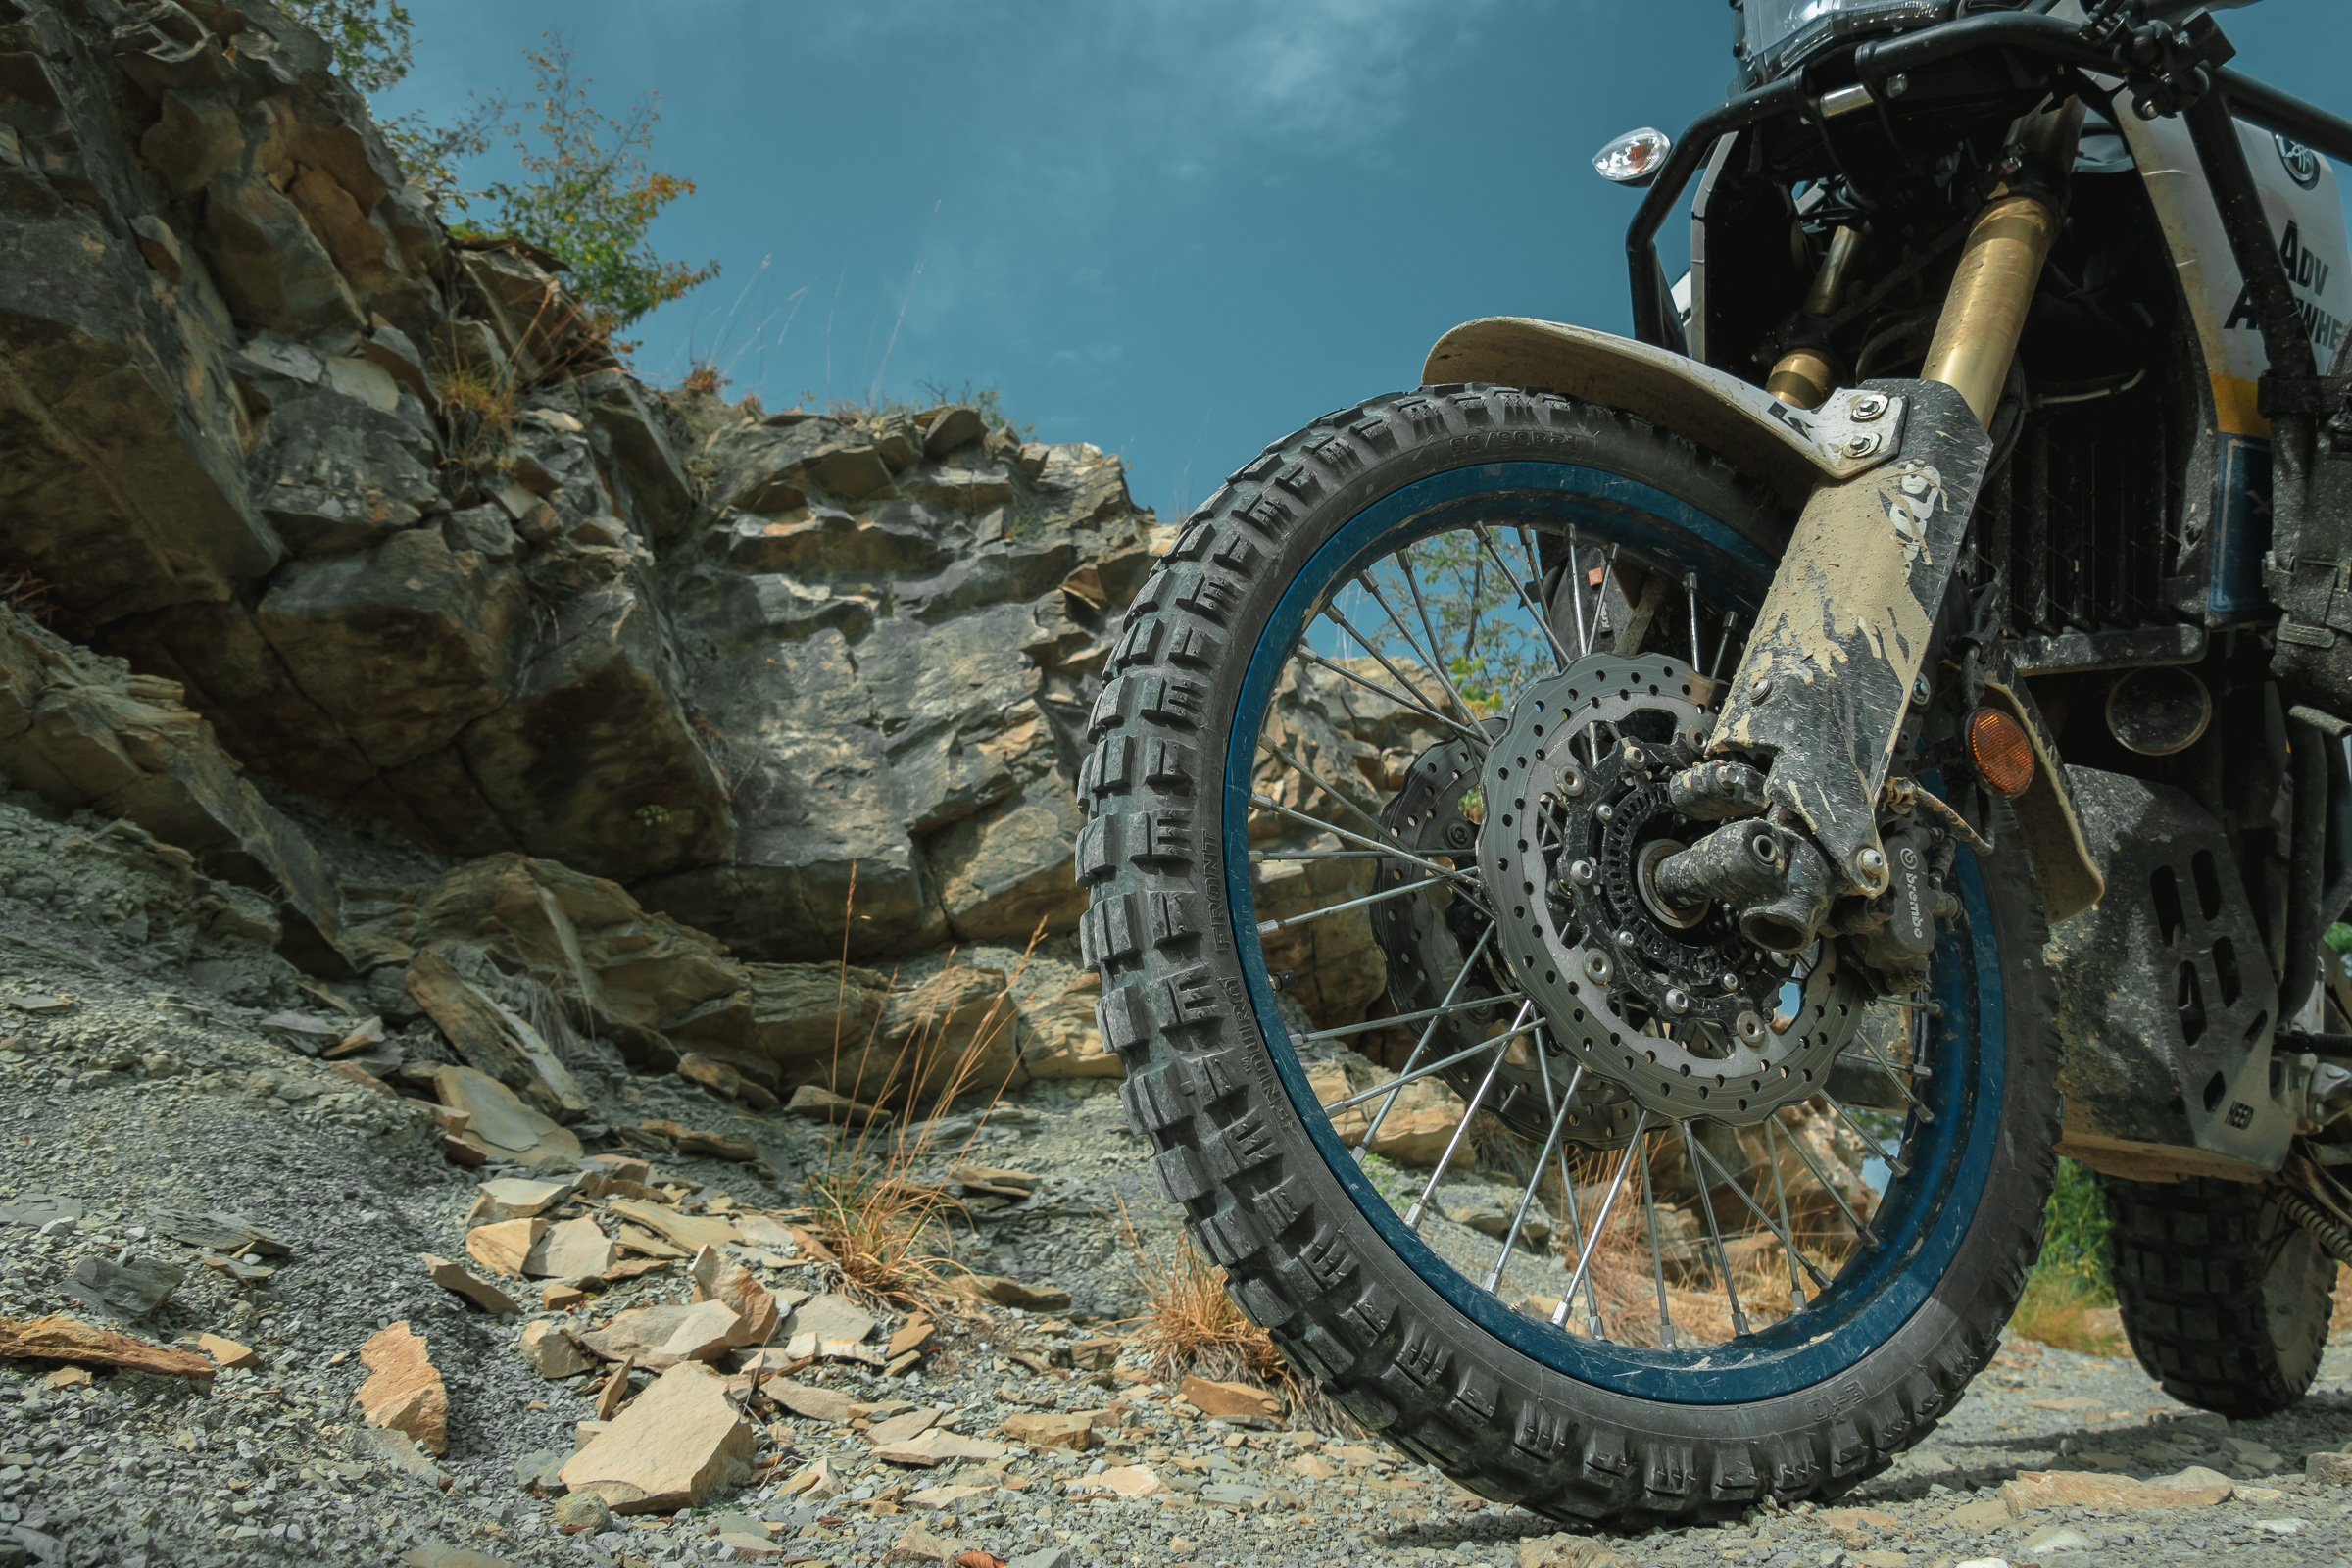
HEED Bunkier Crash Bars
I chose the HEED Bunkier crash bars for Tenere 700 because of the design that protects the largest area of the motorcycle. Complete with a plate under the engine, it creates a real “bunker” that protects the engine and other components from damage.
In addition to securing the motorcycle, it’s also very important for me to be able to mount my favorite soft, indestructible, waterproof Kriega OS panniers. You can get them at a good price in my AdvAnywhere online shop. By buying from me you support the development of the project.
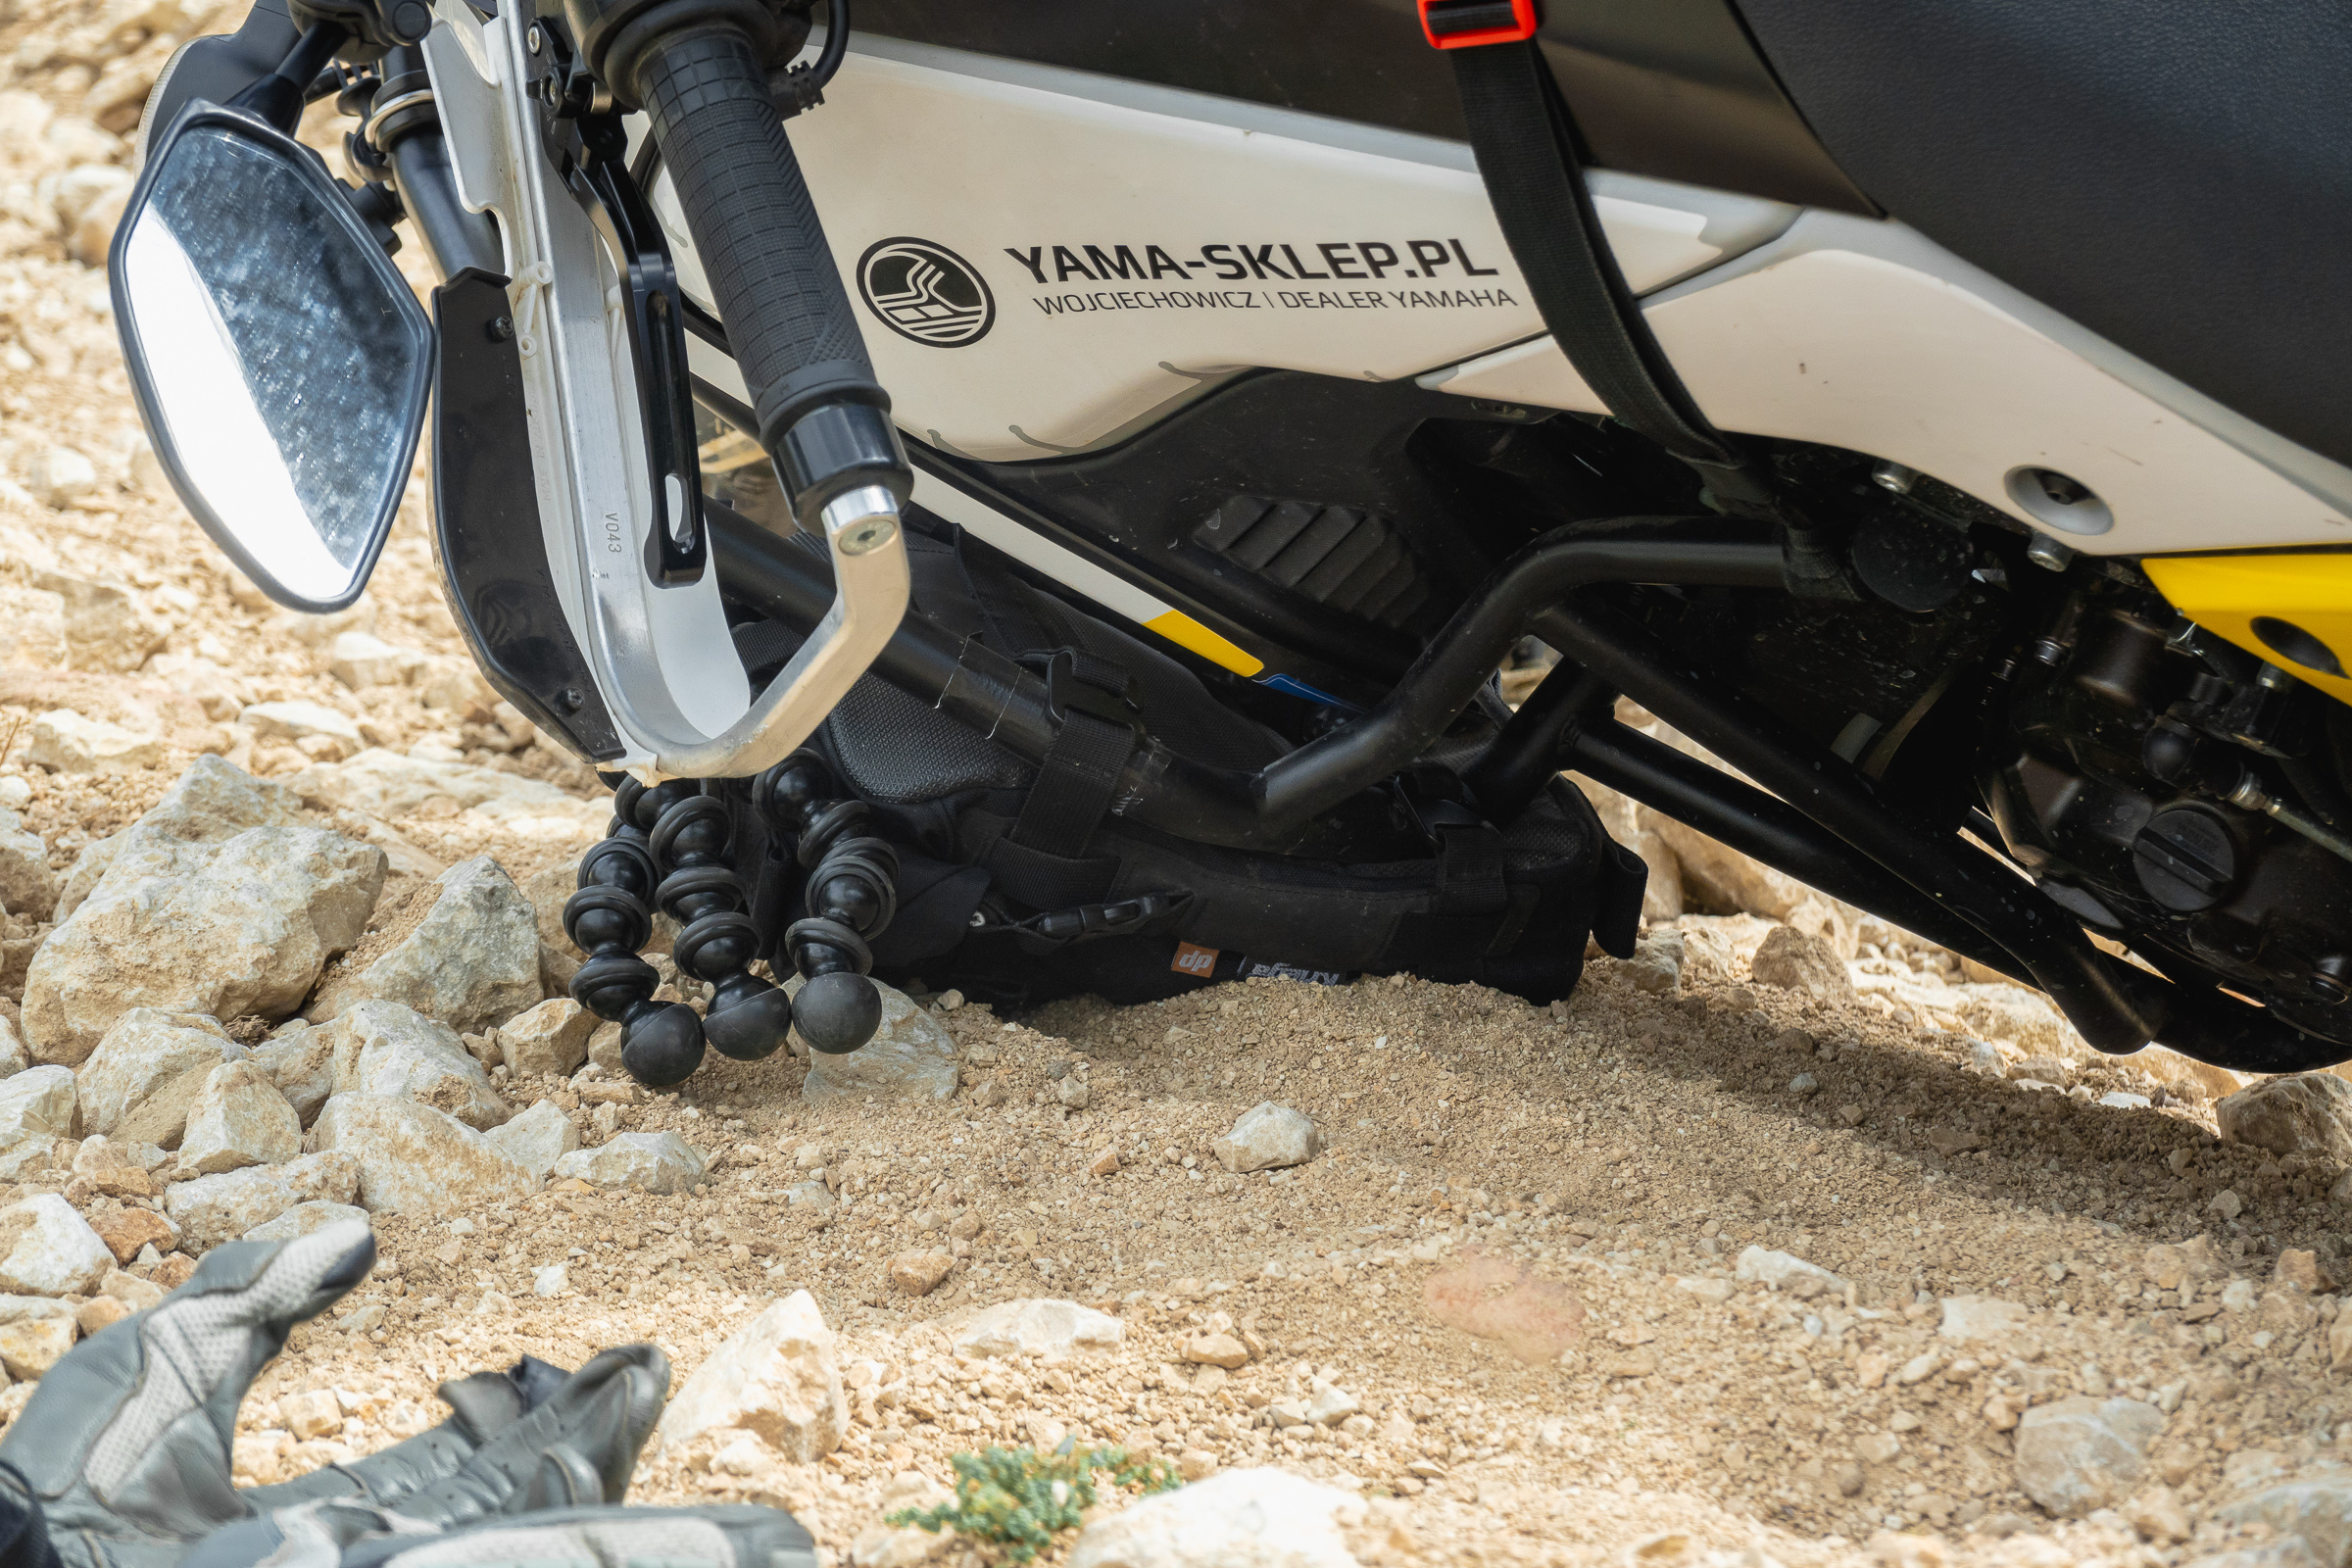
HEED Aluminum Engine Cover
Probably the largest cover available on the market. It covers a large part of the engine and exhaust manifolds and is easy to install. Together with HEED crash bars, it forms armor. It looks powerful, and at the same time adheres well to the structure, almost blending into the motorcycle body of the motorcycle.
The 3mm-thick aluminum version is relatively lightweight and very durable. I have already happened to “hang” a motorcycle on it and slammed into some large stones. A plastic cover would already have some marks, but this one stays pristine.


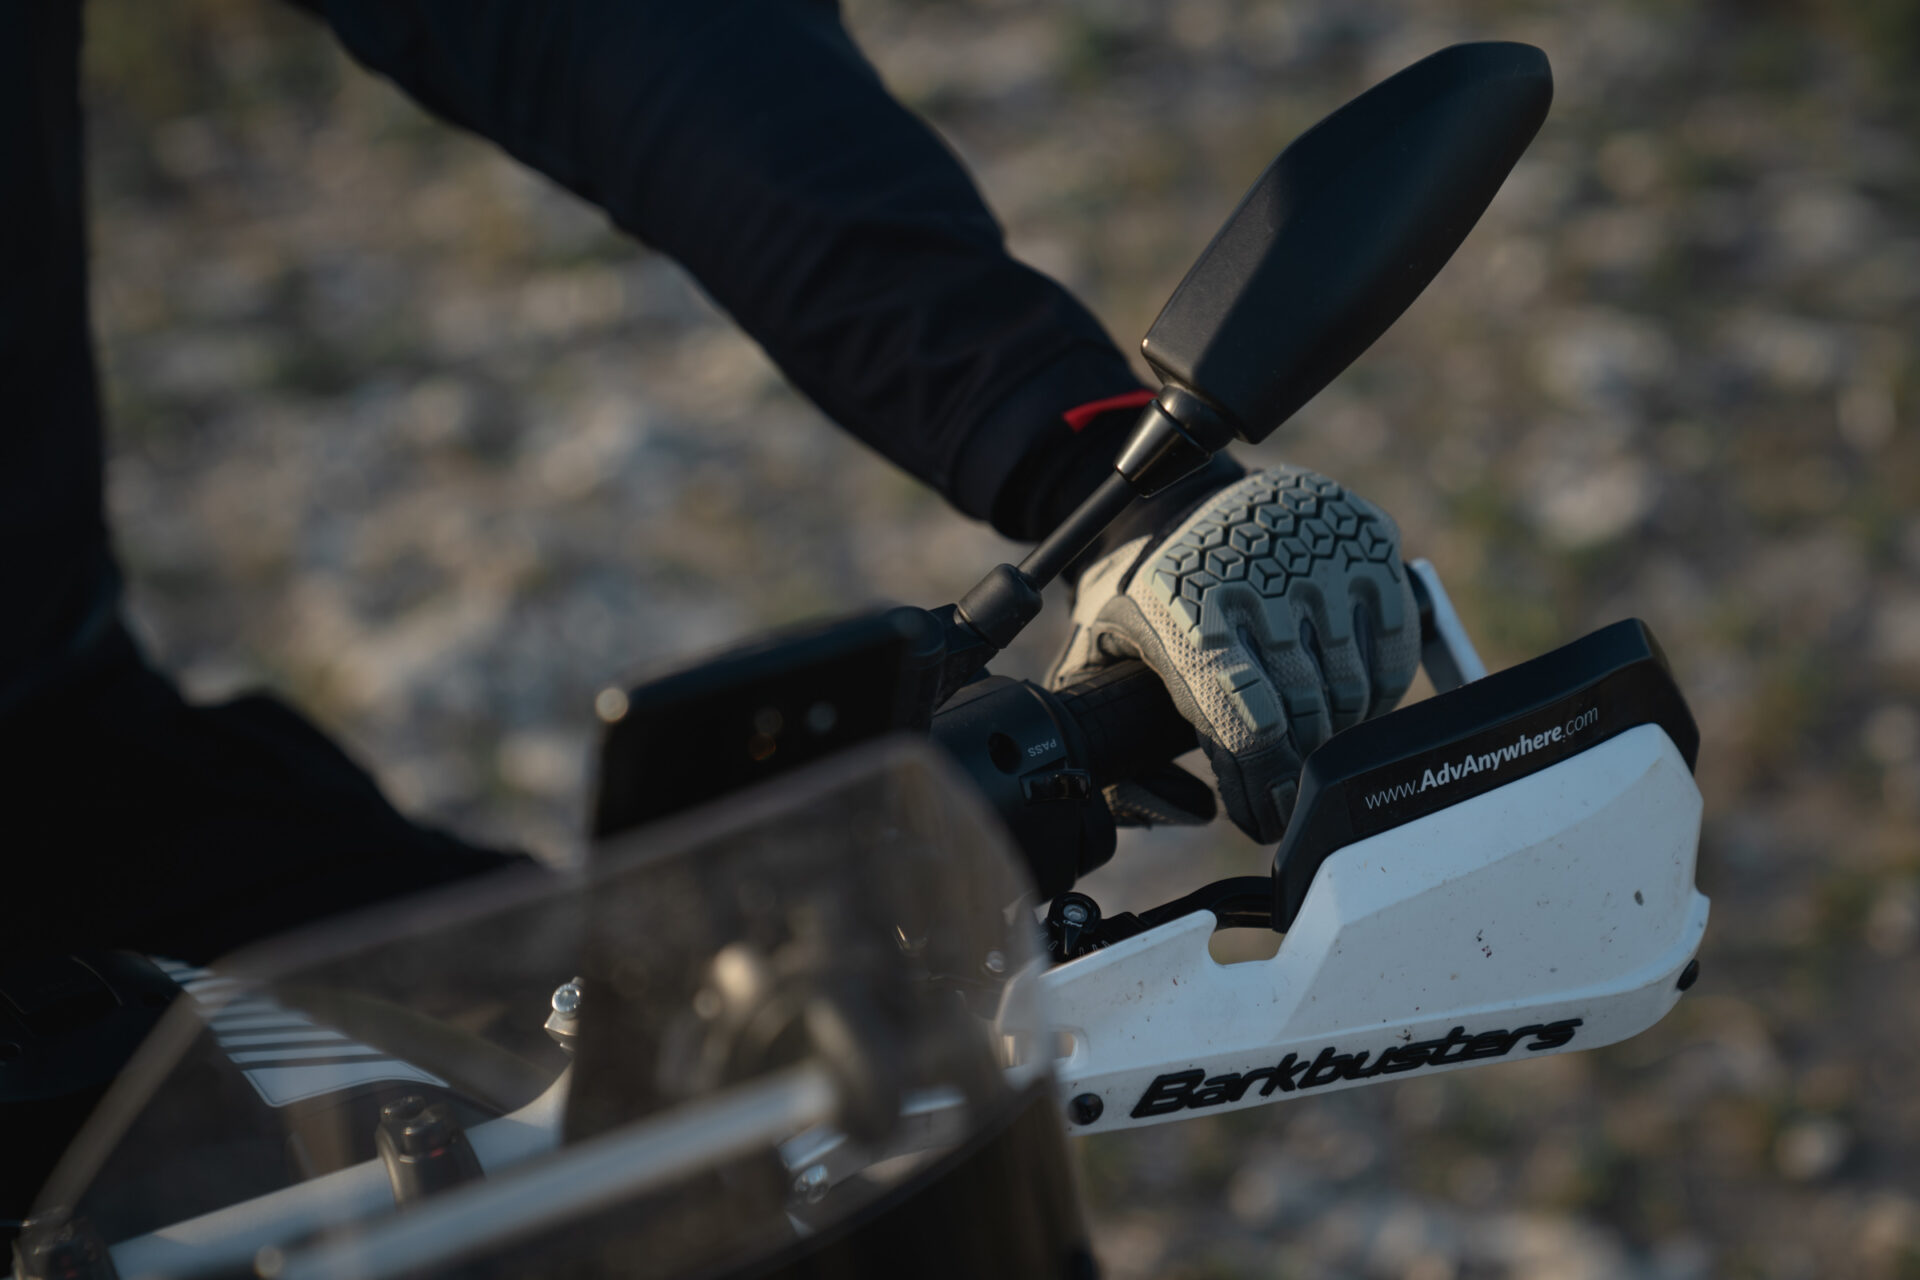
Barkbusters Handbars
Another must-have accessory. I chose Barkbusters Handguards. It’s a tradition, I guess. I’ve been using them for more than 100,000kms, previously on the Tenere XT660 and now on the Tenere 700.
Handbars protect the handles from breaking, make it easier to lift the motorcycle, and protect the hands from branches in the dense forest and from the wind on cold days. My all-time favorite forever and ever.
Scotts steering stabilizer
All in all, the Scotts Steering Damper is an indispensable upgrade for Yamaha Tenere 700 owners who want to realize the motorcycle’s full potential during their off-road travels. Seamless installation, unparalleled performance, off-road riding confidence, and unmatched build quality make it an investment worth considering.
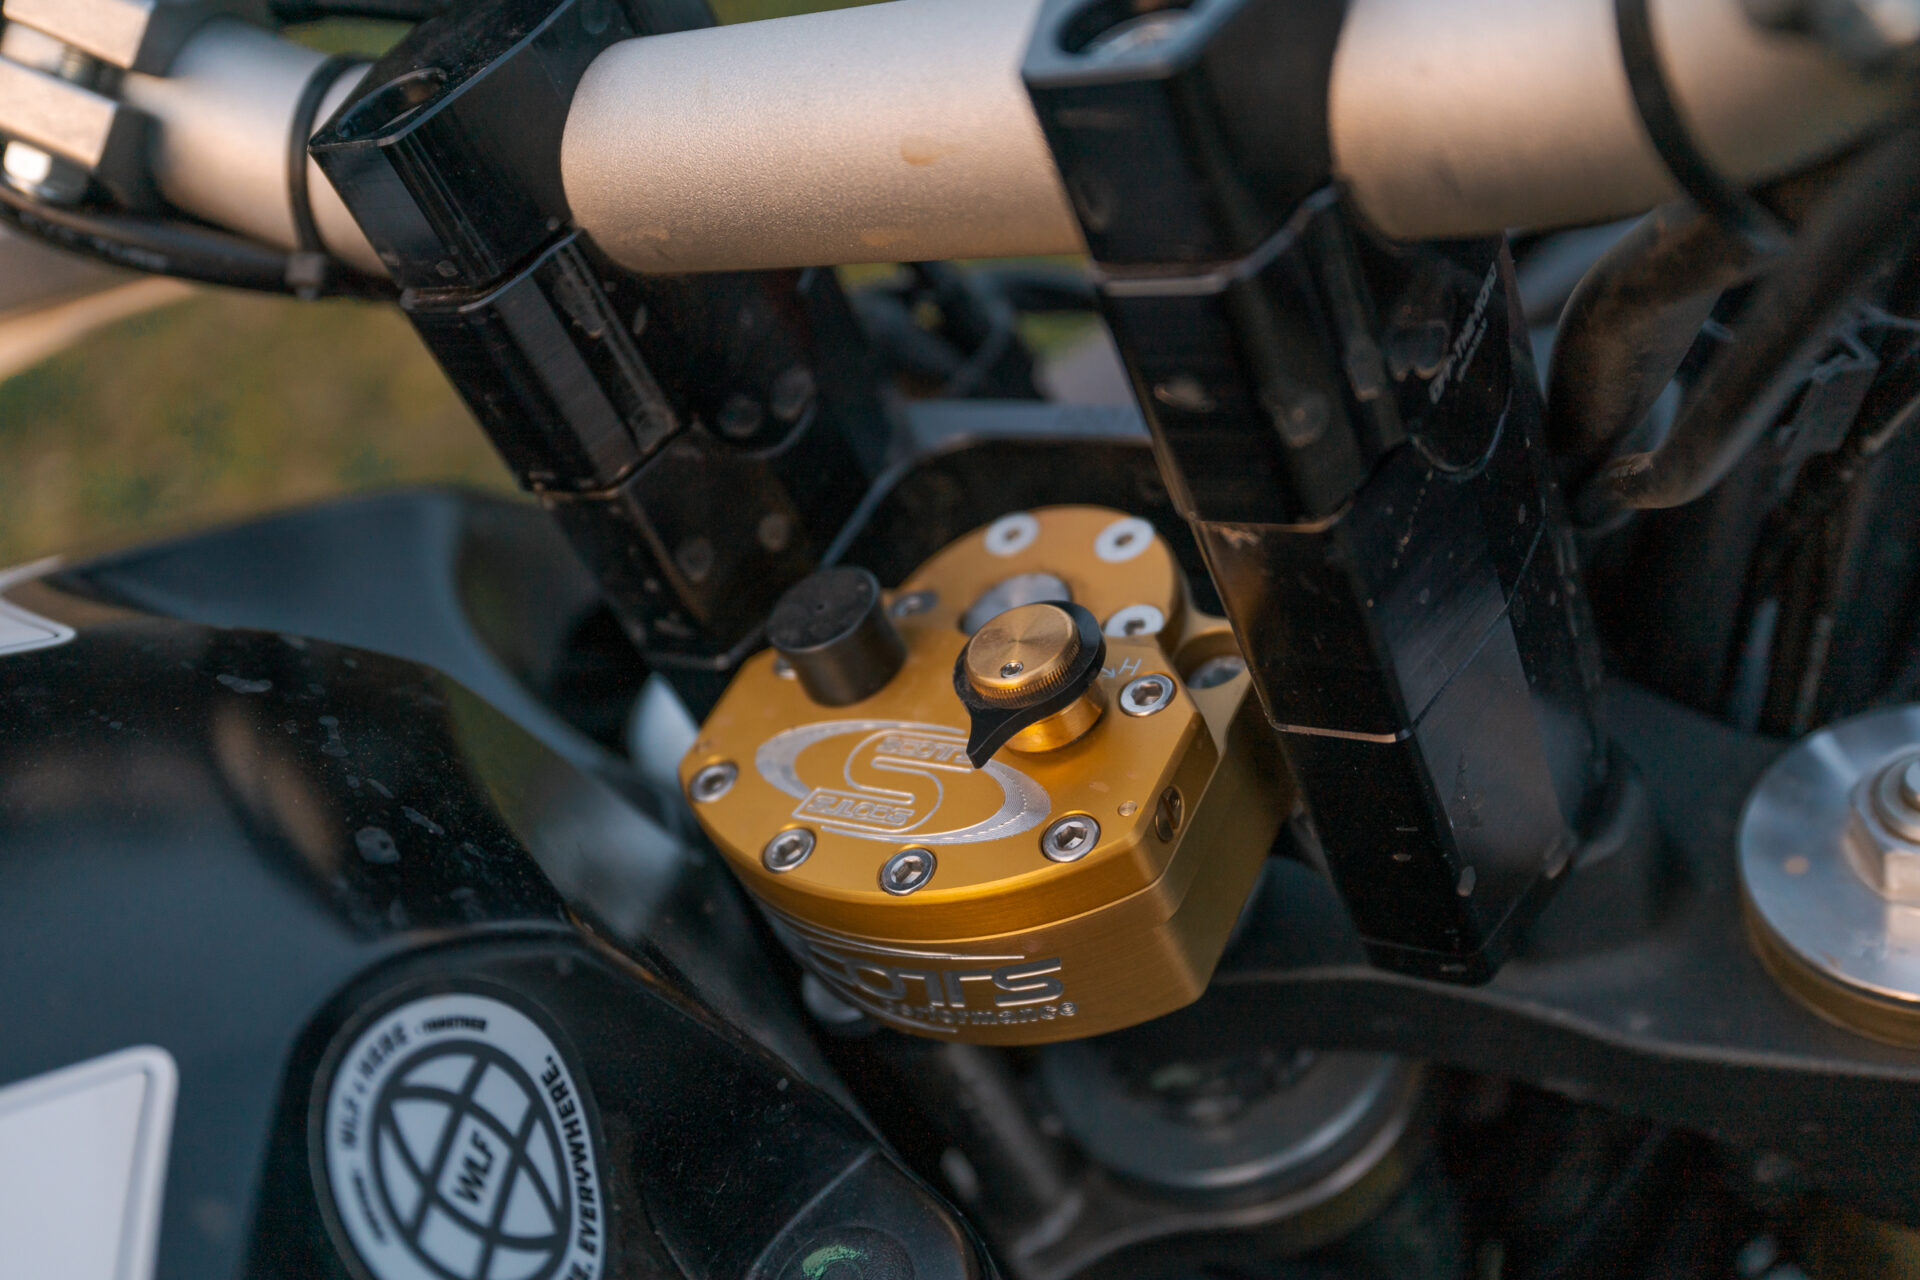
Thanks to the Scotts stabilizer, my rides are more dynamic and my mind stays calm.
I made a full review, installation, and adjustment tutorial here:
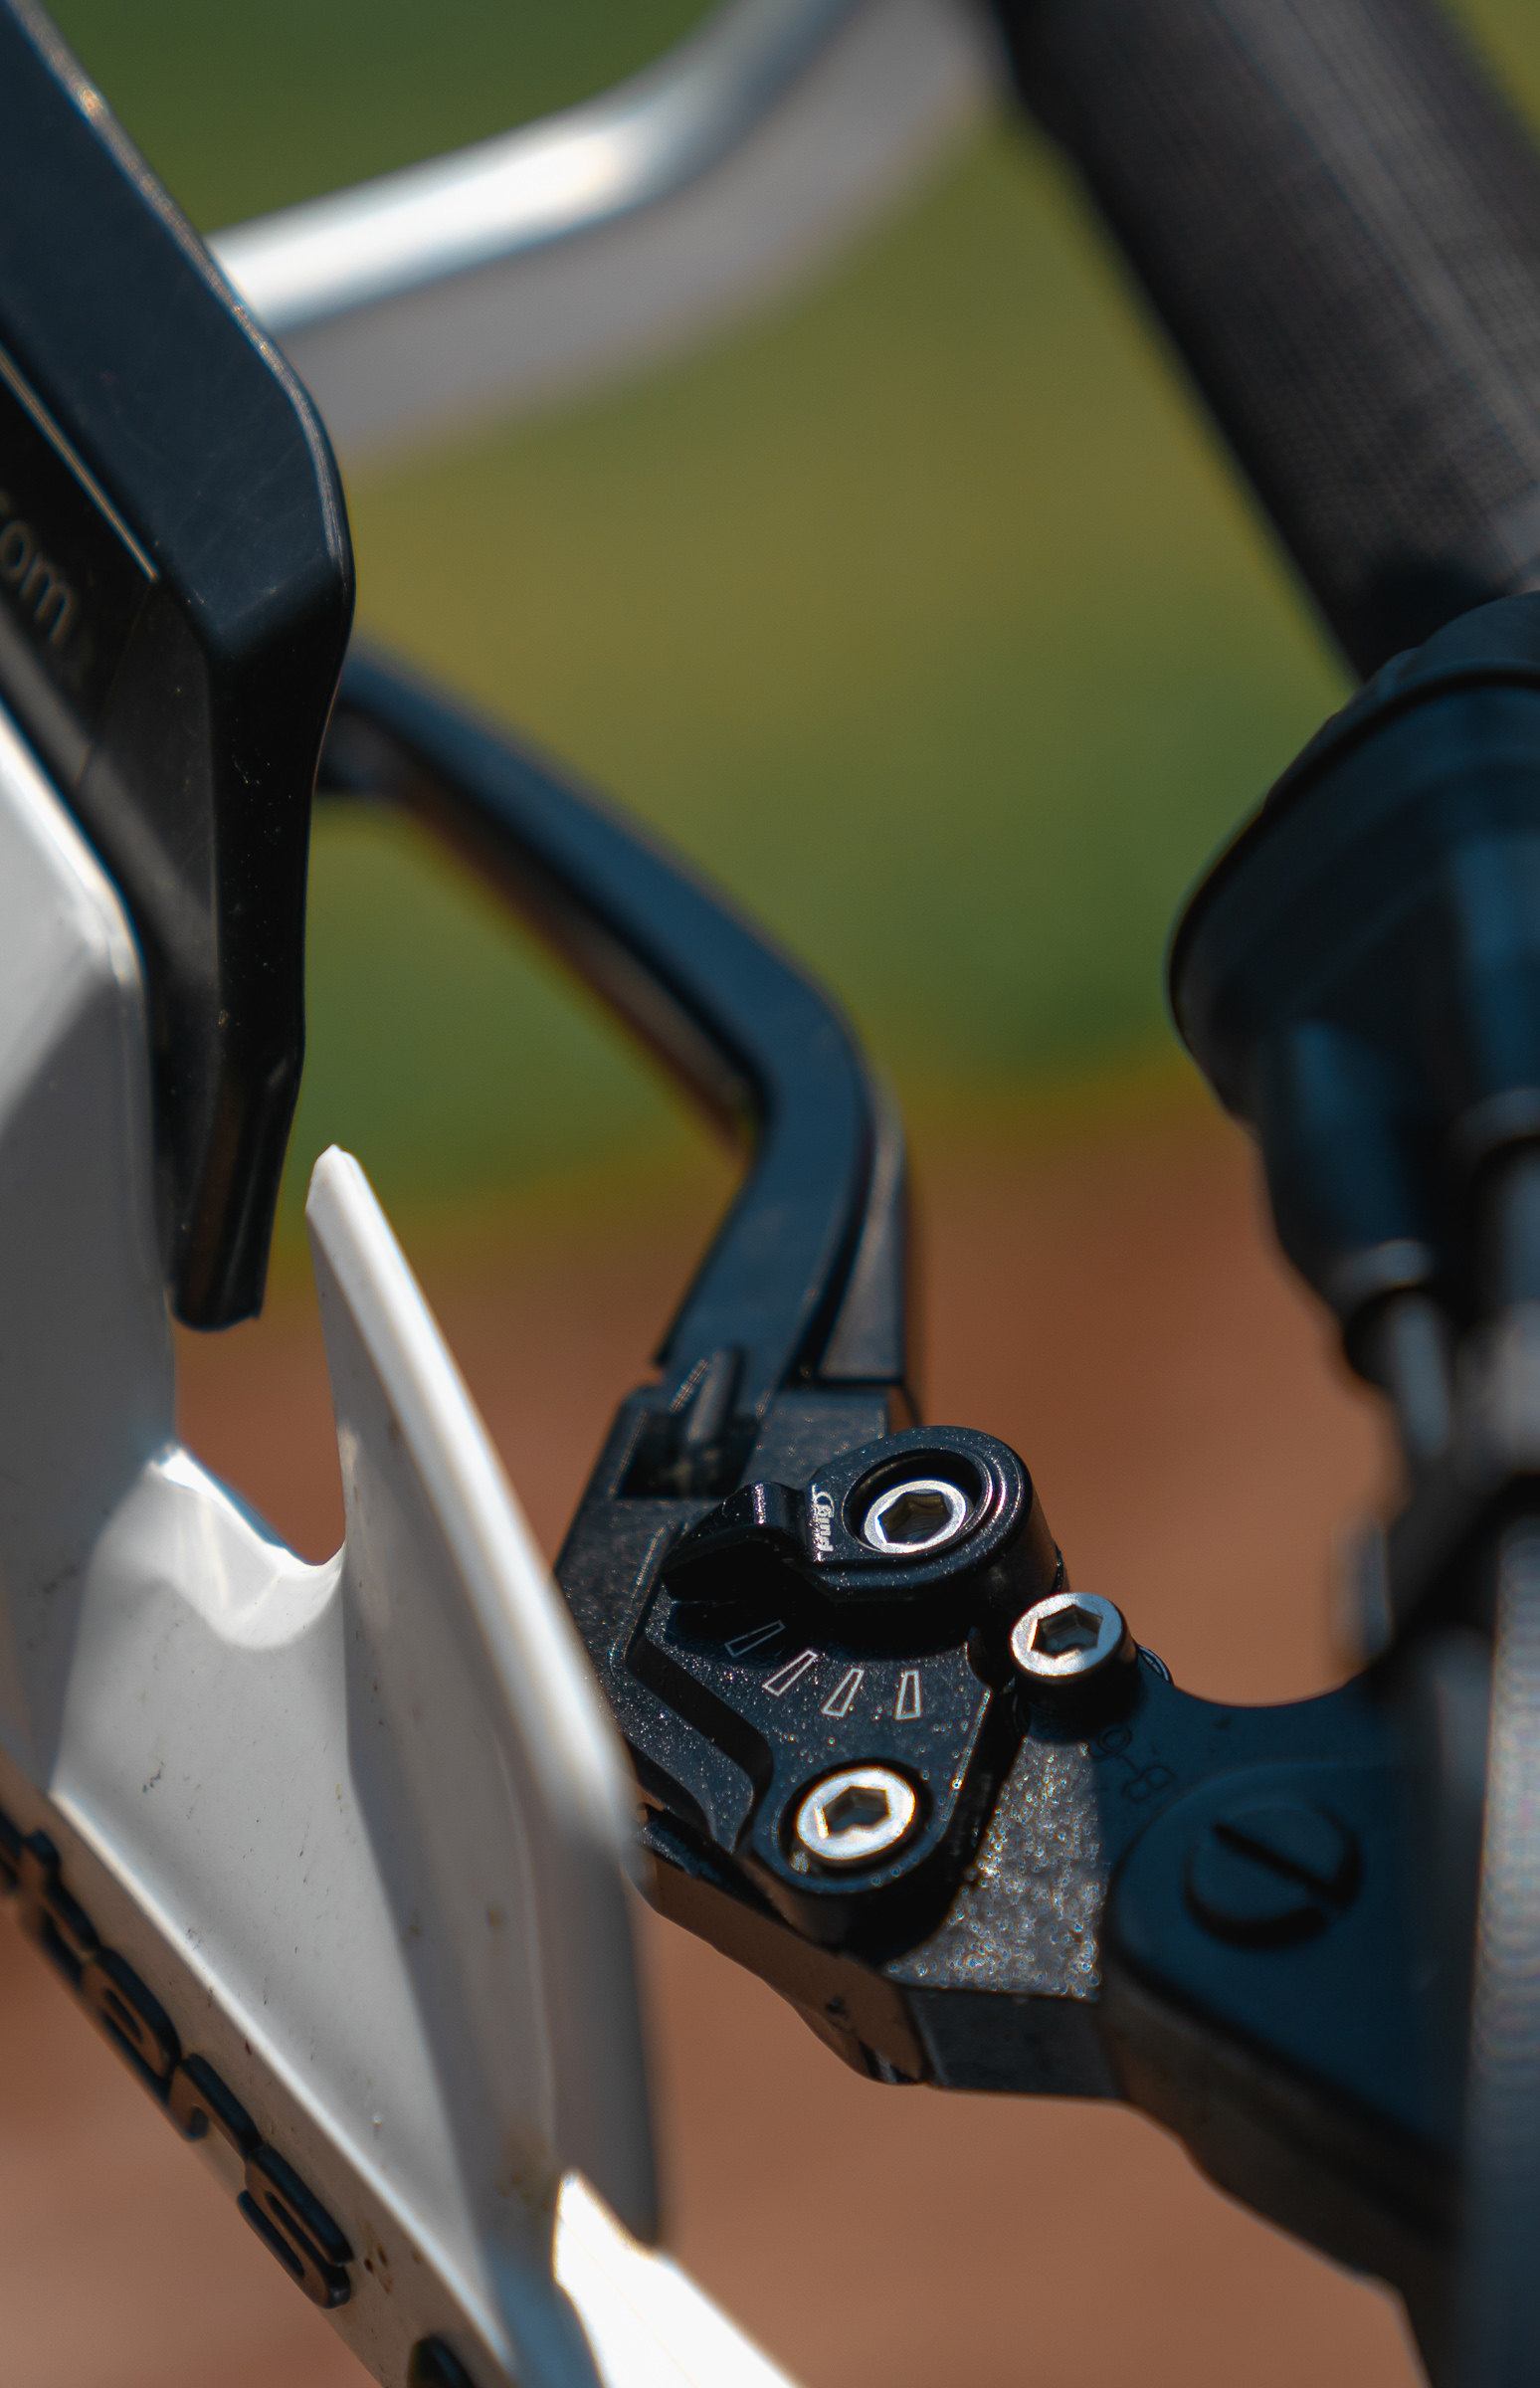
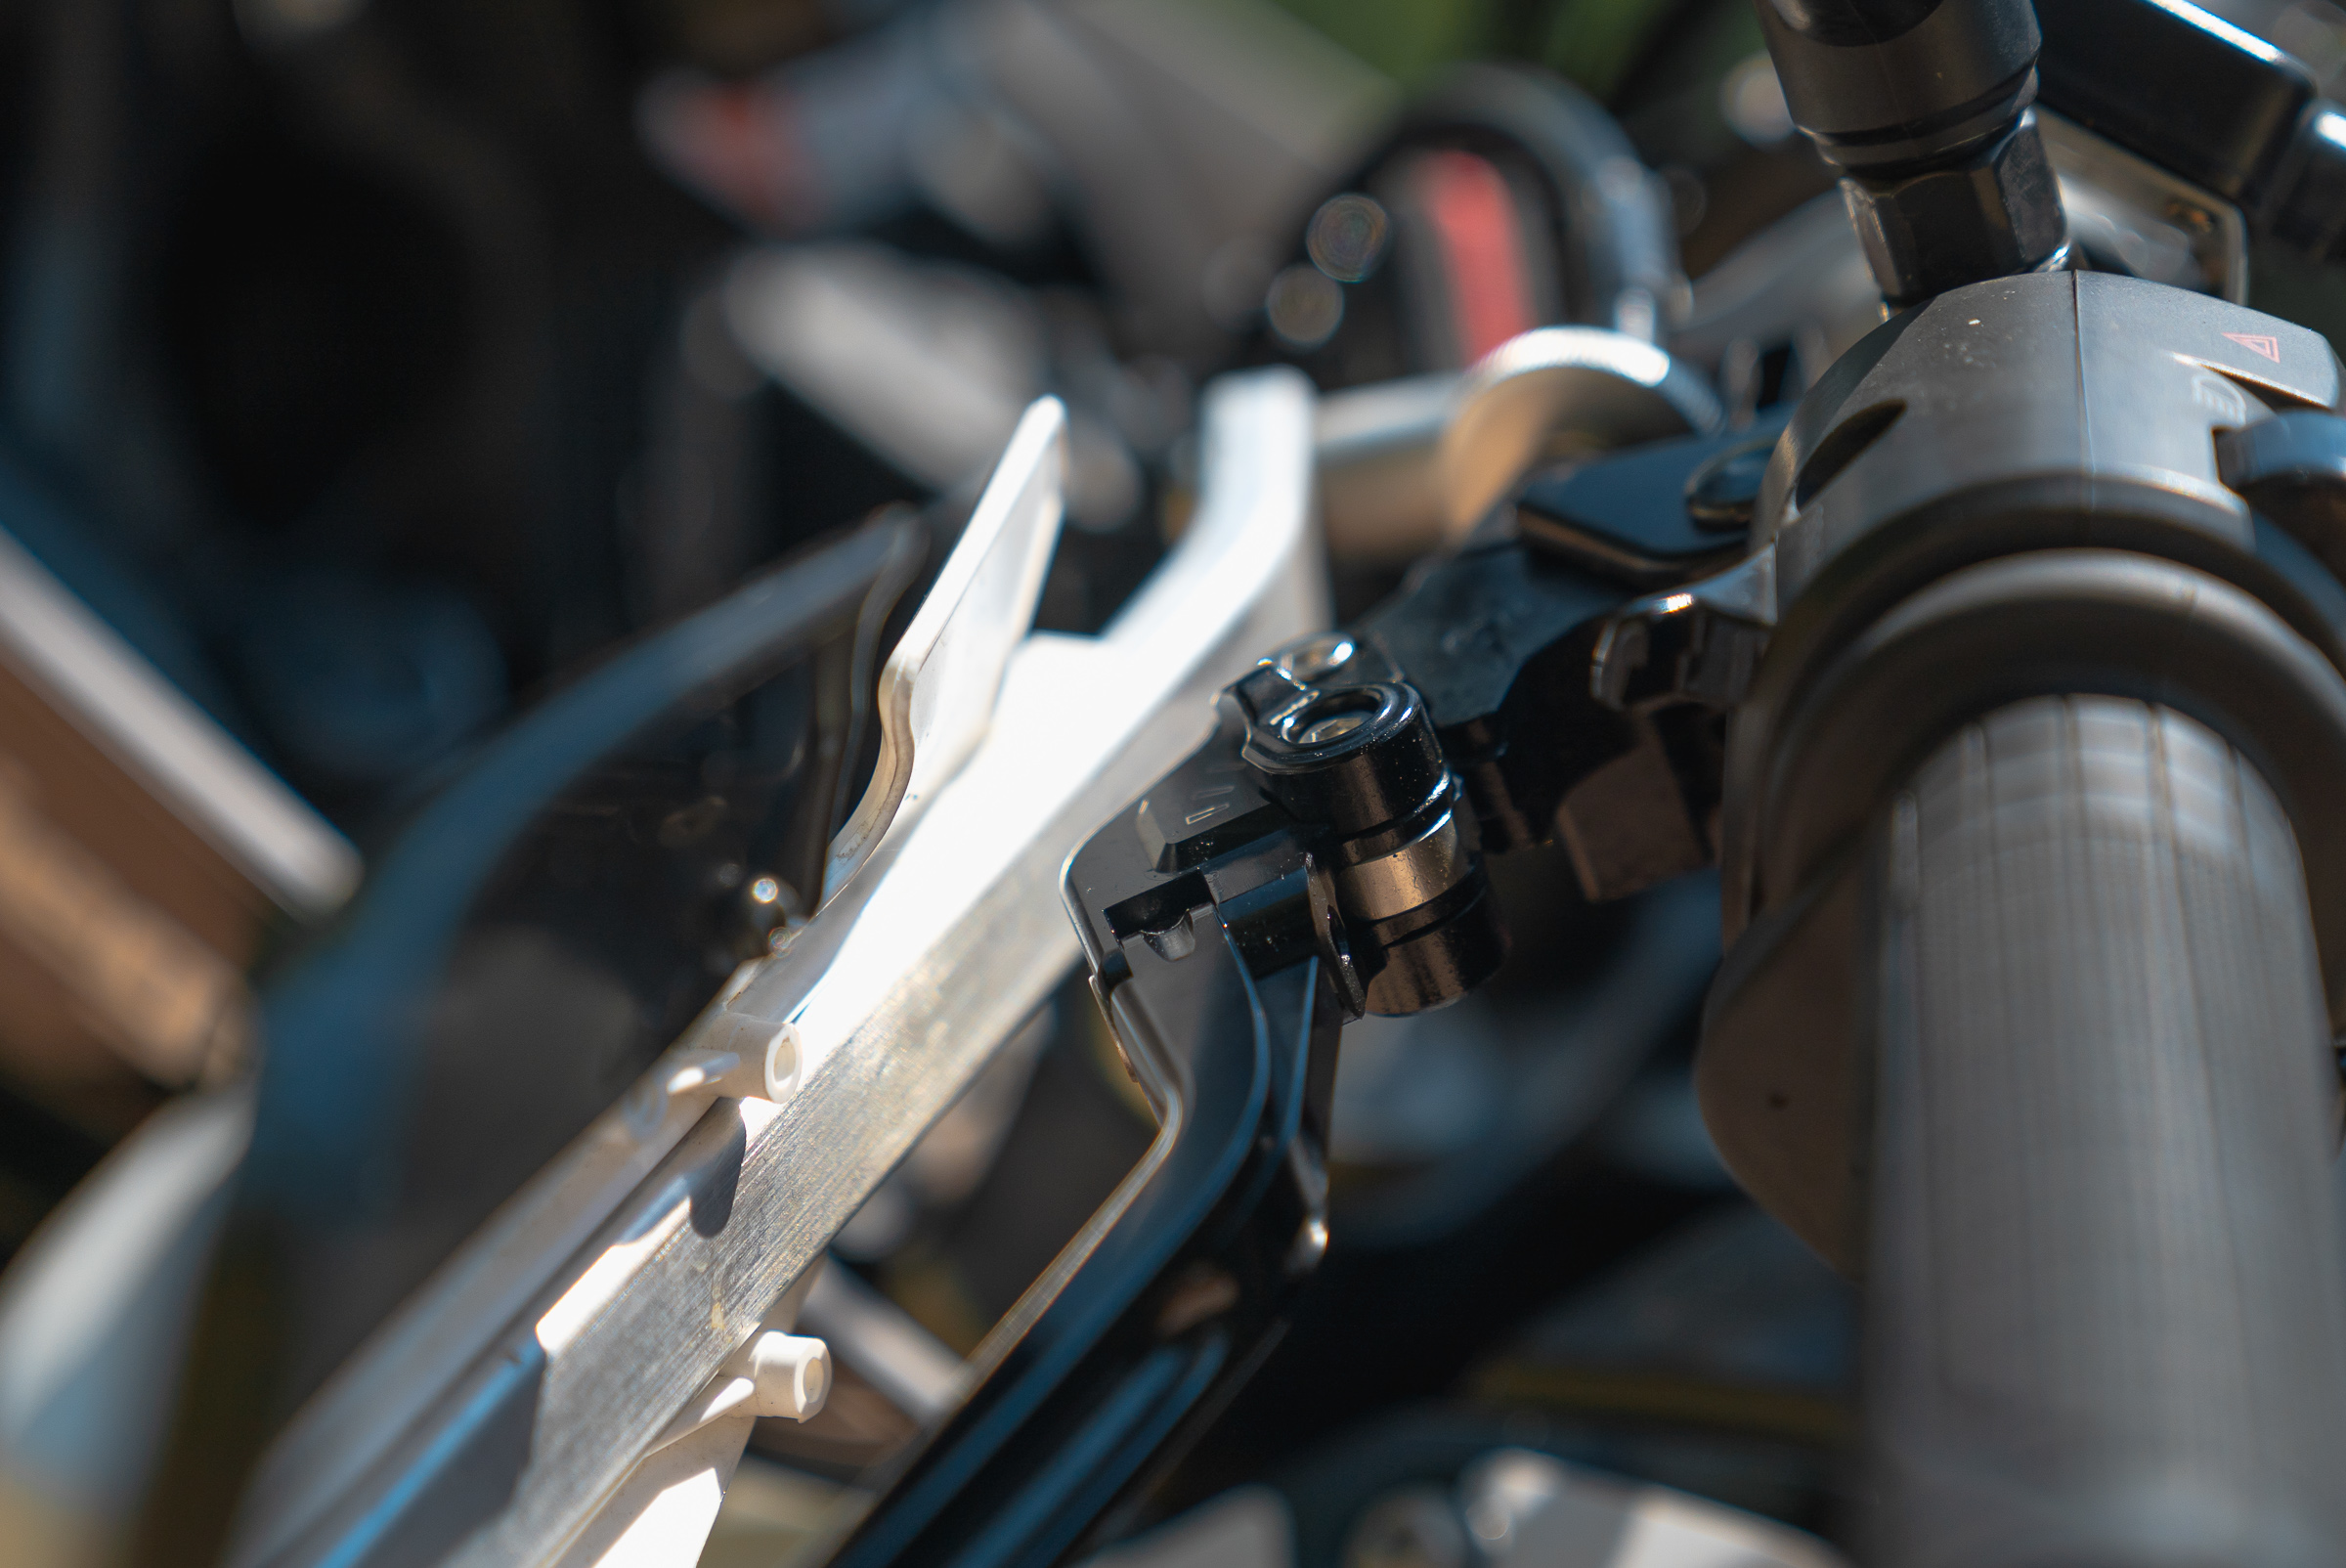
Puig Folding Levers
Accessory levers are one of those upgrades that greatly enhance steering precision and comfort.
Thanks to the fact that they are folding, they are flexible and during a jerky off-road ride, they always stay under the finger without slipping and putting pressure on the finger. A small thing, but it’s details like this that I like to focus on.
Puig’s accessory handles for the Tenere 700 are adjustable, so they’ll suit you perfectly. The build quality is excellent.
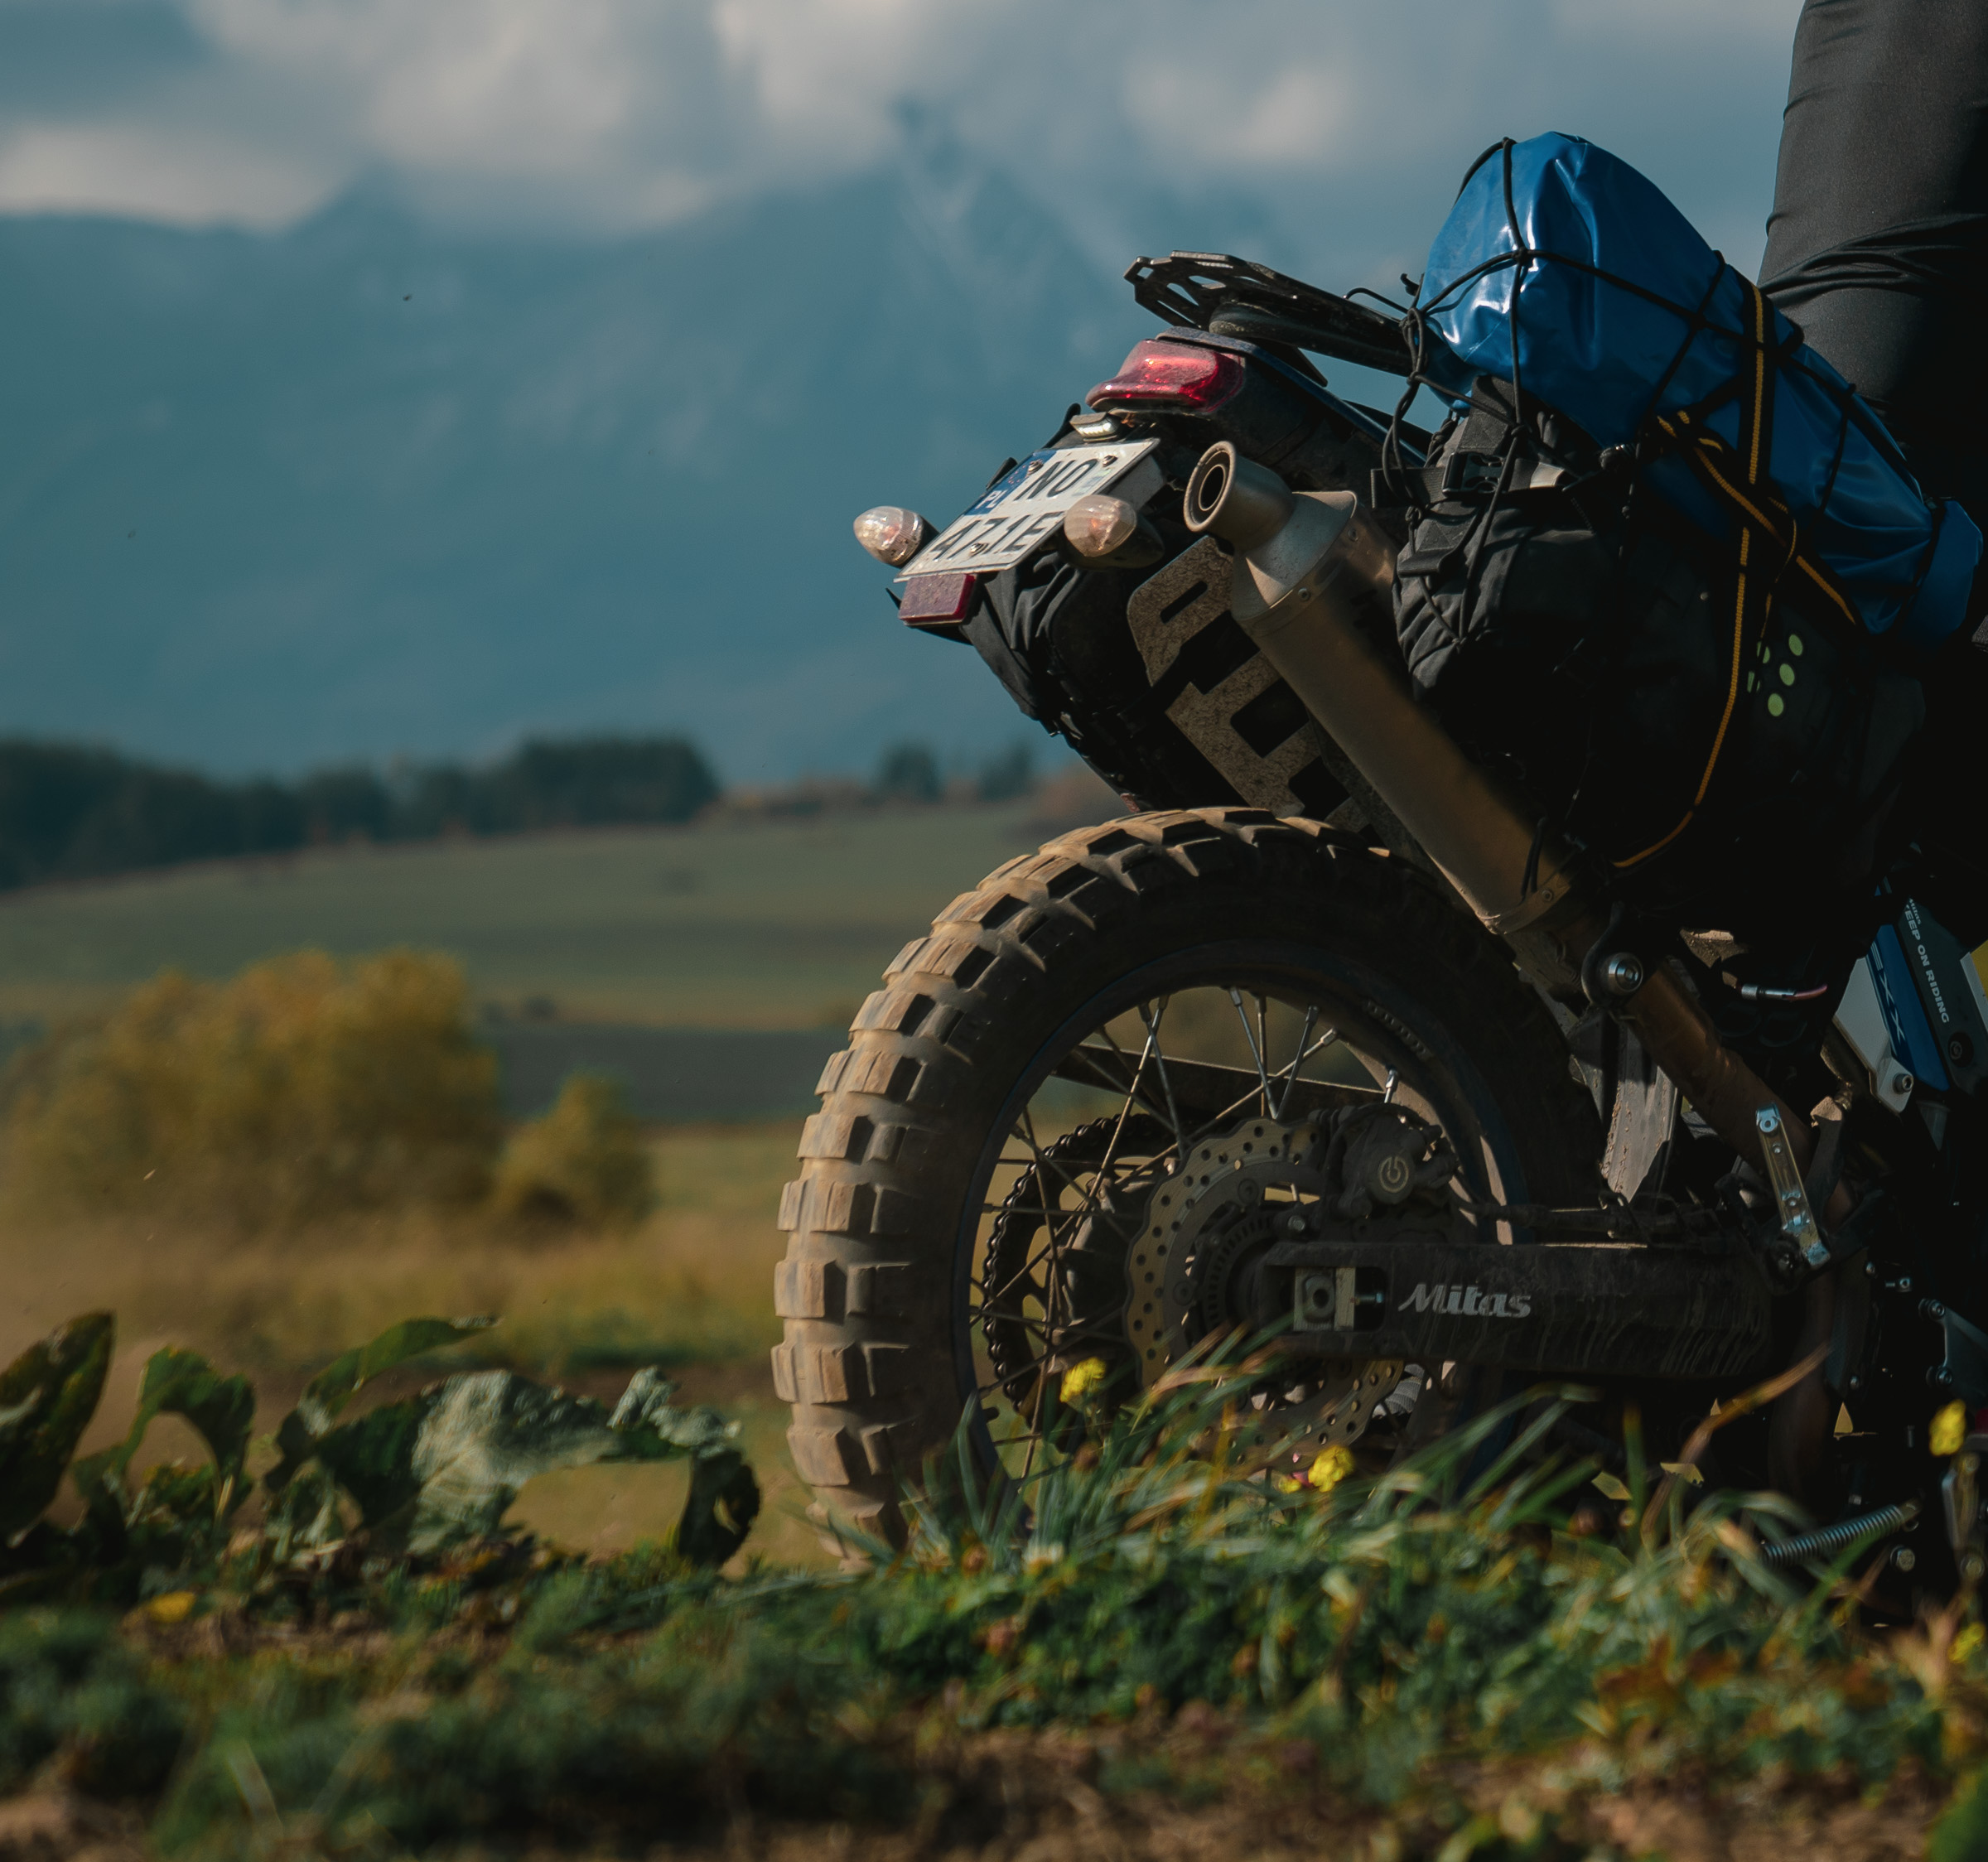
Puig License Plate Holder
I replaced the Tenere 700 factory plate mount with a Puig accessory mount. Lightweight but very durable, it elegantly slims down the rear of the motorcycle.
It’s important to remember that the factory mount also works as a fender. After changing the mount, when riding through swamps, the Tenere turns into a muddy fountain on wheels. But who doesn’t want to get as dirty as a child sometimes?


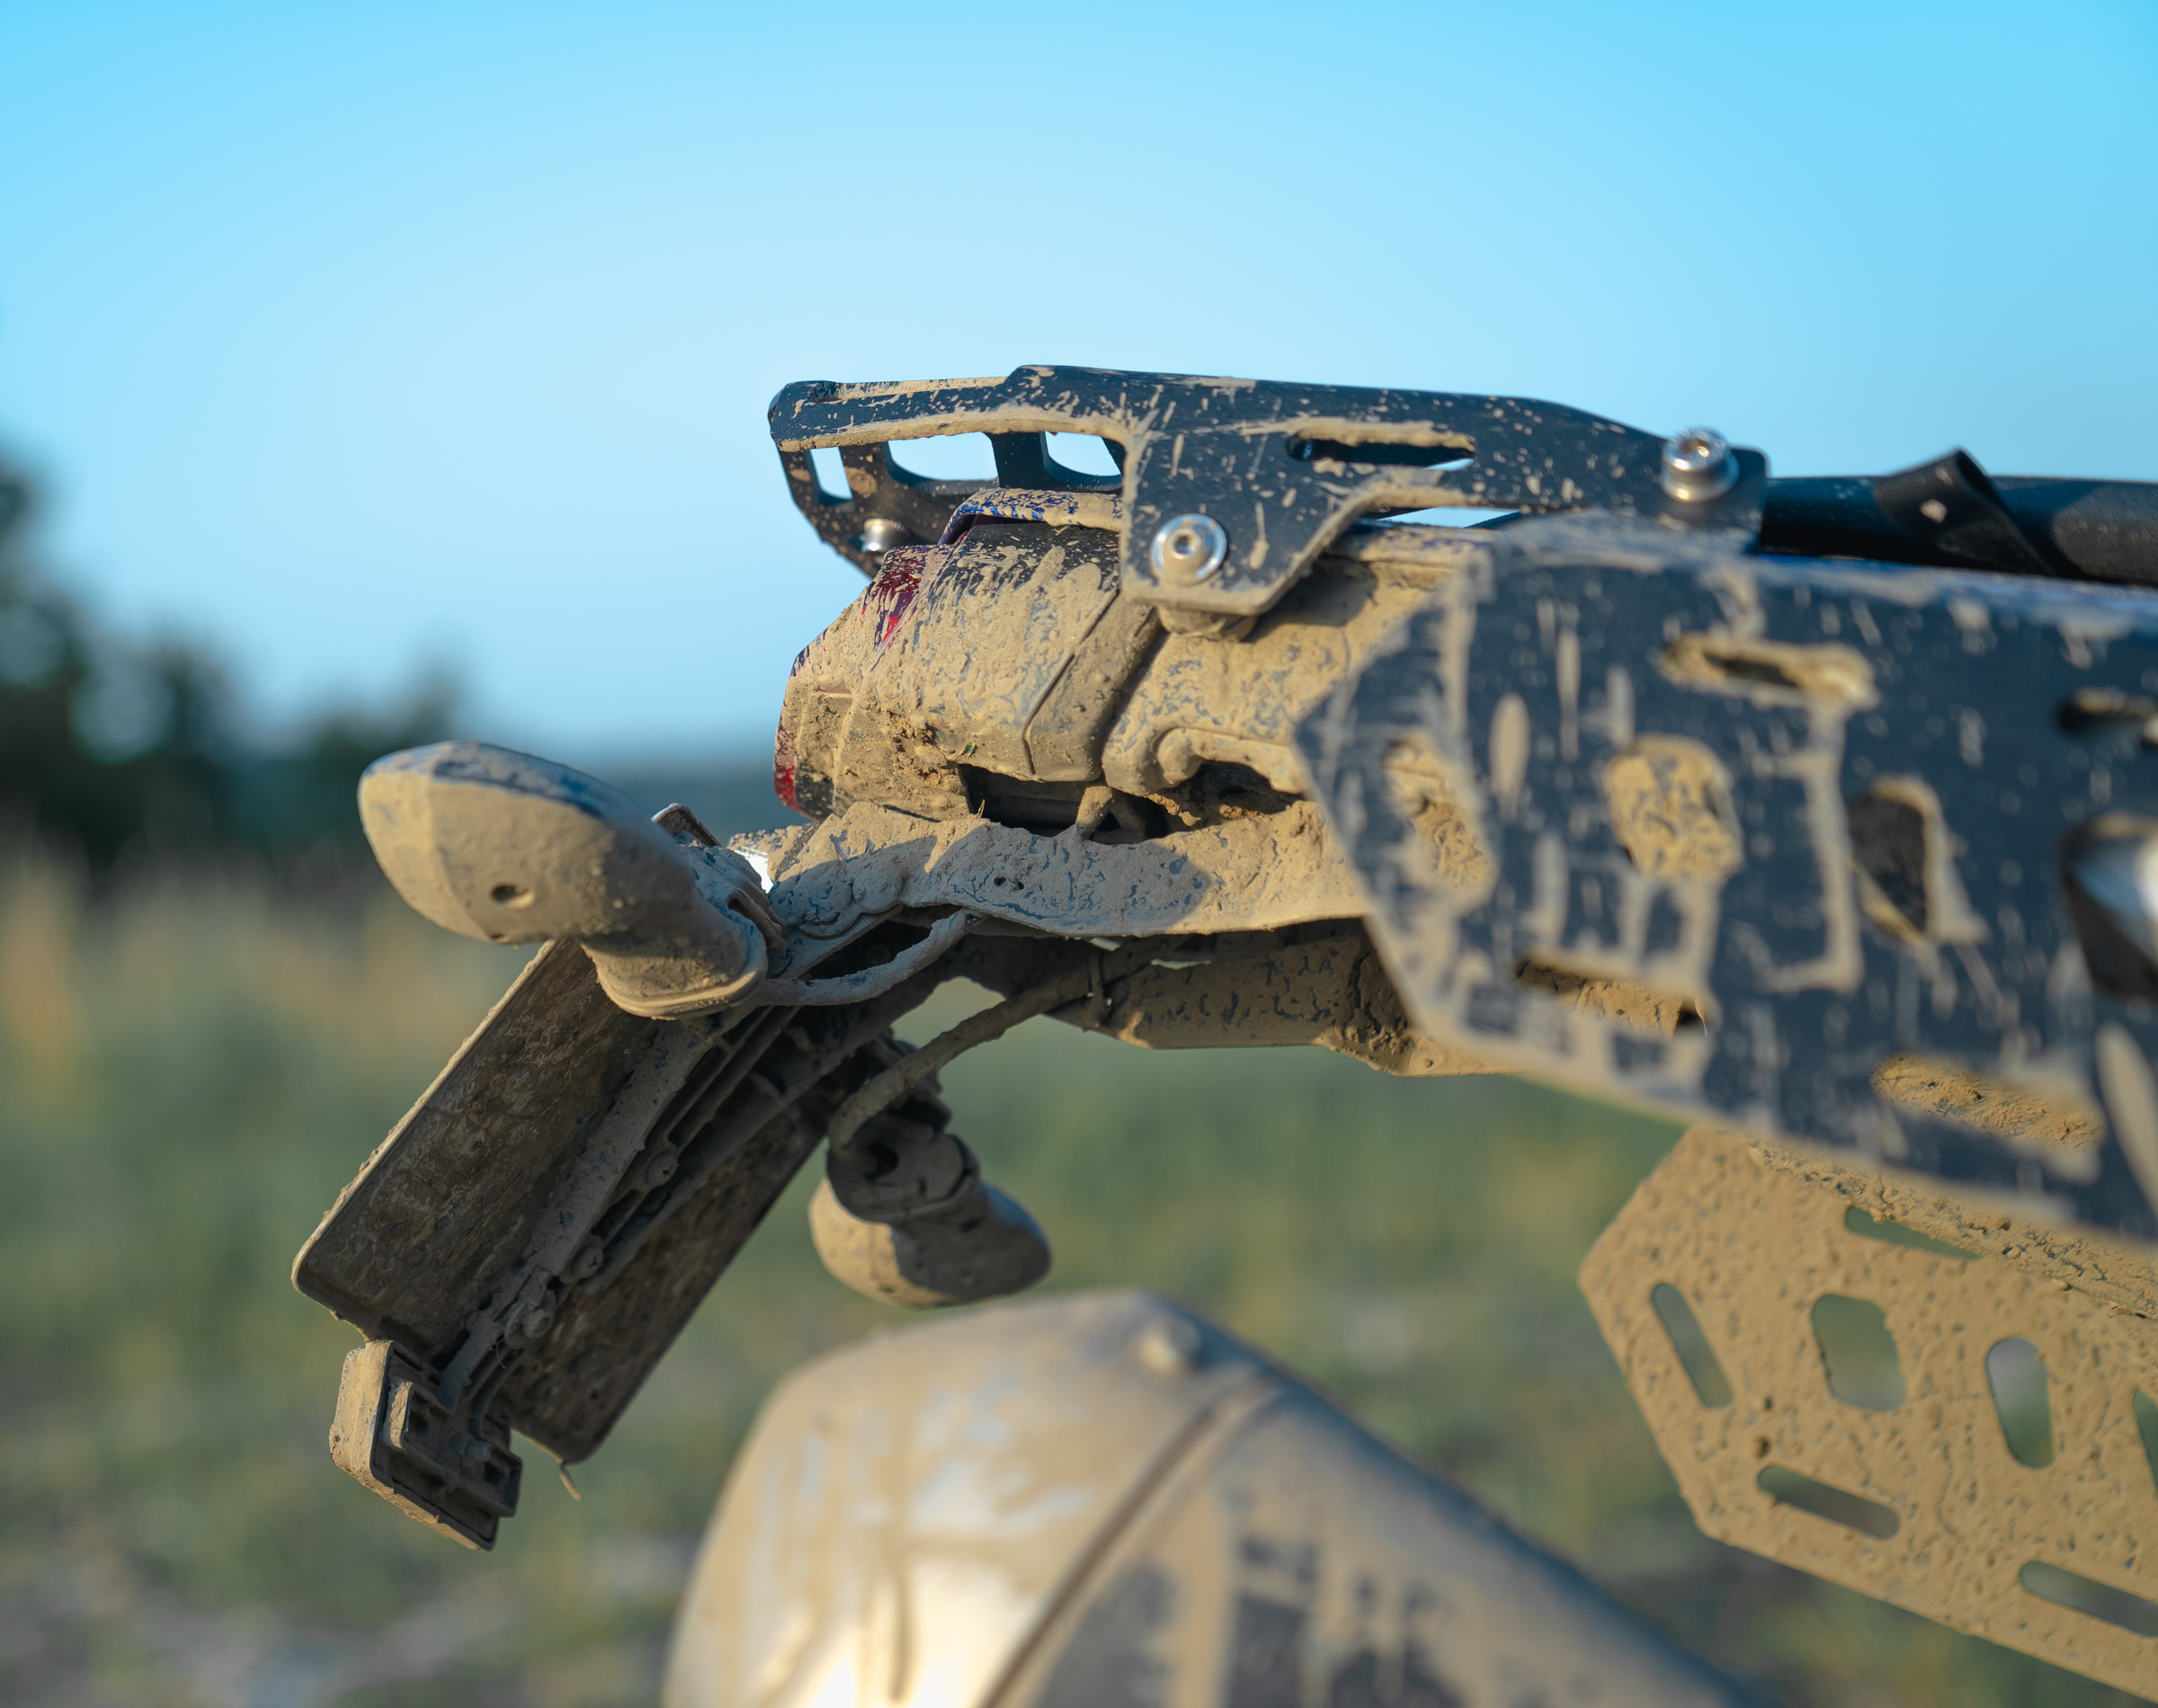
Tidy Tail from Puig positively impacted the aesthetics of my Tenere 700.
Update: Now I use HP Corse tidy tail.
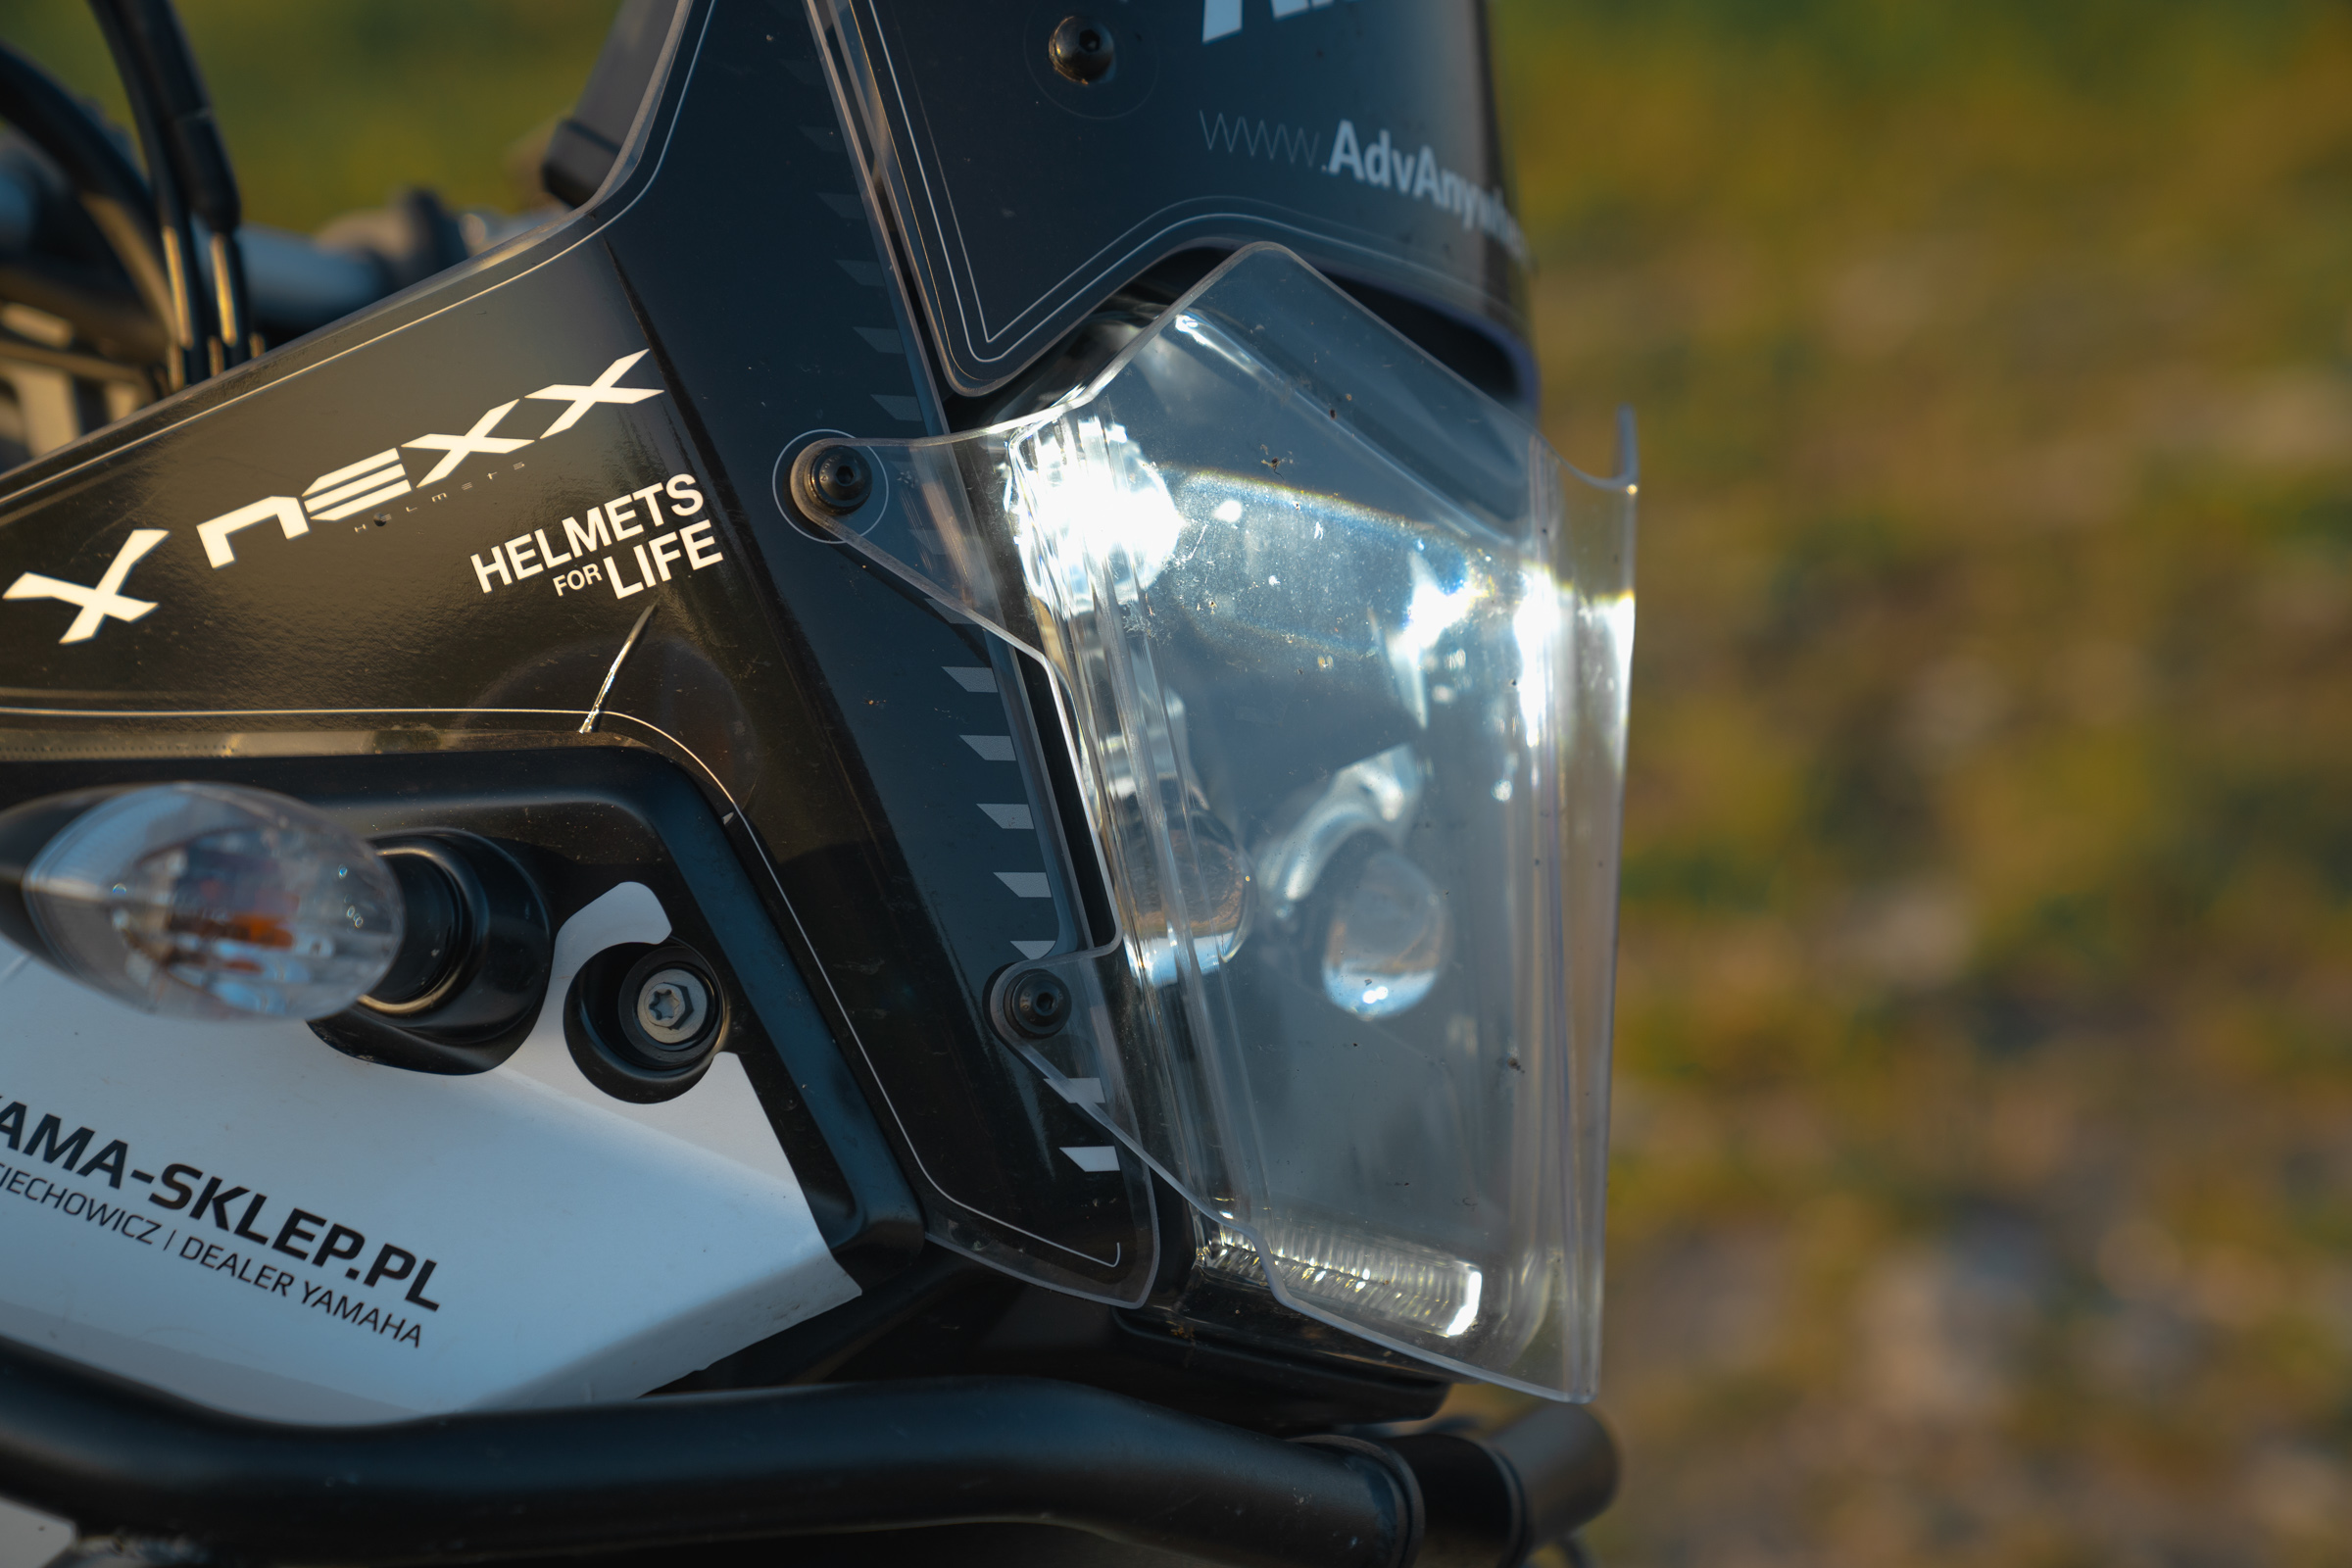
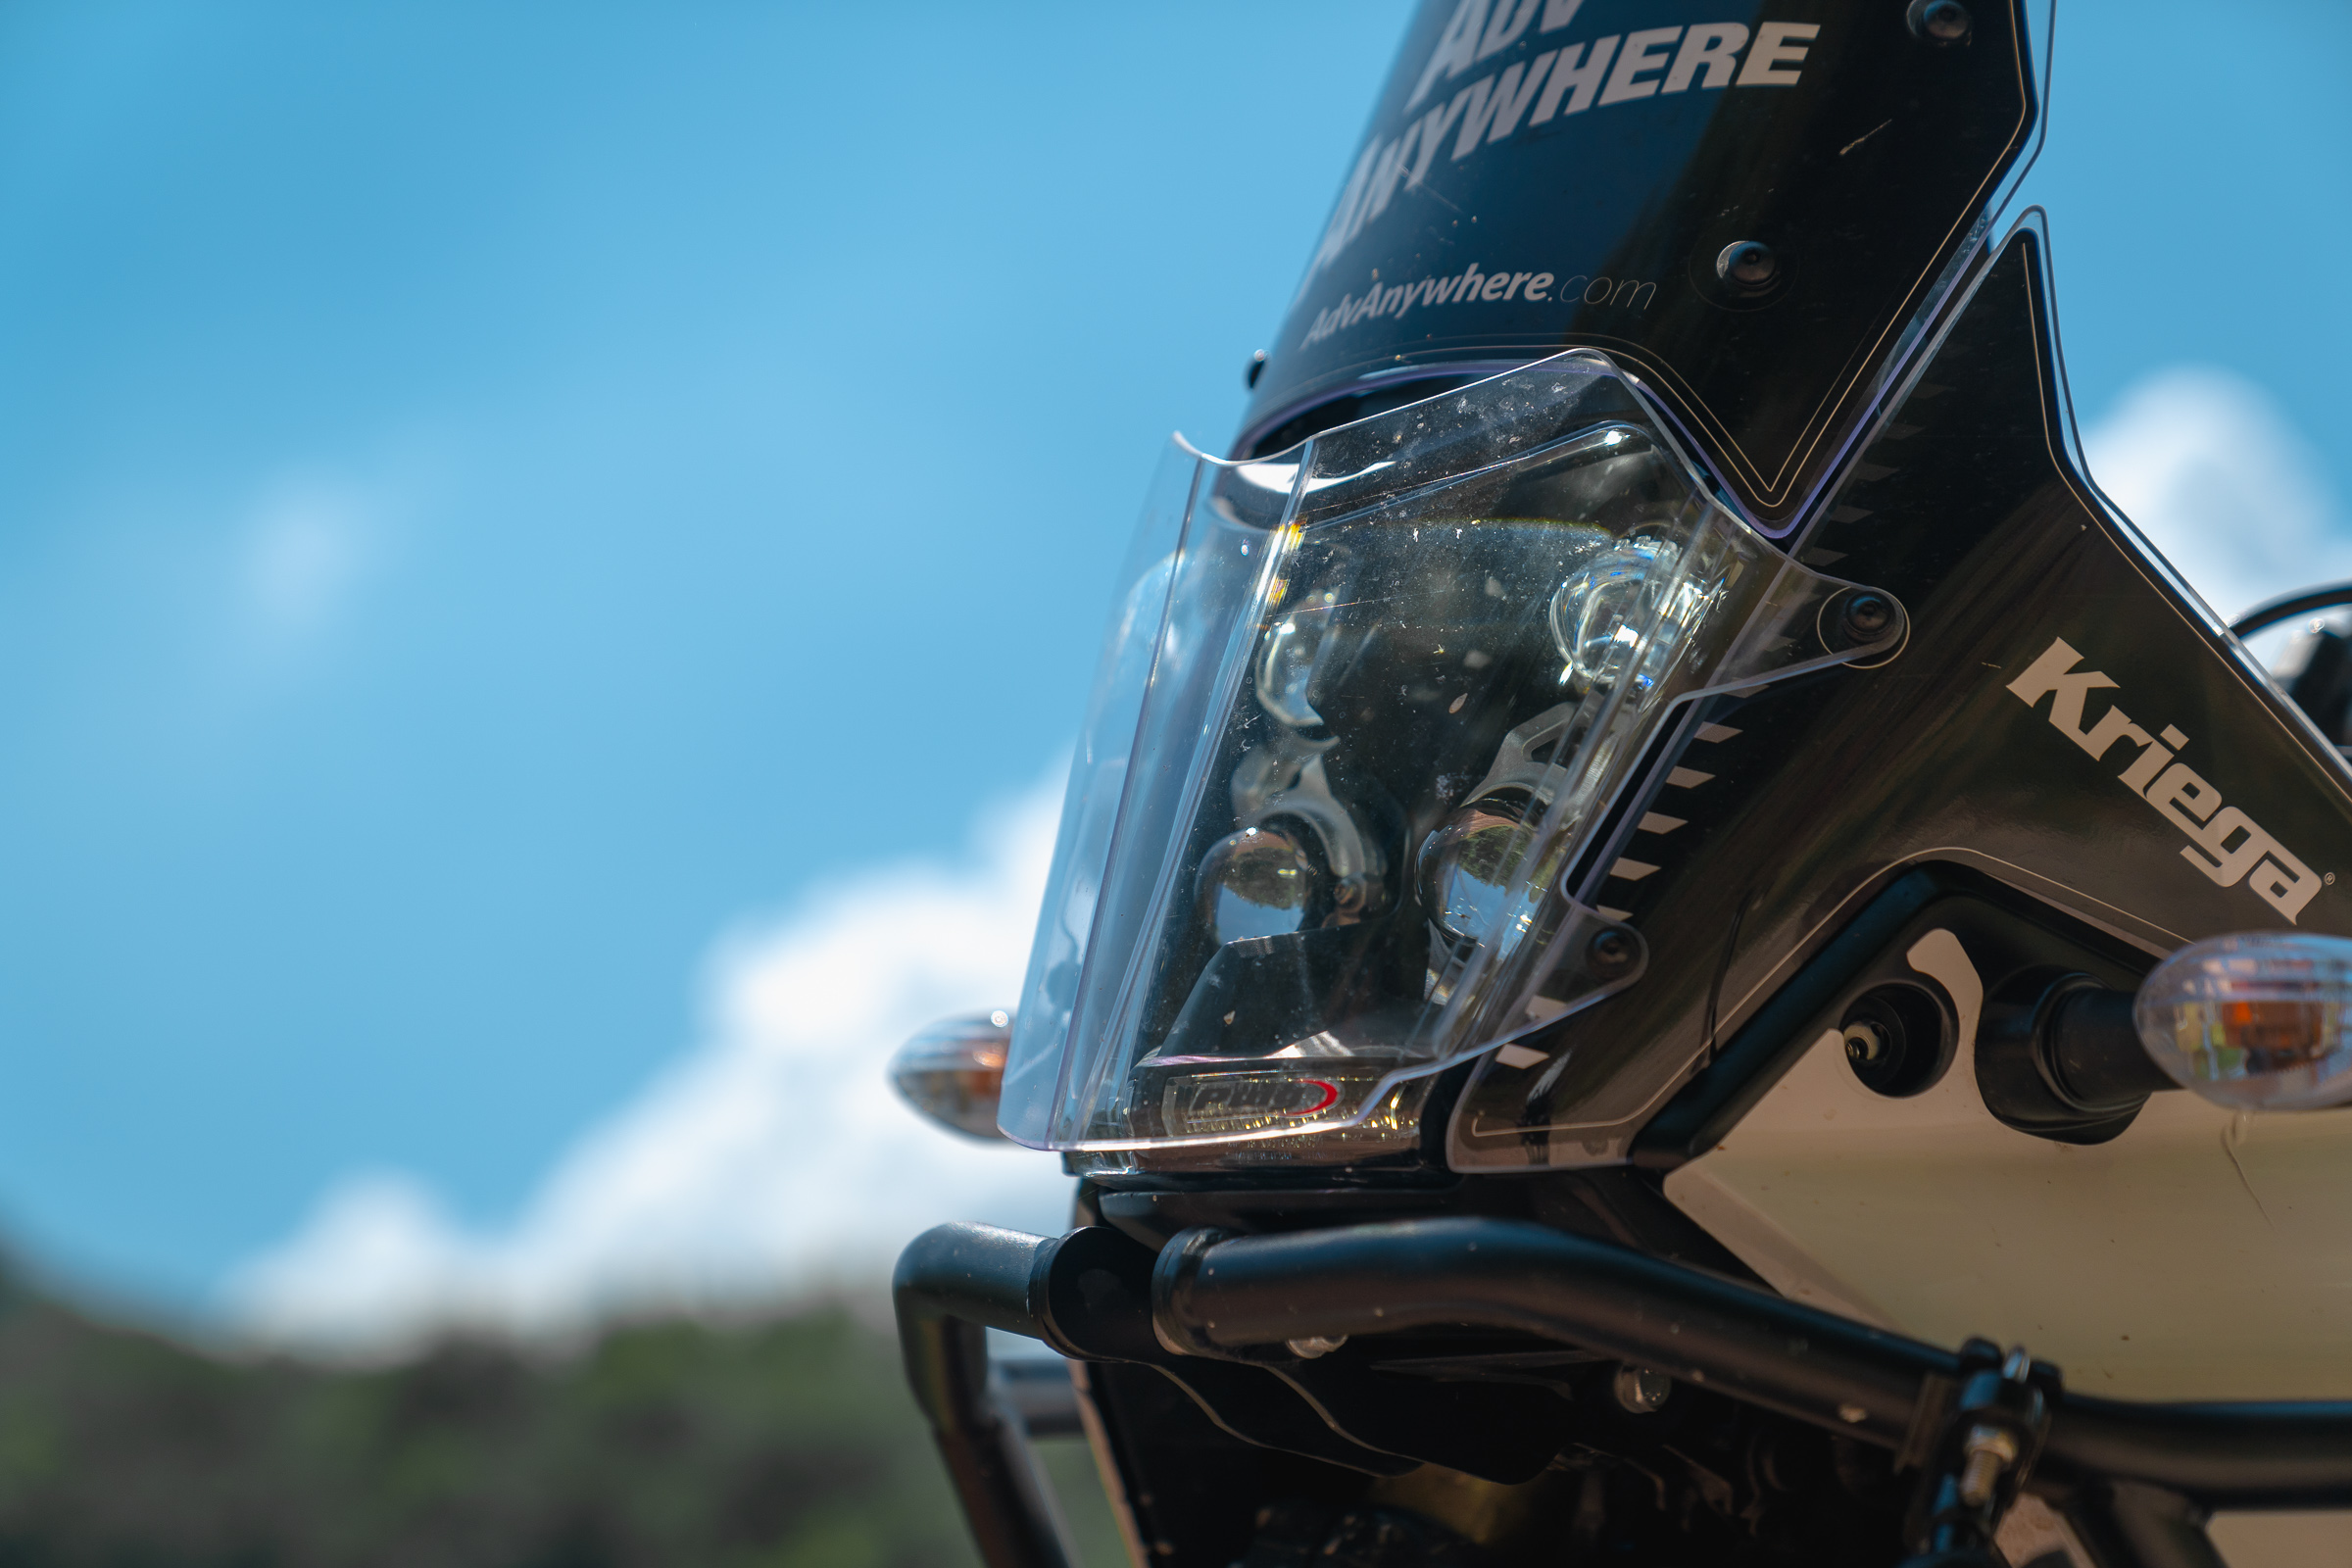
Puig Headlight Protector
Anyone who has driven behind someone off-road knows that stones can fly like bullets. An additional headlight cover is a cheap way to protect an expensive component.
In my opinion, such a monocle adds character to the Tenere. There are also various types of metal nets-like guards on the market, but I am not fond of such a solution. Cleaning such a grill from hundreds of road-killed bugs is a real nightmare. Lightweight, thin plexiglass does not reduce the strength of the light.
Heavy Duties Center Stand
Let’s agree, a center stand is supposed to perform one obvious task. Every center stand does the same thing, but not every one of them costs and weighs the same. Romanian company Heavy Duties offers the cheapest and probably the lightest center stand made of thin – when compared to others – tubing.
With a very cool design, the stand retracts high. Cheapest, lightest, best.
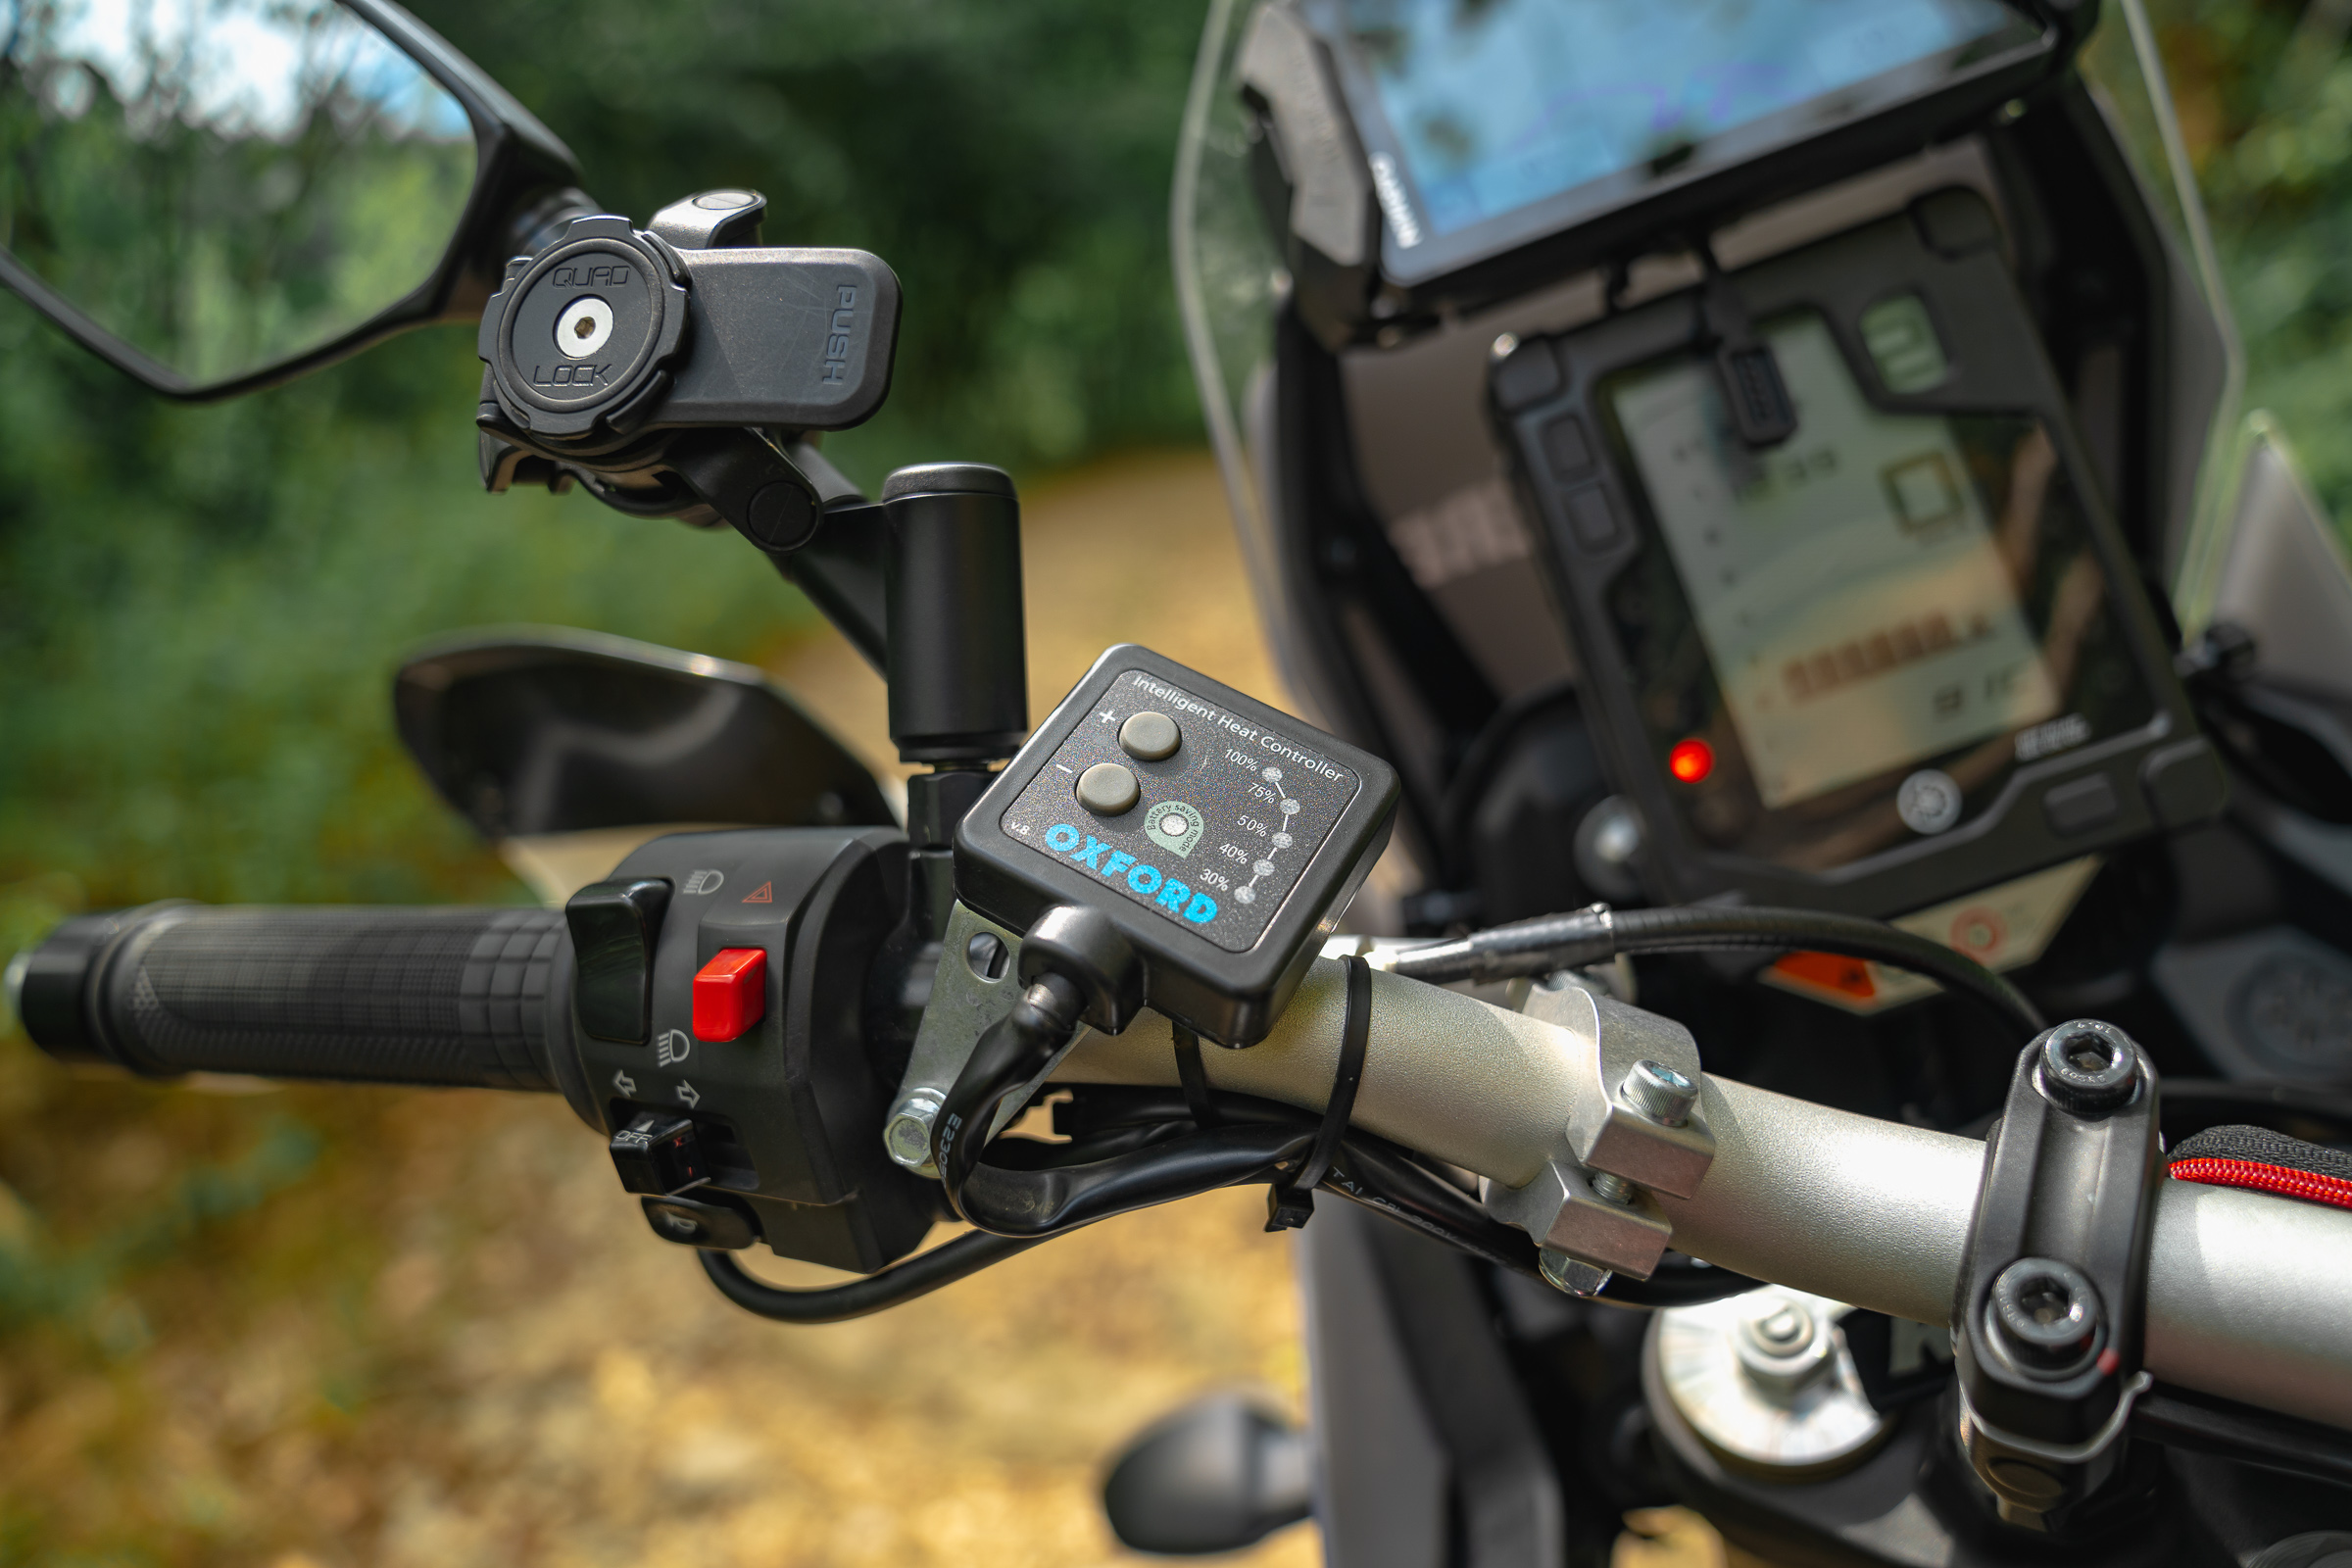
Quad Lock Phone Mount
With Quad Lock, I rode the XT660ZA, and now I ride the Tenere 700. I also have this mount on my bike, and if I were to use my phone somewhere else I would definitely 100% use the Quad Lock. There is no way the phone will fall out of it, even on demanding enduro trails.
The vibration dampener protects the phone from destructive vibrations.
The whole set is expensive but well worth the price.
Garmin Zumo XT GPS
I grew up, or rather – my savings grew, and convinced myself to use GPS navigation. For tens of thousands of kilometers, I mainly used Google navigation on my phone, but during long-distance trips, the phone is very unreliable. It heats up, crashes, battery management is sometimes problematic, etc.
The GPS is powered straight from the motorcycle battery, thus I have one less device to charge.

I mounted Garmin Zumo XT GPS on the top bar using the Touratech mount, which is sturdy and, most importantly, allows me to lock the GPS with a key.
The Garmin underwent its first serious test with me while riding the Italian TET route through the Alps. The operation is very easy and the performance is faultless. I can’t imagine going back to using my phone for navigation, especially for off-road driving. Admittedly, Garmin could improve a few things, but I leave the topic of motorcycle navigation for another post.
Oxford Heated Grips
Just like on the XT660ZA, I also mounted heated grips to the Tenere 700. This time, however, I did it earlier.
Modifications
Tenere 700 has everything I need by default, except for one thing. That’s why this list is very short 🙂
ABS Switch
Completely shutting off ABS on a button is a must-have modification for me. Why? Off-road you need the ability to lock the wheel, for example, to make a slide. There are times when, riding down a hill, locking the wheel will allow you to bite into the ground and stop the motorcycle. Similarly, when you want to stop when riding uphill.
I recommend the waterproof SW-Motech ABS switch, which I have already tested in many conditions.
Yamaha allows you to turn off ABS when the motorcycle is immobilized. Holding the button on the clock for a few seconds disables ABS, but… it’s disabled only until the engine shuts down. Anyone who rides off-road knows that in various conditions the engine turns off and on repeatedly. Because we stop when riding uphill; because we’re waiting for a companion; because we get stuck and don’t want to overheat the engine; because we lay the motorcycle down… Holding the button for a few seconds every time we fire up the engine can be a real nightmare. But we can always get an ABS switch.
This solution has one downside. To turn the ABS back on, it is not enough to switch the switch to ON. Though the power to the ABS will return, the system will not be calibrated. This means that you can turn off the ABS at any time even while riding, but to turn it on and make sure everything is working, you have to stop and reset the power with the ignition key.
If you decide to get an ABS switch, remember that you do so at your own risk.
Tenere 700 Stickers
As with the XT660ZA, I have measured and printed my own sticker template and as soon as I refine it I’ll make it available for free as before. I have a lot going on at the moment, but it should be ready soon. In the meantime, subscribe to my newsletter or follow me on Instagram and Facebook; I’ll announce here when the template is ready.
For Future Consideration
Toolbox – I will probably use the same solution as in my old Tenere XT660Z. The plastic tube mounted to the engine cover worked quite well.The Motohansa Pro Compact 38 Piece under the seat is all I needed!- Camel ADV 1 Finger Clutch Kit – currently this is a low priority for me, but eventually, I’ll probably replace the current lever with a longer one. The change will definitely be noticeable, just like in the XT660ZA. That clutch lever, however, was a pain in the butt. On the Tenere 700, I have no problem using one finger for the clutch all day.
- Suspension – the factory suspension is completely sufficient for my type of riding, and although I know what a huge change better shock absorbers bring, at this point such an expensive modification is not my #1 priority.
- Footpegs – the original ones on the Tenere 700 are not bad. On the XT660ZA, after replacing them with bigger ones, the difference in riding was colossal.
Summary
The Yamaha Tenere 700 has been a dream of mine since its release. It’s a motorcycle that, like the previous XT660ZA model, is very versatile, but on a higher level. I’ll soon write a full review in a separate post.
The Tenere 700 already comes out of the factory with knockout performance and features, and at a very reasonable price. No wonder the T7 has become a popular motorcycle. The possibilities for customizing it to suit your own preferences are enormous. There’s a mass of interesting Teneres worthy of attention. Thanks to its popularity, accessory manufacturers compete for customers by outdoing each other in quality, usability, and price of accessories. This ensures even greater availability of modifications. For me, the factory T7 is like a clean notebook that anyone can supplement with their own content, and what’s more, you can mostly do it with your own hands. Tenere’s design is simple, and even someone with “two left hands” like me can easily handle modifications and simple service.

I bought my Tenere at the Yamaha Wojciechowicz dealership from Fabiq – cheers Fabiq! Yamaha Wojciechowicz provides customers with professional service and runs yama-sklep.pl on-line shop, where you can buy all possible parts for any Yamaha motorcycle. Thanks to their Yamaha parts finder, after selecting your motorcycle model, you’ll be shown interactive diagrams from which you can directly add each item to your cart.
I myself often visit yama-sklep.pl to buy gaskets, oil filters, parts that need replacing, etc. Buying from yama-sklep.pl I’m sure that the parts are original.
I have a discount code for all parts in the store, especially for my blog readers! Just use the code advanywhere when placing an order.
Please note that you can change the language from Polish to English on their website. And currency, too 🙂
https://yama-sklep.pl/oryginalne-czesci-zamienne
OK, and what about the tires?
Motorcycle tires, after all, are a kind of modification to the motorcycle, and a rather important one at that. They’re the only point of contact between the motorcycle and the ground. Their type determines how the motorcycle performs.
Changing motorcycle tires is the easiest, fastest, and only modification that can make an off-road beast from a road rocket. I purposely do not specify one particular set of tires in my list, because I myself change them at least once a season, sometimes even more often. Motorcycle tires must be adapted to the planned trip, so they deserve a separate section with reviews: Motorcycle Tire Reviews. On my blog, you’ll find reviews of my favorite models. It just so happens that Mitas has the perfect range of tires for me, so I’m currently choosing between several sets:
- E-07+ is my choice for long-distance travel. With this tire, I can easily get off the road even if the terrain is difficult.
- E-09 rear and E-13 front is my favorite off-road set. Great for long trips on TET trails, for example.
- E-10 are brilliant off-road knobbies that perform well on asphalt.
- E-12 rear and E-13 front is the most aggressive combination for adventure motorcycles. I heard that this is Chris Birch’s favorite set.


Video
Finally, here’s a link to a video where I present my accessories for Tenere 700:
 Facebook
 Instagram
 Youtube


Great overview of the modifications, they definitely serve as inspiration for others. I was wondering if you plan to do any modification for going 2up, especially in terms of suspension. I have tried myself going 2up, but I was worried that on light off-road sections, the shock absorber might bottom out. Curious to hear your thoughts on that. Keep up the good work!
Hey Andrei, thank you for finding this inspiring.
I do plan some 2up modifications including a better seat for passenger. The suspension would be a must-have it’s quite an expensive upgrade. Maybe next year.
Hello, I have the kriega os-18 panniers, and I’m about to buy the hpcorse high exhaust, but I’m worried to burn the kirega mounting as it ties to the rear foot peg. So I’m thinking that maybe using the same adventure specs side racks like you might solve the problem. But can you show me how do you tie the kriega os bags in there? Thank you!
Hi Lluis, Kriega offers footpeg eliminator for Tenere 700 -> https://advanywhere.com/product/kriega-os-footrest-eliminator/. This might be interesting. Adventure specs rack is also great idea. This season I was riding with AS rack, but next year I will try footrest eliminator and Kriega OS base.
I attach photo in which you can see that my OS-18 is straped to Kriega subframe stripes https://advanywhere.com/pl/product/paski-kriega-subframe-loops/ – it’s included with US-40 bag. Below it’s looped to AS rack.

I hope this helps!
Best regards
Great overview of your modifications, and great review of the T7. In one of the above pictures, you have a caption that mentions “unbreakable” led turn signals. which do you use ?
Hi Bernardo,
what I meant to say is that stock turn signals are unbreakable. You can see how much bend the left signal is and still didn’t want to break 😀